


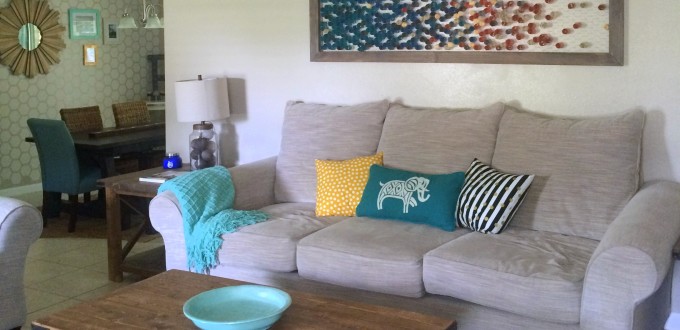

 Our living room has a lot of space and potential with the space it provides. With that said, we also have low ceilings within our ranch style home. This can leave wall space that is sometimes difficult to work with. I contemplated a gallery wall at one point but thought it may be too busy for such a narrow space above the couch.
That is when I decided to place a large statement piece above our couch. We have all seen the frames with chicken wire being used as jewelry holders. Why not transform that idea into a piece of wall art and use swirls of scrapbook paper instead? This DIY tutorial only requires a few materials and the colors that inspire you the most! Time to start creating!

Here’s the how-to:
Supplies:
Frame of your choice || Chicken wire || Scrapbook paper {enough to fill your frame} || Scissors || Staple gun with staples || Wire cutters || Spacers for back of frame || Stain {optional if you are going to stain your frame}

Step 1: You will need to pick a large frame that you would like to use. I have found some of the best frames at my local thrift stores! You can take out the glass and backing to prepare the frame. I had my husband create our frame in order to get the dimensions that I needed for our wall.
Step 2: Using the staple gun, staple the chicken wire to the back of the frame. I made sure to pull the chicken wire tight to get an even and flat surface.

 Step 3: Once the chicken wire is stapled to the frame, cut the excess chicken wire using the wire cutters. You may also want to bend in the pieces that are sticking up/out.
 Step 4: My husband cut a french cleat using wood to hang our frame and to create a space between the wall and frame. This can also be done using spacers found at your local hardware store. Install the spacers according to the package directions on the back of your frame. Once your method of hanging is attached to the frame, hang your frame on the wall.


Spacer
Step 5: Cut the pieces of scrapbook paper into one inch strips. Your strips do not have to be completely straight. Just cut away! It gives the swirls more character.
 Step 6: Simply roll the pieces of paper to create the swirls.

Step 7: Start placing your swirled pieces of scrapbook paper in each hexagon of the chicken wire. This is where you get to have fun with creating your own unique piece! Put a few pieces or put a lot. I went with many pieces in my frame and designed my colors to fade into another color as they were placed down the length of the frame.


Let’s keep in touch!
We have a brand new community over on Facebook, House & Home, where we’ll be chatting, sharing, and helping one another when it comes to home decor and projects. Come join us! Check it out here.
Like on Facebook || Follow on Instagram || Follow on Pinterest

[…] More @ withinthegrove.com […]
[…] Best Wall Prints For Living Room from DIY Framed Paper Wall Art Within the Grove. Source: withinthegrove.com. Visit site: withinthegrove.com […]
I love this idea, I have been looking for something to do in my master bath… that would be colorful inexpensive and take up some space! This is perfect and will be a fun project to do! Thank you!… you don’t have any issues with the swirled pieces falling out?
Thank you so much Shannon! I would love to see a picture if you decide to make one. I haven’t had any issues of the swirled pieces falling out. Make sure you create a space between the frame and the wall to prevent that from happening.
This is so cool! I love how versatile (and large) this project can be.
Thank you so much Anne! I would love to see a picture if you end up trying this DIY project.