


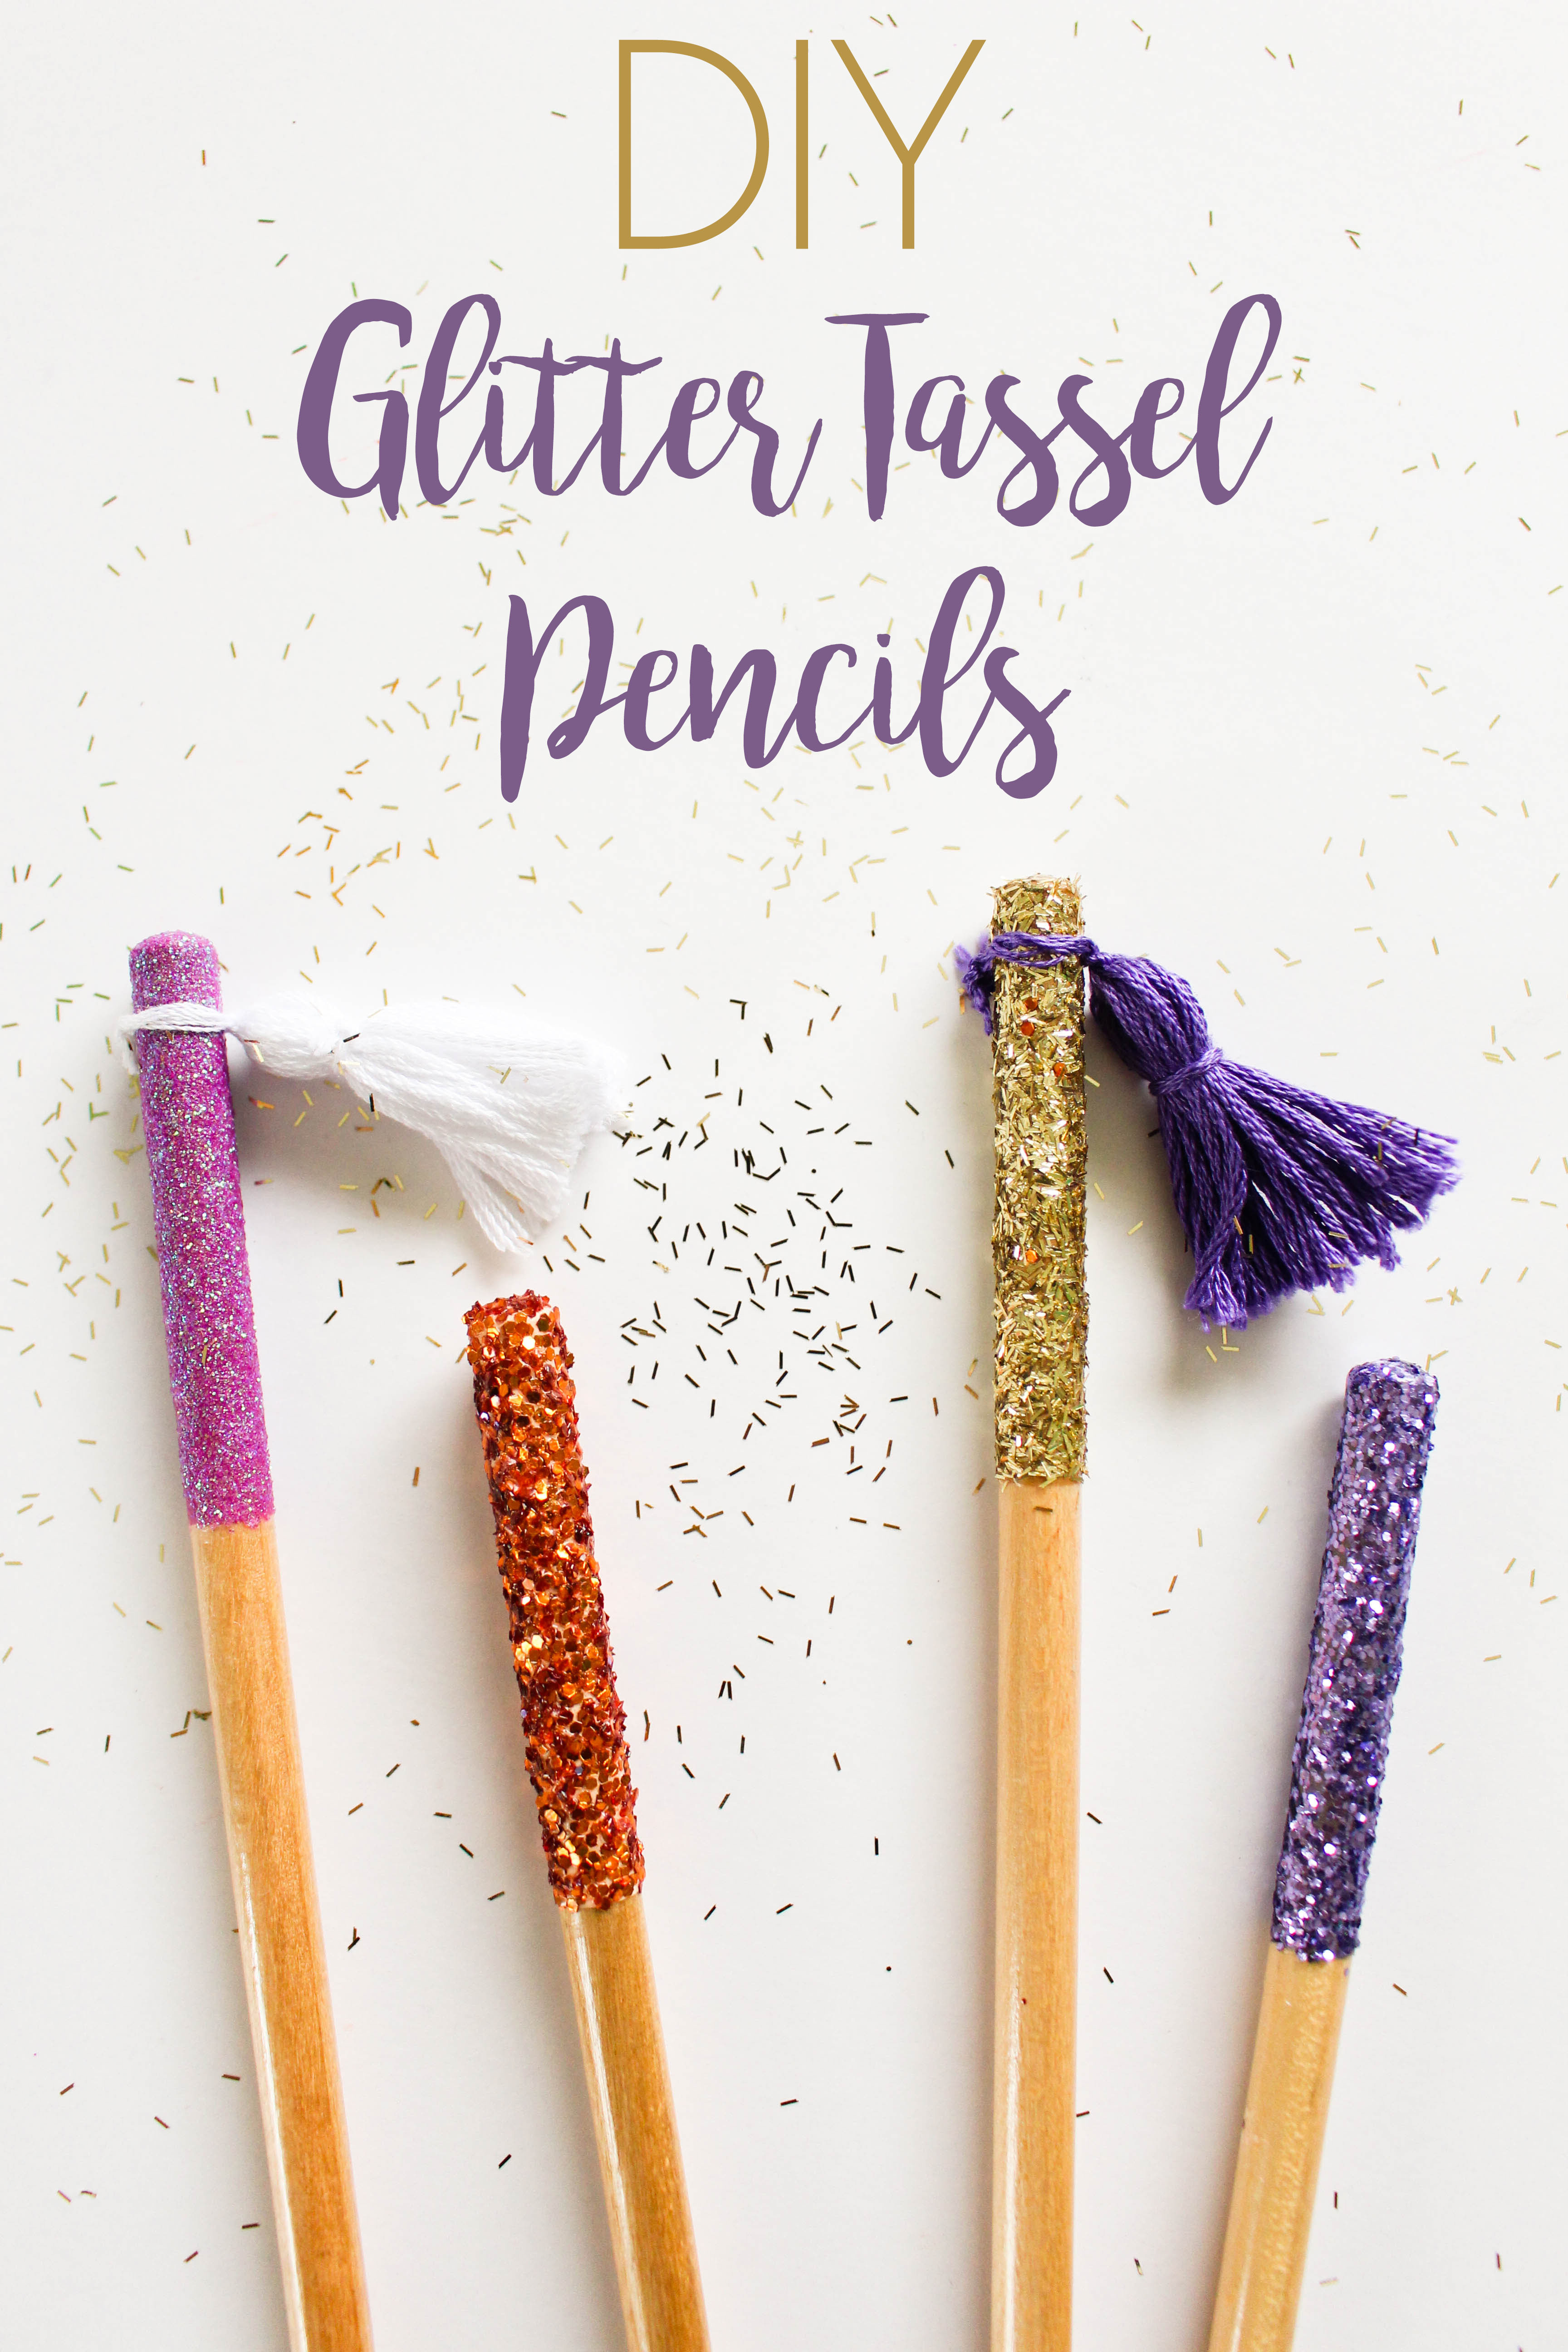


How cute are these glitter tassel pencils?! As a former teacher and with my addiction of school supplies, I wanted to add a little pizzazz to my pencils. Let’s face it, there are some days where I don’t feel as motivated as others to get work done. But put one of these glitter tassel pencils in my hand and the spark just might come back! Maybe you want a set of these for your office, to add some fun while your child completes homework, or to give as a gift to a hard working teacher. Regardles, today’s DIY tutorial is a project that takes no more than an hour with sparkly results.

Supplies:
Pencils {I found my pencils at Target for $1 and they have the perfect guide for where to place my washi tape.} || Washi tape || Paintbrush || Modge Podge || Assortment of glitter || Assortment of embroidery floss || Scissors || Scrap piece of paper || 1 box

The How-To:
Step 1: Determine how much glitter you want on your pencil. Using washi tape, securely wrap it around each pencil. I used the bottom of the paint design as my guide to place the washi tape.

Step 2: Using your paintbrush, apply a decent amount of Modge Podge on the pencil above the washi tape. You want enough Modge Podge for the glitter to stick and completely cover the area.

Step 3: Place a piece of scrap paper down on your work surface. With your desired glitter color, sprinkle the glitter generously all over the Modge Podge. The piece of paper will catch the extra glitter. Tip: When you are done with a particular glitter color, fold the piece of paper in half that caught the extra glitter and pour back into the glitter bottle.

Step 4: After you apply the glitter, immediately remove the washi tape. Next, place your pencils on a box to allow the glue and glitter to dry around the entire pencil. This will also prevent the glitter from smearing off.

Step 5: Once the glitter has dried, using your paintbrush apply Modge Podge over the glitter area and a little past the glitter on each pencil. It will look milky in color but will dry clear. Place each pencil back on the box to dry evenly.

Step 6: While your pencils are drying, it’s time to create the tassels! See below to learn how to create them:

a & b. Take one of your embroidery floss and cut it into two equal parts.
c. Pull out four strands of embroidery floss from each bundle.
d. Cut each bundle in half again. You should now have 4 equal bundles.
e. Take one of your threads and place under a bundle.
f. Tie the single thread in a double knot around the middle of the bundle.
g. Next fold the bundle in half.
h. Place another piece of single thread towards the top of the folded bundle.
i. Tie the single thread in a double knot.
j. Trim the bottom of the tassel to make the strings all even. That’s it!

Step 7: Finally, tie a tassel around the top of each pencil. Trim the excess thread after tying the double knot.

These glitter tassel pencils are adorable and such a fun DIY project! Even though glitter can be messy, you can’t go wrong with the sparkle it brings to your work space. Writing in my planner and creating my to-do list has never been this much fun!

Let’s keep in touch!
We have a brand new community over on Facebook, House & Home, where we’ll be chatting, sharing, and helping one another when it comes to home decor and projects. Come join us! Check it out here.
Like on Facebook || Follow on Instagram || Follow on Pinterest
