


So, let’s chat about Target’s One Spot for a minute. It was full of school themed items all summer long and finally the fall items made an appearance. As in it was all gone by the next day. My local Target never restocked but their Halloween decor is still thriving. So, I decided to challenge myself and find a Halloween item that I can turn into home decor for this month’s One Spot DIY. There were an abundance of wooden skeleton faces that clearly were collecting dust. They remind me of the wooden pieces people paint and hang on a wreath. But I had different plans for this wooden skeleton face. In an afternoon I transformed it into home decor that can be displayed on a piece of furniture, a shelf, or hung on the wall. And it doesn’t scream scary or isn’t too orange or purple.

Isn’t she cute!? This is the type of Halloween home decor I can say yes to! Give yourself an afternoon to create one to display in your home for the month of October.
Let’s Do This!
Supplies:
Wooden Skeleton Face from the One Spot || 17 x 17 inch Piece of Wood || Brown Stain || Cloth or Rag || Black Paint || Paintbrush || Wood Glue || Hot Glue Gun || Glue Sticks || Fake Flowers || Scissors || Clamps or Heavy, Flat Object || White Paint Pen

The How-To:
Step 1: Start with your 17 x 17 inch piece of wood and paint it black. I didn’t worry about the back since you won’t see it. Once it dries, paint a second coat to give it an even color all over.

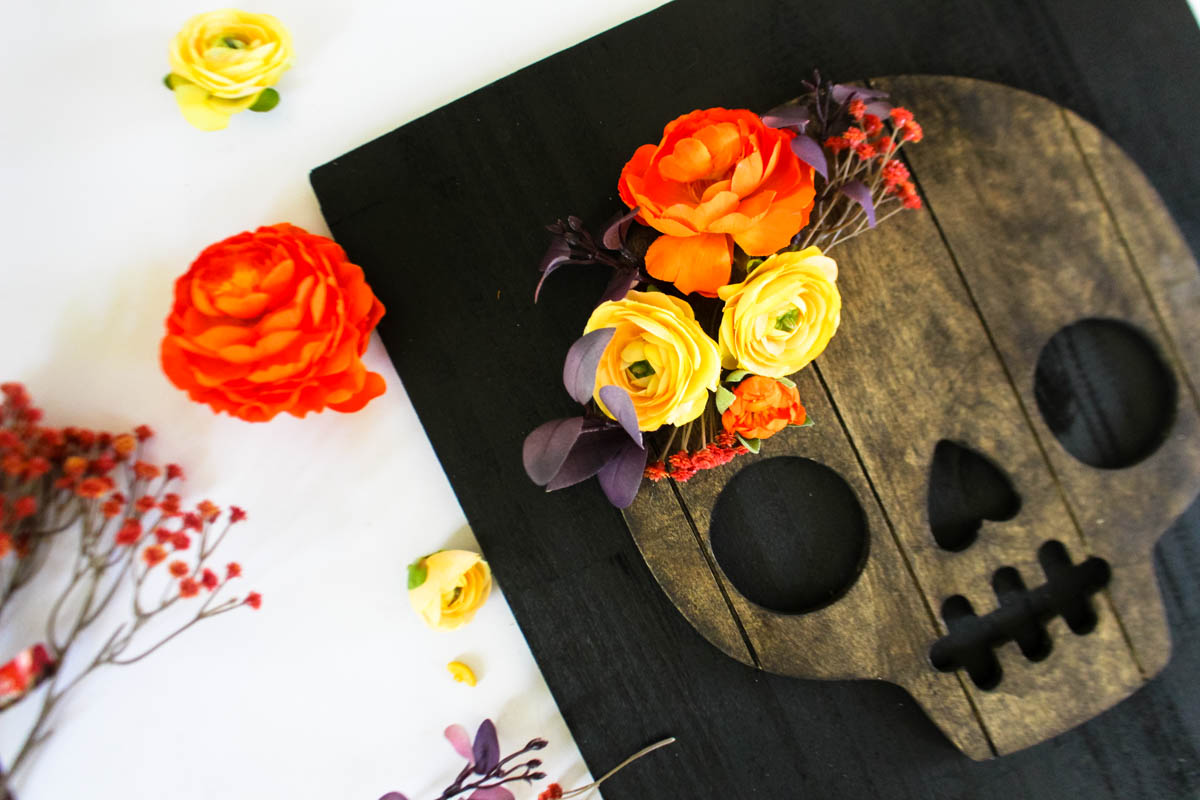
Step 2: While the black paint is drying, stain your skeleton face using a rag or cloth. I used dark walnut stain for mine.

Step 3: Apply the wood glue to the back of the skeleton face and place on the middle of the dry, black wooden piece. You want to put enough glue for it to stick but not so much it seeps out of the sides.

Step 4: Attach a clamp to each side of the skeleton face and allow it to dry for an hour. If you don’t have any, carefully place a heavy object on top of the skeleton face.

Step 5: Once the wood glue is dry, remove the clamps and attach your faux flowers on the skeleton face using your hot glue gun.

Step 6: Using a pencil, write the words hocus pocus on the sign. Once you’re happy with your wording, trace over it with the paint marker. You can see a tutorial on how to do this over on blog post, Calligraphy Fall Sign.

You may or may not be finished with your sign at this point. If you’re going to display your new hocus pocus sign on a shelf, leaning against a wall, etc., then you’re done. If you want to hang it on the wall, you’ll need to attach picture frame hooks to the back so you can hang it.

I’m so excited about this Halloween sign! This skeleton face certainly made quite the transformation with just a little paint, stain, and faux flowers. This will be a fun home decor piece to take out every year. Especially knowing it was a budget friendly project with great results. If you’re Target is like mine, there will be plenty of skeleton faces still available for just a few dollars. Stain yours a different color, change the wording, and/or pick different colors for the flowers. The creativity is endless now that you know how to make the sign. Happy sign building!

Let’s keep in touch!
We have a brand new community over on Facebook, House & Home, where we’ll be chatting, sharing, and helping one another when it comes to home decor and projects. Come join us! Check it out here.
Like on Facebook || Follow on Instagram || Follow on Pinterest

[…] withinthegrove.com […]