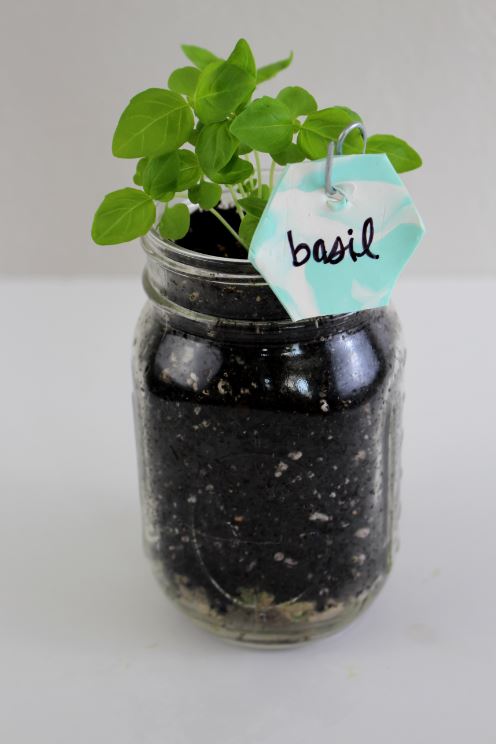
If you’ve been following me on Instagram then you know I’ve got a pretty big love affair with gardening and fresh flowers. The spring vibes hit me quickly this year. I think I’ll blame it on the beautiful Florida weather we’ve been having lately. Due to this ‘fever’, I decided to plant seeds to grow my own herbs a few weeks ago. First, to see if I could successfully grow them. Secondly, because they are very pricey in grocery store and often for just a one time use. I planted them in a few mason jars but then quickly realized I needed a solution on how to mark which jar was which herb.
In the past I’ve written on my mason jars but then it was hard to reuse the jar for any other purpose. Making my own small garden markers using clay was my solution. Of course I decided to create them in my favorite shape using one of my favorite colors! Now my herbs have their own identity and the clay garden markers add a little home decor at the same time. They turned out way too cute!

Here’s the how-to:
Supplies:
Oven Baked Clay in Mint and White || Hexagon Stencil Print-out || X-ACTO Knife || Wire || Wire Cutters || Sharpie || Rolling pin || Parchment Paper || Baking Sheet || Bamboo Skewer or Scratch AWL Tool

Step 1: Soften each piece of clay by folding, smashing, and twisting. This will make it easier to work with. I used one block of mint and less than one block of white for each hexagon.

Step 2: Roll the mint piece of clay to create a snake shape and place pieces of white clay all around the mint.

Step 3: Twist the white into the mint and then roll into a ball. The less you twist the bolder the marble look. For a more blended look, twist more.

Step 4: Use the rolling pin to flatten the clay to be about 1/4 of an inch thick.

Step 5: Cut out your hexagon stencil. There are 4 different sizes to choose from!

Step 6: Place your hexagon stencil on the rolled out clay. Using the X-ACTO knife, cut out the hexagon shape.

Step 7: Use the Scratch AWL tool or a bamboo skewer to create a hole at the top of the hexagon.

Step 8: Using the wire cutters, cut pieces of wire to your desired length. Bend the wire to create an area to hang your hexagon from.


Step 9: Place your clay hexagons on parchment paper and place on a baking sheet. Bake the clay according to package directions. I baked mine at 265 degrees for 15 minutes.

Step 10: Allow your clay hexagon garden markers to completely cool. Using a sharpie, write the name of of the herbs you planted on each garden marker.

Step 11: Hang your marbled garden markers on the wire and they’re ready to be placed in your mason jars or pots!

This project took less than an hour to complete. I’m now trying to find other ways to use marbled clay due to the cuteness and how easy it was to use this material. These garden markers would also make a great gift to give to those in your life that love to garden. Have fun creating!

Let’s keep in touch!
We have a brand new community over on Facebook, House & Home, where we’ll be chatting, sharing, and helping one another when it comes to home decor and projects. Come join us! Check it out here.
Like on Facebook || Follow on Instagram || Follow on Pinterest
