


Cut Flower Garden Update: Raised Garden Beds and Seedlings


It’s been a month since our last cut flower garden post and a lot has happened since then! Last month we planted the flower seeds around the last frost of the season and started mapping out our raised garden beds. I’m excited to say the seedlings have flourished.We also officially have not 1, but 4, raised garden beds after two weekends of clearing out a space for them. Can you believe it!? But before we get too excited, only two are for my flowers and the other two are for Ryan’s vegetable garden.
Here’s are the raised garden beds for my cut flowers. The best part about these? They’re right next to the door to my office. Talk about needing some fresh air during the work day when the flowers start blooming!
 And then these two are Ryan’s. We had to separate them due to finding the areas that have the best sunlight throughout the day. Priorities, you guys!

With a toddler running around, we had to opt for something quick and efficient for the raised garden beds. That’s when we remembered Home Depot carries materials where you can easily assemble raised garden beds. After leveling the ground, we built all 4 within 30 minutes using the planter wall blocks and 2 x 8’s. Next spring we’ll be able to add in height but this was within our budget this year.

We also found a local small business that provides fill dirt, top soil, and compost at unbelievable prices. We were able to fill all 4 raised garden beds with a layer of top soil and a layer of garden mix with mushroom compost for less than $50. At 4 x 8 feet each in size, this was a steal of a price! It’s a must to research your area to find a small business that you can support and fill your garden beds at a fraction of the price.


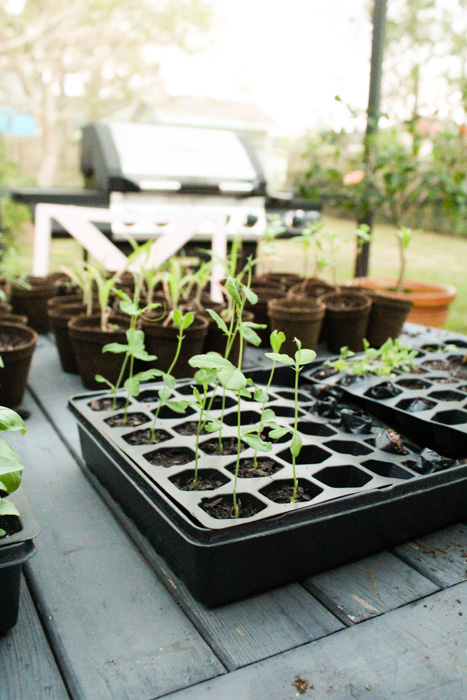
This week Florida was hit with another cold front leaving us in the 40’s, sometimes 30’s at night. We had the fertilizer and seedlings ready to plant last weekend but had to put it on hold. I was SO bummed but I knew it wasn’t worth killing the seedlings that have already taken a month to grow. Meanwhile, I transplanted them into peat pots (which are also biodegradable) to give them more room to grow. Just take a look at how far they’ve come!


We still had fun looking at a few vegetable plant options and browsing the garden center (almost a daily adventure for us). Ryan ultimately decided to plant seeds directly into his garden. I’m excited to see what happens with his!

For now, that’s it! Hopefully this weekend we’ll fertilize the compost mixture and finally plant the seedlings. I’ve had to learn to be really patient with this whole process of growing flowers from seeds, but it has made me appreciate them that much more. In our next post we’ll be sharing the planting process, fertilizers we use, and our water drip system. I can’t wait!
Let’s keep in touch!
We have a brand new community over on Facebook, House & Home, where we’ll be chatting, sharing, and helping one another when it comes to home decor and projects. Come join us! Check it out here.
Like on Facebook || Follow on Instagram || Follow on Pinterest

Thanks so much for this! I am encouraged that I can do this. I live in north Florida, Fernandina Beach, and I have a blank canvas that I am overwhelmed with where to start. This is helpful! YAY!