• Home
  • ABOUT
  • WORK WITH ME
  • Paint Colors
  • Shop Our House
    • Guest Bedroom
    • Front Living Room
    • Living Room with Fireplace
    • Previous Second Living Room
    • Current Playroom
    • Prior Playroom
    • Dining Room
    • Laundry Room
    • Oliver’s Bedroom
    • Guest Bathroom
    • Covered Lanai
    • Patio
    • Master Bedroom
  • CONTACT
    • Facebook
    • Instagram
    • Pinterest

Within the Grove

Join the list to receive occasional news and special updates!

DIY Floating Desk

June 12, 2020

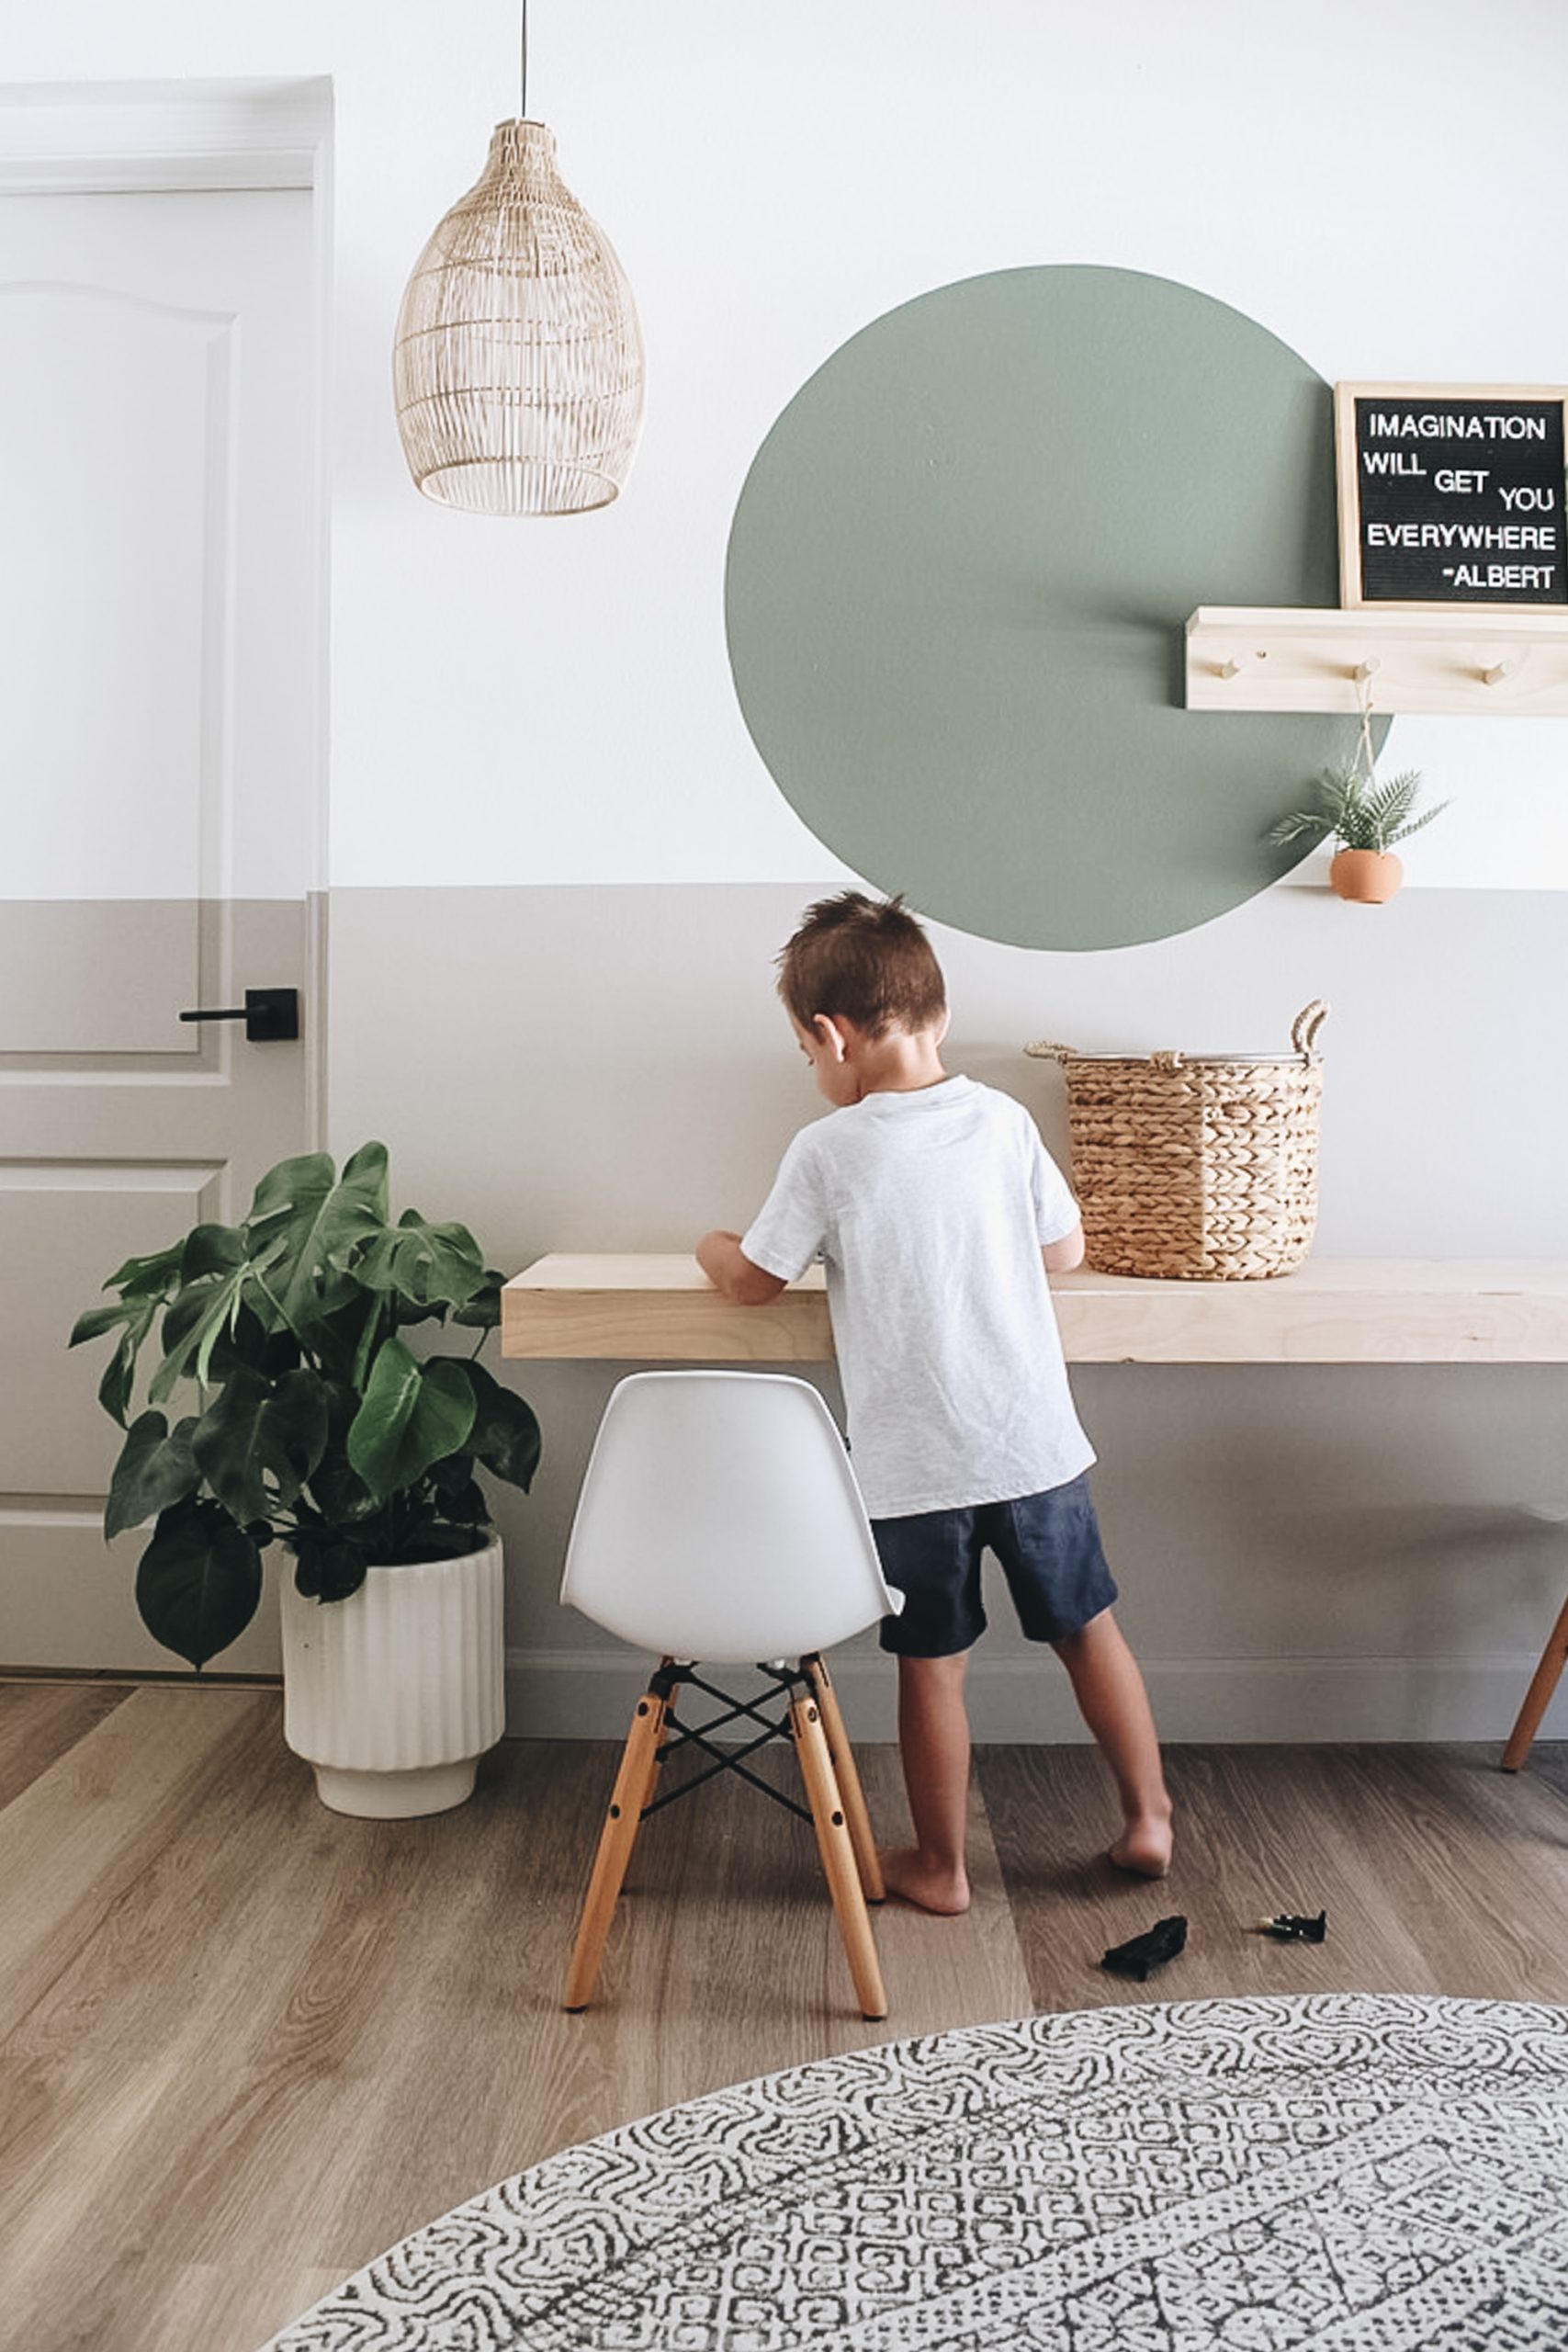
We recently made over the playroom and I kept functionality as one of the top priorities for the space. One of the first things I knew wanted to incorporate was a floating desk running along one of the walls. I wanted it long enough and deep enough for it to be used for crafting, school work, playing with legos, etc. and without it taking up too much room. And the best part? We built it for under $40!

What’s unique about this floating desk is that the ends are not butting up against adjacent walls. It is truly a floating desk. An update that we will be making to the desk are two wooden braces on the left and right side. But first, we wanted to see how it would do without them. It’s sturdy but the braces will make it even sturdier. If you’re ready to incorporate one of these fun desks in your home, if for you or your kids, here’s the full tutorial with how you can!

Materials Needed
  • 1/4″ birch plywood
  • 2 x 3s (You’ll need to calculate how many you need based off of the size you’re making the floating desk)
  • Miter saw
  • Jigsaw / circular saw / table saw – whichever you prefer to cut down the sheet of plywood
  • Drill
  • Stud finder
  • 3″ Wood construction screws
  • 2″ Wood construction screws
  • Wood glue
  • Clamps
  • Level
Building the Frame

The first thing you’ll want to do is determine the width and depth of your floating desk. One thing we took into consideration is how much of the wall we wanted the floating desk to stretch across. And the other how far we wanted it to stick out without. One of the things we were working around is this large window on the adjacent wall to the right. I personally didn’t want the desk sticking so far out, it awkwardly blocked part of the window.

With all that said, we decided to make our floating desk 68 1/2 inches wide and 15 inches deep. Knowing those measurements, we could get started on the frame built out of 2x3s. Side note: we went with 2 x 3s versus 2 x 4s because we didn’t want the floating desk too thick/wide.

The 2 x 3 that runs along the back of the frame will be cut to your desired width for the floating desk. In our case, it our back piece was cut to 68 1/2 inches. This will be the board that’s attached to the wall.

You’ll then want to add the sides and interior support for the floating desk. You’ll do this by cutting a few more 2 x 3 pieces that are your desired depth. BUT keep in mind, you need to subtract the width of the back and front 2 x 3 piece fo factor in how long you’re cutting the support and side pieces.

Attach two 2 x 3s flushed on both ends and then a few more in the middle evenly spaced out. Apply wood glue on the end of the smaller 2 x4 and secure it by using a 2 inch wood construction screw by drilling in from the backside of the long 2 x 3. Then attach the front 2 x 3 piece by screwing into the interior pieces. that’s the length of your desk. Your frame is now ready for the wall!

Attaching the Frame to the Wall

When attaching the frame to the wall, you’ll need an extra set of hands! First locate the studs in the wall with a stud finder and mark with a pencil where they are. Determine the height you want your floating desk. For us, we wanted a height that was perfect for our toddler when sitting and when standing. The top of our desk sits at 24 inches.

Placing the back of the frame against the wall at your desired height, place a level on top to make sure it is level before screwing it into place. This is when you’ll need an extra set of hands! Once it is level, drill two 3″ wood contraction screws through the 2 x 3 into each stud. It is SO important to drill into the studs to confidently secure it to the wall and for stability.

Attaching the Desk Surfaces (Front, Sides, Top, Bottom)

The goal for our floating desk was to make it look like a thick board. For the surface of the desk we went with 1/4″ inch birch plywood. It wasn’t necessary to go with a thick piece and it helps to prevent adding to much weight to the floating desk. I also decided to go with birch because it’s a beautiful looking piece of plywood. Knowing that we weren’t going to stain or paint our floating desk, birch still allows it to look very pretty and finished.

To cut the pieces that will attach and cover the frame, you’ll want to start by measuring the surface area of the top of the frame. You’ll want to add the thickness of the plywood, in our case 1/4″, to the right/left side and the front piece of the plywood to your overall measurement. You’ll do this so when attaching all the sides together, they’ll fit nicely together while hiding the frame. Otherwise, you’ll create a gap between the boards.

Apply wood glue on top section of the 2x4s. Place the piece of plywood on top and make sure it’s centered and flush with the wall. To make sure there’s even pressure along the top as the glue is drying, place a 2 x 3 along the tenth of the front and back. Then clamp them down for the needed pressure. Once it’s dry (usually about 30 minutes), move on to the next section.

Tip: You can use a brad nailer to attach the pieces of plywood. I opted not to since we aren’t staining or painting the desk. I didn’t want nail holes filled in with wood putty that would be visible. And don’t worry, wood glue along is powerful enough to hold everything in place.

Next will be the front piece. Take your measurements add the thickness of plywood to the left/right side and the bottom side. Apply wood glue along the front of the 2 x 3s, put the front piece of plywood in place, and secure it with the clamps.

Now for the side pieces. When taking the measurement for the side pieces, you’ll a only have to add the thickness of the plywood to your overall measure for along the bottom. Attach these pieces the same way as you did the others with the wood glue and clamps.

When attaching the bottom piece, take the exact measurement. You won’t have to add anything additional. We attached the bottom section a little different than all the others and here’s why. If you remember, we installed this floating desk that works for our toddler currently. As he grows, we want this desk to grow with him. Therefore, we want to be able to easily adjust the height for the desk down the road.

To ensure that we can do this, we did not use any wood glue for the bottom side. We then attached the piece of plywood using construction screws by drilling into the 2 x 3 pieces. We placed a screw at each corner and 2 evenly spread out along the front and 2 along the back.

The floating desk is done! We choose to keep our floating desk the natural color so we applied two coats of polycrylic in matte to seal it. We’re planning to revisit the floating desk if we need to when it comes to adding additional braces along the bottom for support. But as of right now, it’s doing great!

You can see the full playroom reveal here and keep checking back for additional DIY projects in this space. There were a lot of amazing ones we completed to make this space possible.

Come join us on our other social channels for even more behind the scenes. 
Like on Facebook || Follow on Instagram || Follow on Pinterest

Share this:

  • Click to share on Twitter (Opens in new window)
  • Click to share on Facebook (Opens in new window)

Related

Filed Under: DIY, Home of the Rishels, Home Project, Playroom

« Playroom Makeover with a Fresh Set of Paint Colors
We’re Painting our House! »

Comments

  1. Hannah says

    March 4, 2021 at 9:41 am

    What are the paint colors on the wall?

    Reply
    • WithintheGrove says

      March 29, 2021 at 10:13 am

      Hi! I have them all listed here in this blog post: https://withinthegrove.com/playroom-makeover/

      Reply
  2. Rawan Habib says

    November 18, 2020 at 9:28 am

    Hi! This is a wonderful idea! Do you happen to know how much weight this can hold? I am building an office in our spare bedroom and would like to take down the closet and place a desk in there to hold a 70lb glowforge. Was unsure if this would hold the weight? I am guessing it depends on the drywall anchors? What do you think?

    Reply

Trackbacks

  1. 50 Stylish AF DIY Desk Ideas To Elevate Your Home Office - Mia's DIY Projects says:
    April 14, 2022 at 11:16 pm

    […] 10. I’m Obsessed With This DIY Floating Desk – So Chic! […]

    Reply
  2. Beste DIY-Schreibtische – Craft-Mart – Tagebuch einer Frau says:
    February 17, 2021 at 8:30 am

    […] 2. DIY FLOATING DESK von withinthegrove.com […]

    Reply

Leave a Reply Cancel reply

Your email address will not be published. Required fields are marked *

This site uses Akismet to reduce spam. Learn how your comment data is processed.

Looking for something?

withinthegrove

The garden is cleaned up, prepped, and ready for t The garden is cleaned up, prepped, and ready for the summer crop. What started as a single garden box has transformed to this garden space over the past few years. Favorite thing about it: being tucked away in this cozy corner with the winding paths throughout it. One thing I would do differently: using pea gravel instead of the granite rocks we went with. These rocks hurt! Pea gravel is smooth enough to comfortably walk barefoot on.
The grass is in! Saying BUH BYE to the dirt around The grass is in! Saying BUH BYE to the dirt around the pool for the first time since December when we broke ground. We spent the past few weeks installing irrigation throughout our backyard and around the pool. Yesterday we finally had the sod delivered and within a few hours it got us one step closer to finishing our backyard oasis. We still have a long ways to go, but my goodness does it feel good to see this part done! And we can finally check off the final inspection for the pool build.
What does it cost to fill a 16,000 gallon pool wit What does it cost to fill a 16,000 gallon pool with a garden hose? Our total came to $229! Does this total surprise you? This of course can greatly vary depending on where you live and your situation. For us, we live in Florida and on county water. We only pay water fees and not sewage. The water company did not give us a discount. We filled the pool right at the start of our billing month so this is it! Have you filled up a pool before? I’d love for you to share your cost, pool size, and location if you feel comfortable doing so!
We have a 16,000 gallon pool and filled it up with We have a 16,000 gallon pool and filled it up with a single water hose. And we for sure had some questions! Answering them here:

• Why not use a water truck? We weren’t in a rush, it was the best way to end this project watching it fill up, and it would have been more expensive. 

• Why not use our local fire station? Our local fire department doesn’t do this and it isn’t very common that most do. We wouldn’t ask if they did. 

• Did our water company give us a discount? Nope. Most water companies will take off the sewage fee but we only pay for water and not sewage where we live. We did notify them so they wouldn’t turn our water off thinking it was a leak. 

• What is that on the end of your hose? We added a filter on the hose to help reduce iron, scale, any other heavy metals and containments to help give our pool a fresh start. 

• How long did it take? 51 hours 

I’ll be sharing the cost soon so make sure to add your guess in the comments!
Pizza nights are back! And one thing we’re addin Pizza nights are back! And one thing we’re adding since our screen enclosure is gone, are these Bitefighter LED String Lights by @tikibrandproducts . You’ve seen us use them in our playset area and now for our patio area. They give us the ambiance we need at night while helping to fight off the mosquitoes as a 2 in 1 solution. There’s no odor, no mess, and they will last all season long. Cheers to the summer nights ahead! #ad #TIKIbrand
Protecting outdoor furniture for the summer!

It’s time to give your outdoor furniture the best start for summer and to help it last long term. Here are some things you can do to protect your outdoor furniture as we enter the summer season:

1. If you have wood furniture, it’s time to seal it! I use Thompson’s Waterseal on all my outdoor wood furniture except for teak. This protects it from moisture, sunshine, and mold/mildew.

2. Easiest way to help keep cushions clean is by spot cleaning throughout the season. I use 30 Seconds Outdoor Cleaner for quick, fresh looking cushions. 

3. To really protect cushions, Shield H2O provides a water repellent treatment that repels moisture and spills, which in return helps prevent mold and mildew. 

4. Have teak furniture? Use a teak SEALER and not an oil. Teak oil is a short term solution and easily washes out with rain. Time to seal it to last long term! 

I have everything I used in my Amazon storefront under outdoor.
We were told 16 weeks for our pool install but it We were told 16 weeks for our pool install but it ended up taking exactly 12 weeks. Broke ground on December 16th and started filling it with water on March 16th. I’m sharing all the pool details over on my blog. Including the answer to the number one question: How much did this cost? Covering how we picked a pool builder, the construction process, the materials we went with and why, what we splurged on and where we saved, and so much more. Save it for future reference! It’s a good one!
We have an outdoor dining space again! It’s some We have an outdoor dining space again! It’s something we have missed the most these past few months while under construction with the pool. I’m such a visual person so being able to walk into @homesense_us and see exactly what we could use to create our outdoor dining space was amazing. There was so much to choose from at a great price point and something for every style. I’m noticing more Homesense Stores opening around the US so check to see if there is one near you! #HomesensePartner #DiscoverHomesense

Here are a few tips for creating an outdoor dining space:

1. Choose a table that fits the space with at least 4 feet around each side. 
2. Plenty of seating. Extra seats if you have the space.
3. Add an option for shade.
4. Select a style + decor that suits you 
5. Use outdoor furniture that’s easy to maintain. 
6. Enjoy your new outdoor space!
Are we lounging poolside or beach side? It’s har Are we lounging poolside or beach side? It’s hard to tell without our sod installed yet but regardless, loving this new addition to the pool area. Just need to find some cute side tables and this part of the pool area is done. Should I go with teak or black ones?  I’ve linked everything on my LTK through the link in my profile!
Load More... Follow on Instagram

Sign up here to have our fresh posts delivered to your inbox!

Enter your email address:

Delivered by FeedBurner

Copyright © 2023 Within The Grove • Customized by Brave Creative Design · Log in

  • Privacy Policy
  • Terms and Conditions
  • Disclosures + Photo Usage
 

Loading Comments...