• Home
  • ABOUT
  • WORK WITH ME
  • Paint Colors
  • Shop Our House
    • Guest Bedroom
    • Front Living Room
    • Living Room with Fireplace
    • Previous Second Living Room
    • Current Playroom
    • Prior Playroom
    • Dining Room
    • Laundry Room
    • Oliver’s Bedroom
    • Guest Bathroom
    • Covered Lanai
    • Patio
    • Master Bedroom
  • CONTACT
    • Facebook
    • Instagram
    • Pinterest

Within the Grove

Join the list to receive occasional news and special updates!

One Spot DIY // No Sew Pillow Covers

November 20, 2017

DIY No Sew Pillow Covers

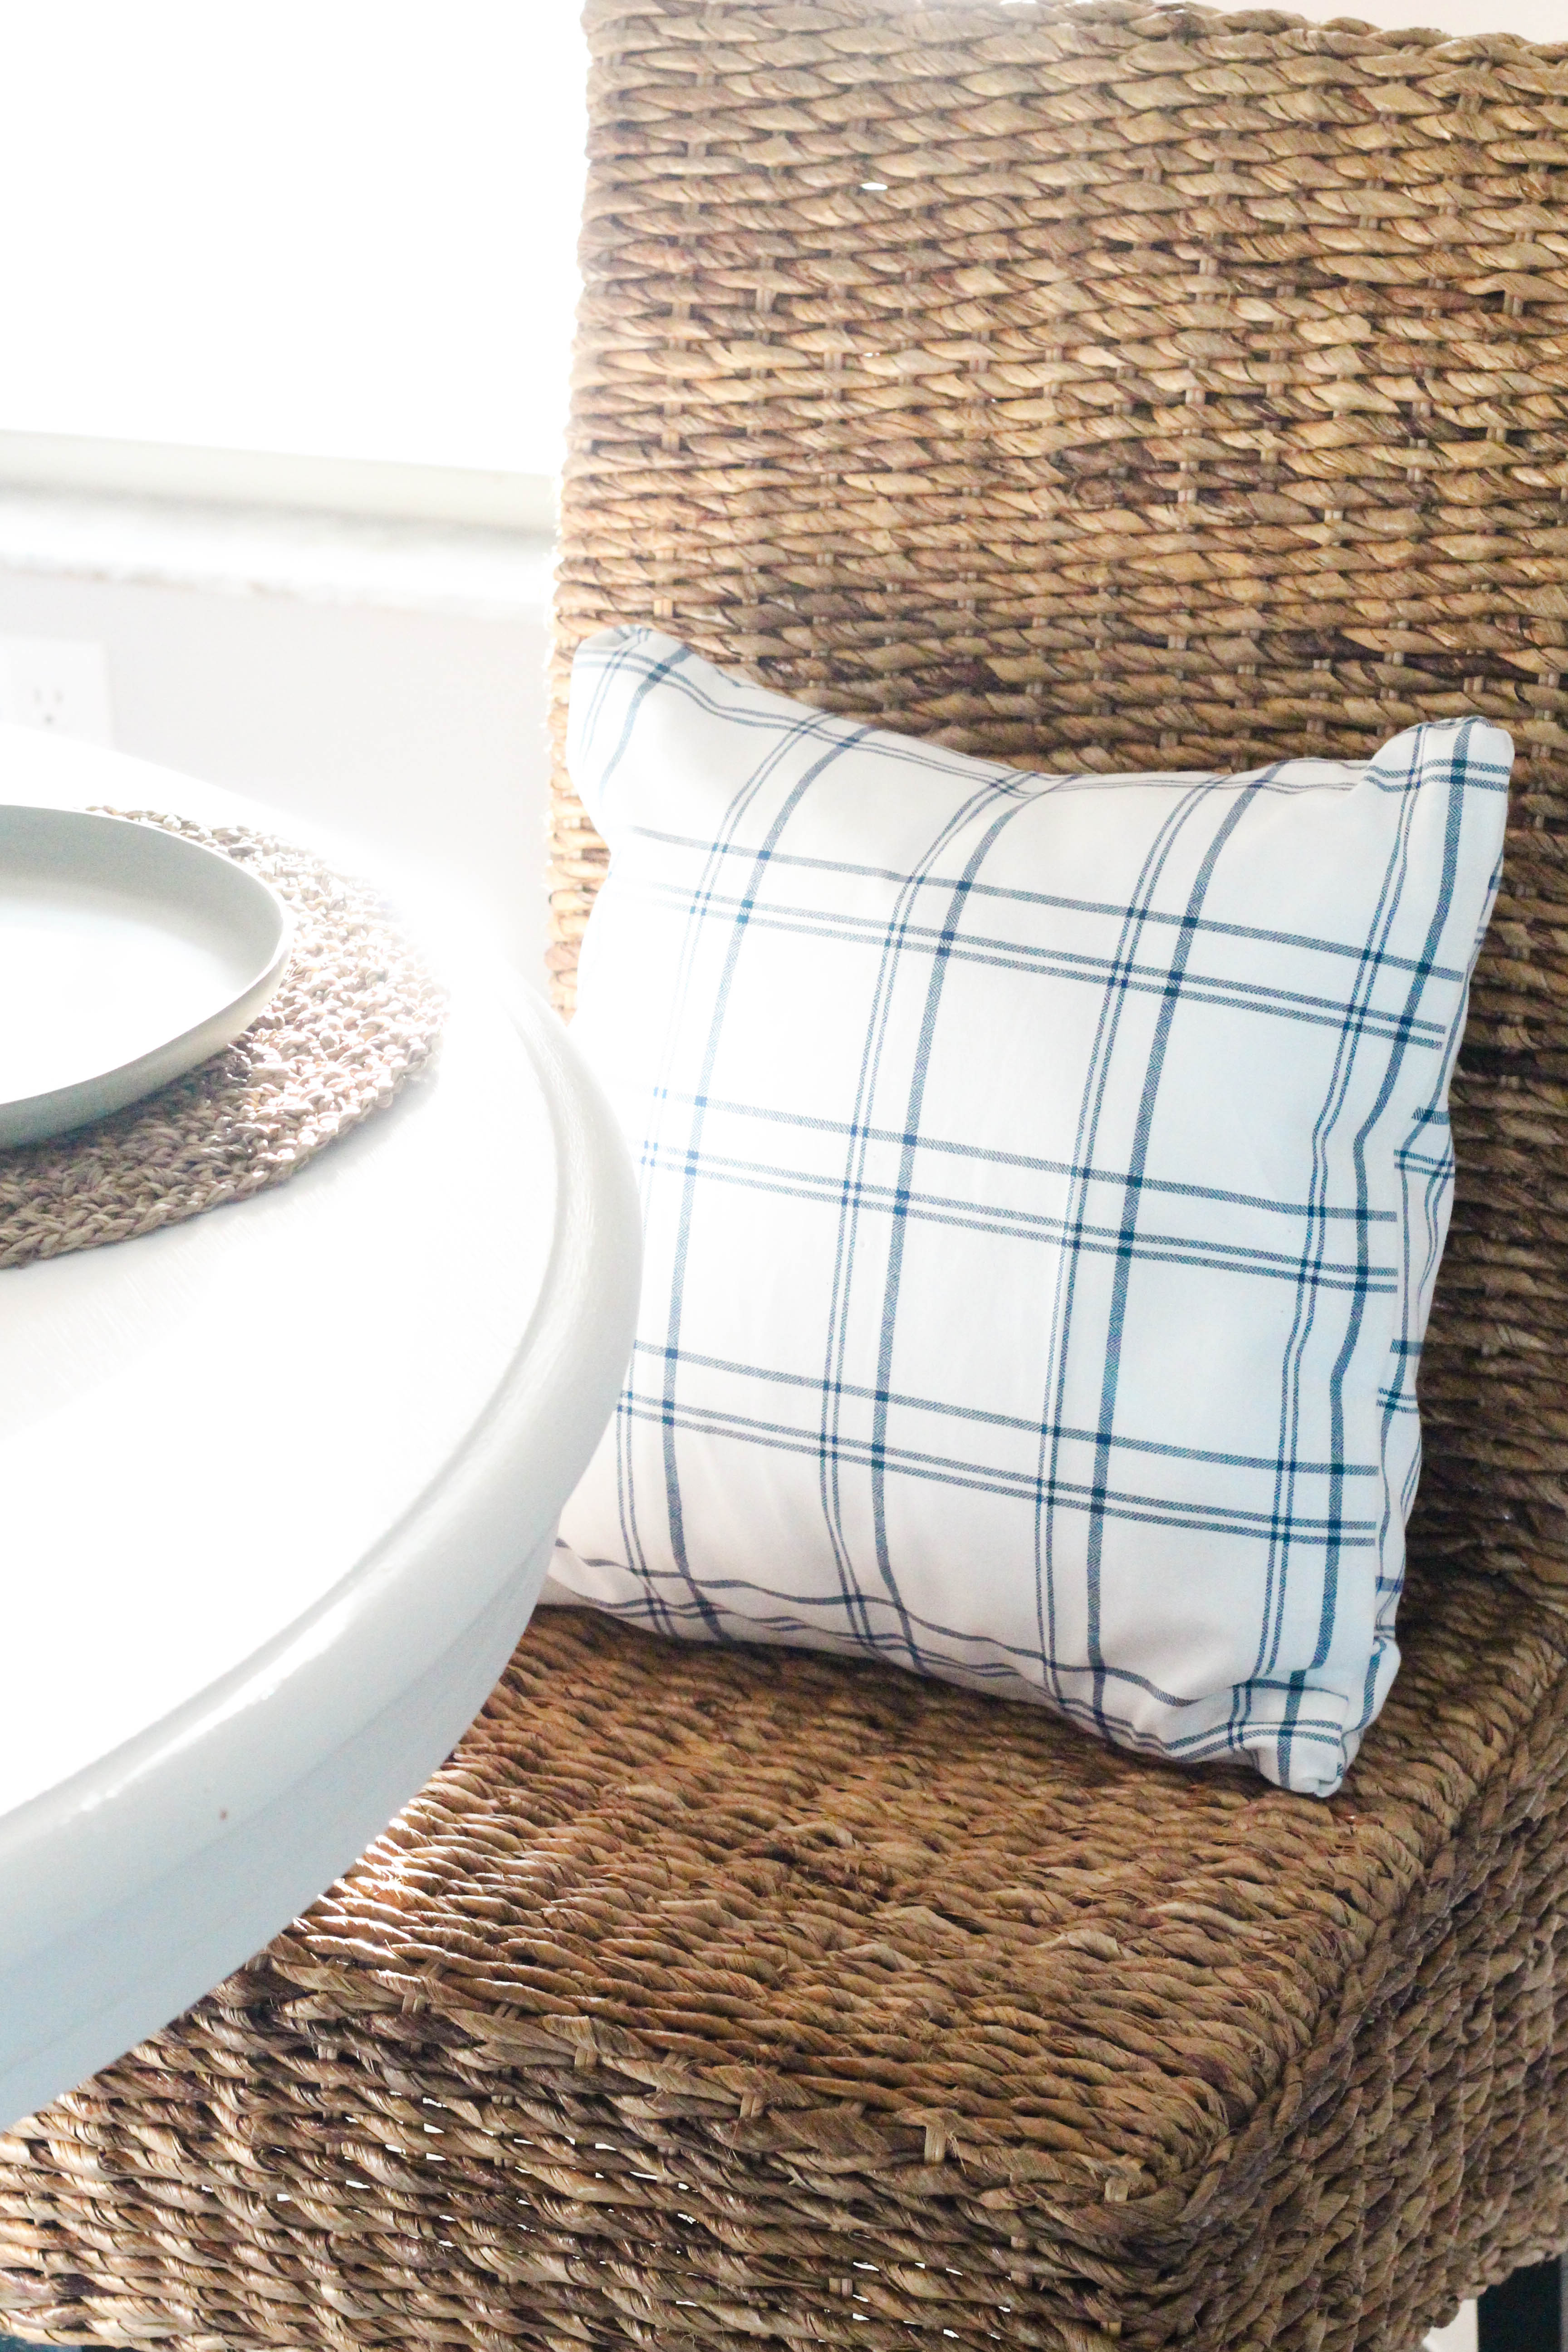
When it comes to creating a home that you love, you really want to think about the home decor items you want to incorporate (and ones that make you happy). For me that’s adding more pillows throughout my home. For example, on our beds, accent chairs, couch, and even our outdoor space. It’s one thing that I promised myself I would be better about since I can’t tell you the last time I bought a decorative pillow. But that changes today! Except I’m not buying a pillow. I’m creating no sew pillow covers for pillow inserts I already have. 

No sew pillow covers

What’s the benefit of creating or purchasing only pillow covers? You can switch out your pillows easily and it doesn’t require a large amount of storage space. I don’t know about you, but I don’t have any room to store pillows that aren’t being used for the current season. That’s why I’m showing you how to create your own set of no sew pillow covers. And to top it all off, I’m using napkins from Target’s One Spot which means I only spent $6 total for two pillow covers. Target is still carrying these blue and white napkins but the winter themed napkins are starting to arrive (which make cute pillows also).

Let’s do this!

DIY Target One Spot Pillows

Supplies:

Two 16″ cloth napkins in a pattern of your choice || 14″ pillow insert || Scissors || Iron || Iron on adhesive (like Heat’n Bond)

Supplies for no sew diy pillows

The How-To:

Step 1: Turn your iron on to a medium-high setting. While it’s heating up, cut one of your napkins down the center. 

Cut your napkin down the middle.

Step 2: Place the other napkin pattern side up on a flat surface. Align the two pieces you cut, pattern side down, on top of the napkin on the flat surface. Make sure the two halves overlap slightly and that all the sides are lined up evenly. 

Creating no sew pillow covers

Step 3:Peel back the long edge of one of the halves. Place the iron adhesive tape along the edge of napkin that’s on the bottom. Fold the top napkin back down on top of the adhesive tape to make sure the tape is concealed. Lift the top napkin back up and using the iron, fuse the tape to the bottom napkin. Make sure to follow the package instructions for your adhesive tape. 

DIY no sew pillows using napkins

Step 4: Allow the fabric to completely cool and peel the paper liner off the tape. Place the top napkin on top of the tape and fuse the two pieces together using the iron following the package instructions.

DIY no sew pillows using napkins

Step 5: Repeat steps 3-4 with the other sides of the napkins. 

Step 7: Once all of the sides have been fused together with the tape, flip the pillow case right side out. Insert your pillow into your brand new cover!

DIY no sew pillows using napkins

In just a few easy steps, you can create a no sew pillow cover using napkins. So, the next time you’re in the Target One Spot or browsing your favorite store, keep an eye out for cotton napkins with gorgeous patterns. Since I already had the pillow inserts, this project cost me under $10 to complete. And now I have cute little pillows for my breakfast nook that I can continue to switch out. 

No sew pillow cover

Let’s keep in touch!

We have a brand new community over on Facebook, House & Home, where we’ll be chatting, sharing, and helping one another when it comes to home decor and projects. Come join us! Check it out here. 

Like on Facebook || Follow on Instagram || Follow on Pinterest

Share this:

  • Click to share on Twitter (Opens in new window)
  • Click to share on Facebook (Opens in new window)

Related

Filed Under: DIY, Home Decor, One Spot DIY, Target

« Thanksgiving Decor on Amazon
5 Hostess Gifts for the Holidays »

Comments

  1. Angela Hall says

    February 2, 2018 at 5:18 am

    I was searching pillows on the internet today and saw your blog which stopped me to read it. Nice Blog.

    Reply
    • ElizabethRishel says

      February 11, 2018 at 11:59 pm

      I’m thrilled that you stopped by!

      Reply
  2. Samantha says

    December 5, 2017 at 9:05 am

    I was asking for a sewing machine for Christmas so I can make tons of pillows,but maybe I dont need it after all. Great idea, thanks for sharing!! Now to go make 100 pillows…

    Reply
    • ElizabethRishel says

      December 11, 2017 at 7:31 pm

      I know, right!? Give me all the no-sew pillows! So glad you stopped by and enjoyed the post!

      Reply
  3. L △ U R △ says

    November 22, 2017 at 4:37 pm

    These are so cute! And so simple!
    I didn’t even know they did iron on adhesive. You could make tonnes of these in whatever style you like.
    I’ve got to try this – thanks so much for sharing!

    Laura ¦ http://www.laurahasablog.co.uk

    Reply
  4. Bethany says

    November 21, 2017 at 9:10 am

    What a great quick fix!

    Reply
    • ElizabethRishel says

      November 21, 2017 at 10:35 am

      Super quick! Thanks for stopping by!

      Reply
  5. courtney says

    November 21, 2017 at 8:47 am

    this is the cutest!! i can’t wait to try it out xo

    Reply
    • ElizabethRishel says

      November 21, 2017 at 10:35 am

      Thank you! Let me know how it goes!

      Reply
  6. Katie J says

    November 21, 2017 at 7:58 am

    That’s such a good idea! I’m constantly wanting new pillows for my living room too!

    Reply
    • ElizabethRishel says

      November 21, 2017 at 10:36 am

      Yes!! And it’s an inexpensive way to switch and/or add pillows.

      Reply
  7. yenyen s. says

    November 21, 2017 at 6:49 am

    really cool idea especially for me who’s still an amateur at sewing.

    Reply
    • ElizabethRishel says

      November 21, 2017 at 10:37 am

      And sometimes sewing just takes so long!

      Reply
  8. Meghan R says

    November 20, 2017 at 10:06 am

    This is a great idea! I may have to start looking for napkins to do this with 🙂

    Reply
    • ElizabethRishel says

      November 21, 2017 at 10:37 am

      Yes! I’m always keeping my eye out for napkins with fun patterns now.

      Reply

Leave a Reply Cancel reply

Your email address will not be published. Required fields are marked *

This site uses Akismet to reduce spam. Learn how your comment data is processed.

Looking for something?

withinthegrove

Round 2 (and final!) for the grass install in our Round 2 (and final!) for the grass install in our backyard. Dang, does it feel GOOD to finally say that! It has been a long time coming and a little sweat equity saved us so much by doing it ourselves. Next on the backyard to do list is turning it into a tropical oasis by planting the flower beds. Think huge birds of paradise! Time to start planning.
It has been 6 years since we moved into our home a It has been 6 years since we moved into our home and visualized the potential our backyard would one day have. The first few years were spent clearing out and claiming our property back . Two years ago we built our dream garden, last year we built the play area that feels more like a magical treehouse, and this year we added a pool (still pinching myself every day). We’re seeing our hard work over the years starting to come together as we approach the finish line of installing grass and landscaping that’s going to bring it all together. As I always say, stay tuned because you know I’m going to share it all with you! And a little reminder for you to keep going because home takes time.
The garden is cleaned up, prepped, and ready for t The garden is cleaned up, prepped, and ready for the summer crop. What started as a single garden box has transformed to this garden space over the past few years. Favorite thing about it: being tucked away in this cozy corner with the winding paths throughout it. One thing I would do differently: using pea gravel instead of the granite rocks we went with. These rocks hurt! Pea gravel is smooth enough to comfortably walk barefoot on.
The grass is in! Saying BUH BYE to the dirt around The grass is in! Saying BUH BYE to the dirt around the pool for the first time since December when we broke ground. We spent the past few weeks installing irrigation throughout our backyard and around the pool. Yesterday we finally had the sod delivered and within a few hours it got us one step closer to finishing our backyard oasis. We still have a long ways to go, but my goodness does it feel good to see this part done! And we can finally check off the final inspection for the pool build.
What does it cost to fill a 16,000 gallon pool wit What does it cost to fill a 16,000 gallon pool with a garden hose? Our total came to $229! Does this total surprise you? This of course can greatly vary depending on where you live and your situation. For us, we live in Florida and on county water. We only pay water fees and not sewage. The water company did not give us a discount. We filled the pool right at the start of our billing month so this is it! Have you filled up a pool before? I’d love for you to share your cost, pool size, and location if you feel comfortable doing so!
We have a 16,000 gallon pool and filled it up with We have a 16,000 gallon pool and filled it up with a single water hose. And we for sure had some questions! Answering them here:

• Why not use a water truck? We weren’t in a rush, it was the best way to end this project watching it fill up, and it would have been more expensive. 

• Why not use our local fire station? Our local fire department doesn’t do this and it isn’t very common that most do. We wouldn’t ask if they did. 

• Did our water company give us a discount? Nope. Most water companies will take off the sewage fee but we only pay for water and not sewage where we live. We did notify them so they wouldn’t turn our water off thinking it was a leak. 

• What is that on the end of your hose? We added a filter on the hose to help reduce iron, scale, any other heavy metals and containments to help give our pool a fresh start. 

• How long did it take? 51 hours 

I’ll be sharing the cost soon so make sure to add your guess in the comments!
Pizza nights are back! And one thing we’re addin Pizza nights are back! And one thing we’re adding since our screen enclosure is gone, are these Bitefighter LED String Lights by @tikibrandproducts . You’ve seen us use them in our playset area and now for our patio area. They give us the ambiance we need at night while helping to fight off the mosquitoes as a 2 in 1 solution. There’s no odor, no mess, and they will last all season long. Cheers to the summer nights ahead! #ad #TIKIbrand
Protecting outdoor furniture for the summer!

It’s time to give your outdoor furniture the best start for summer and to help it last long term. Here are some things you can do to protect your outdoor furniture as we enter the summer season:

1. If you have wood furniture, it’s time to seal it! I use Thompson’s Waterseal on all my outdoor wood furniture except for teak. This protects it from moisture, sunshine, and mold/mildew.

2. Easiest way to help keep cushions clean is by spot cleaning throughout the season. I use 30 Seconds Outdoor Cleaner for quick, fresh looking cushions. 

3. To really protect cushions, Shield H2O provides a water repellent treatment that repels moisture and spills, which in return helps prevent mold and mildew. 

4. Have teak furniture? Use a teak SEALER and not an oil. Teak oil is a short term solution and easily washes out with rain. Time to seal it to last long term! 

I have everything I used in my Amazon storefront under outdoor.
We were told 16 weeks for our pool install but it We were told 16 weeks for our pool install but it ended up taking exactly 12 weeks. Broke ground on December 16th and started filling it with water on March 16th. I’m sharing all the pool details over on my blog. Including the answer to the number one question: How much did this cost? Covering how we picked a pool builder, the construction process, the materials we went with and why, what we splurged on and where we saved, and so much more. Save it for future reference! It’s a good one!
Load More... Follow on Instagram

Sign up here to have our fresh posts delivered to your inbox!

Enter your email address:

Delivered by FeedBurner

Copyright © 2023 Within The Grove • Customized by Brave Creative Design · Log in

  • Privacy Policy
  • Terms and Conditions
  • Disclosures + Photo Usage
 

Loading Comments...