


Are you in need of a workspace in your home but limited in space? Then this is for you! Or this could be an inspiration to try something new in your home when it comes to a moody paint color and a painted arch. My husband has a desk and workspace on a 44-inch wall space between two windows. I knew I could elevate the space with a little bit of paint and by adding some shelving. Here’s what the space looked like before:
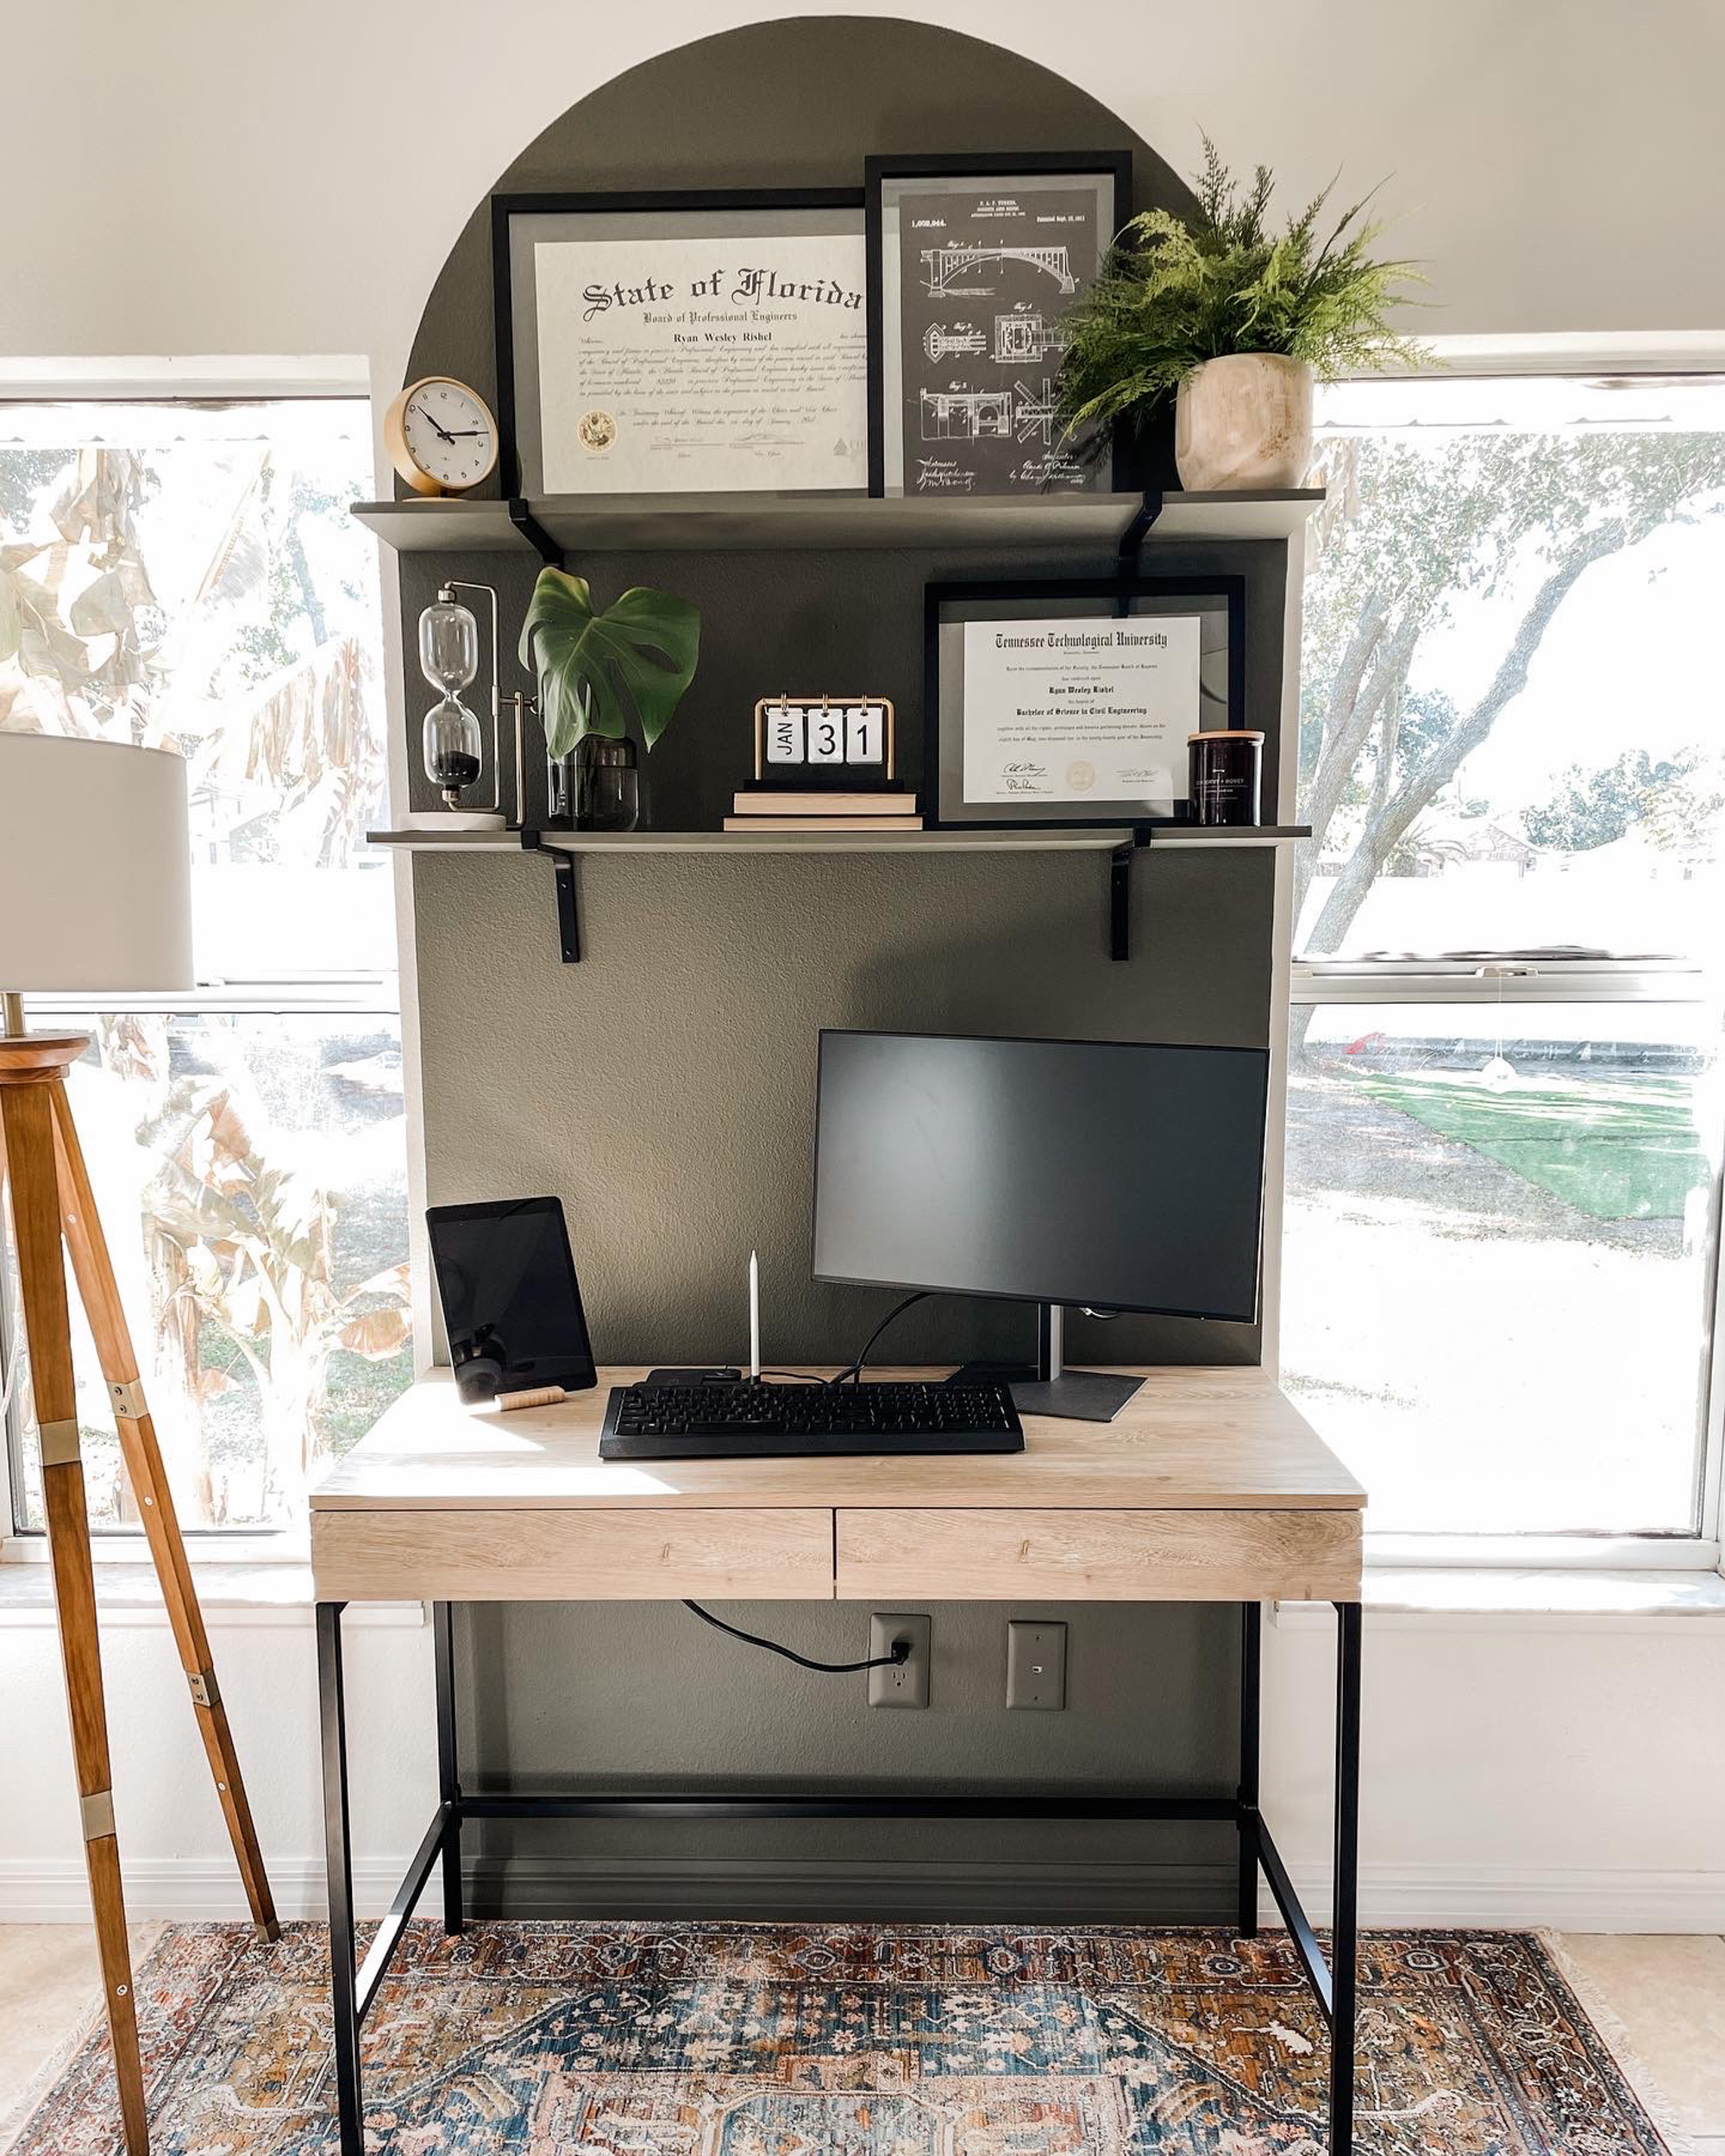
And here’s how it looked after:
Isn’t it amazing the difference paint, shelving, and a few accessories made? It goes to show that even with a small wall space, you can create something that gives a big impact. So, how exactly did I transform this space in two days? Let me show you exactly what I did!
Painted Arch
The first thing I knew I wanted to do was paint an arch behind his desk just like I did mine. Our desk spaces are right beside each other and I knew it would flow so well. I think what makes this arch dreamy looking is that it’s the exact width of the desk. This makes it appear it’s a part of it creating the illusion of a large piece of furniture.
It’s easier than you think to create and paint an arch. First, I drew my vertical lines that are 42 inches apart since that is the width of the desk. I traced them with a level to 68 inches high. This part really depends on the height of your ceiling and how high you personally want your arch to go.
Next, I found the midpoint between the two lines (21 inches) at the 68-inch height. I inserted a pushpin on that spot with a string attached. I cut the string to 21 inches with a pencil attached to the other end. This is so when I stretch the string out, the pencil lands at the top of the vertical lines.
Starting at the top of the left vertical line and keeping the string taught, I draw the arch by moving the pencil around to the top of the vertical line on the right. This creates your arch! From here, you’ll cut in along the lines of the arch and then roll the rest. The paint color I used here is Gladiator Gray by Behr.
DIY Shelving
The shelving helps to elevate the desk space even more. By painting them the same color as the arch, it creates a monochromatic look that helps to create depth and style. So how exactly did I make these shelves?
I found these brackets and love the narrow design of them so they aren’t too bulky. This is what will hold my shelves and attach them to the wall. For the shelves themselves, I picked up a small sheet of MDF board and cut them down to size. Why MDF? It’s an affordable option and already smooth so there isn’t any sanding required. I can paint them right away!
For my shelves, I cut them the exact width of the painted arch area which is 42 inches. The depth of the shelves matches the depth of the brackets I used. Keep that in mind when creating your own shelves! I primed then painted them with the Gladiator gray, attached the brackets to the shelves, and then attached them to the wall. Make sure you use drywall anchors for this to hold the weight!
End Result
So with a little bit of paint, DIY shelving, and mixing in new and old accessories, this goes to show even with a 44-inch wall space, a beautiful workspace is possible! The best part is, a painted arch can be used in so many spaces if you don’t need a workspace like this. For example, painting one as a headboard, behind a coffee station, behind a dresser, or part of a larger accent wall. There are so many options!
For more of the behind the scenes with these projects, make sure to follow along over on Instagram.
Links
Arch Paint Color: Gladiator Gray by Behr
Wall Paint Color: Cloud White by Benjamin Moore

