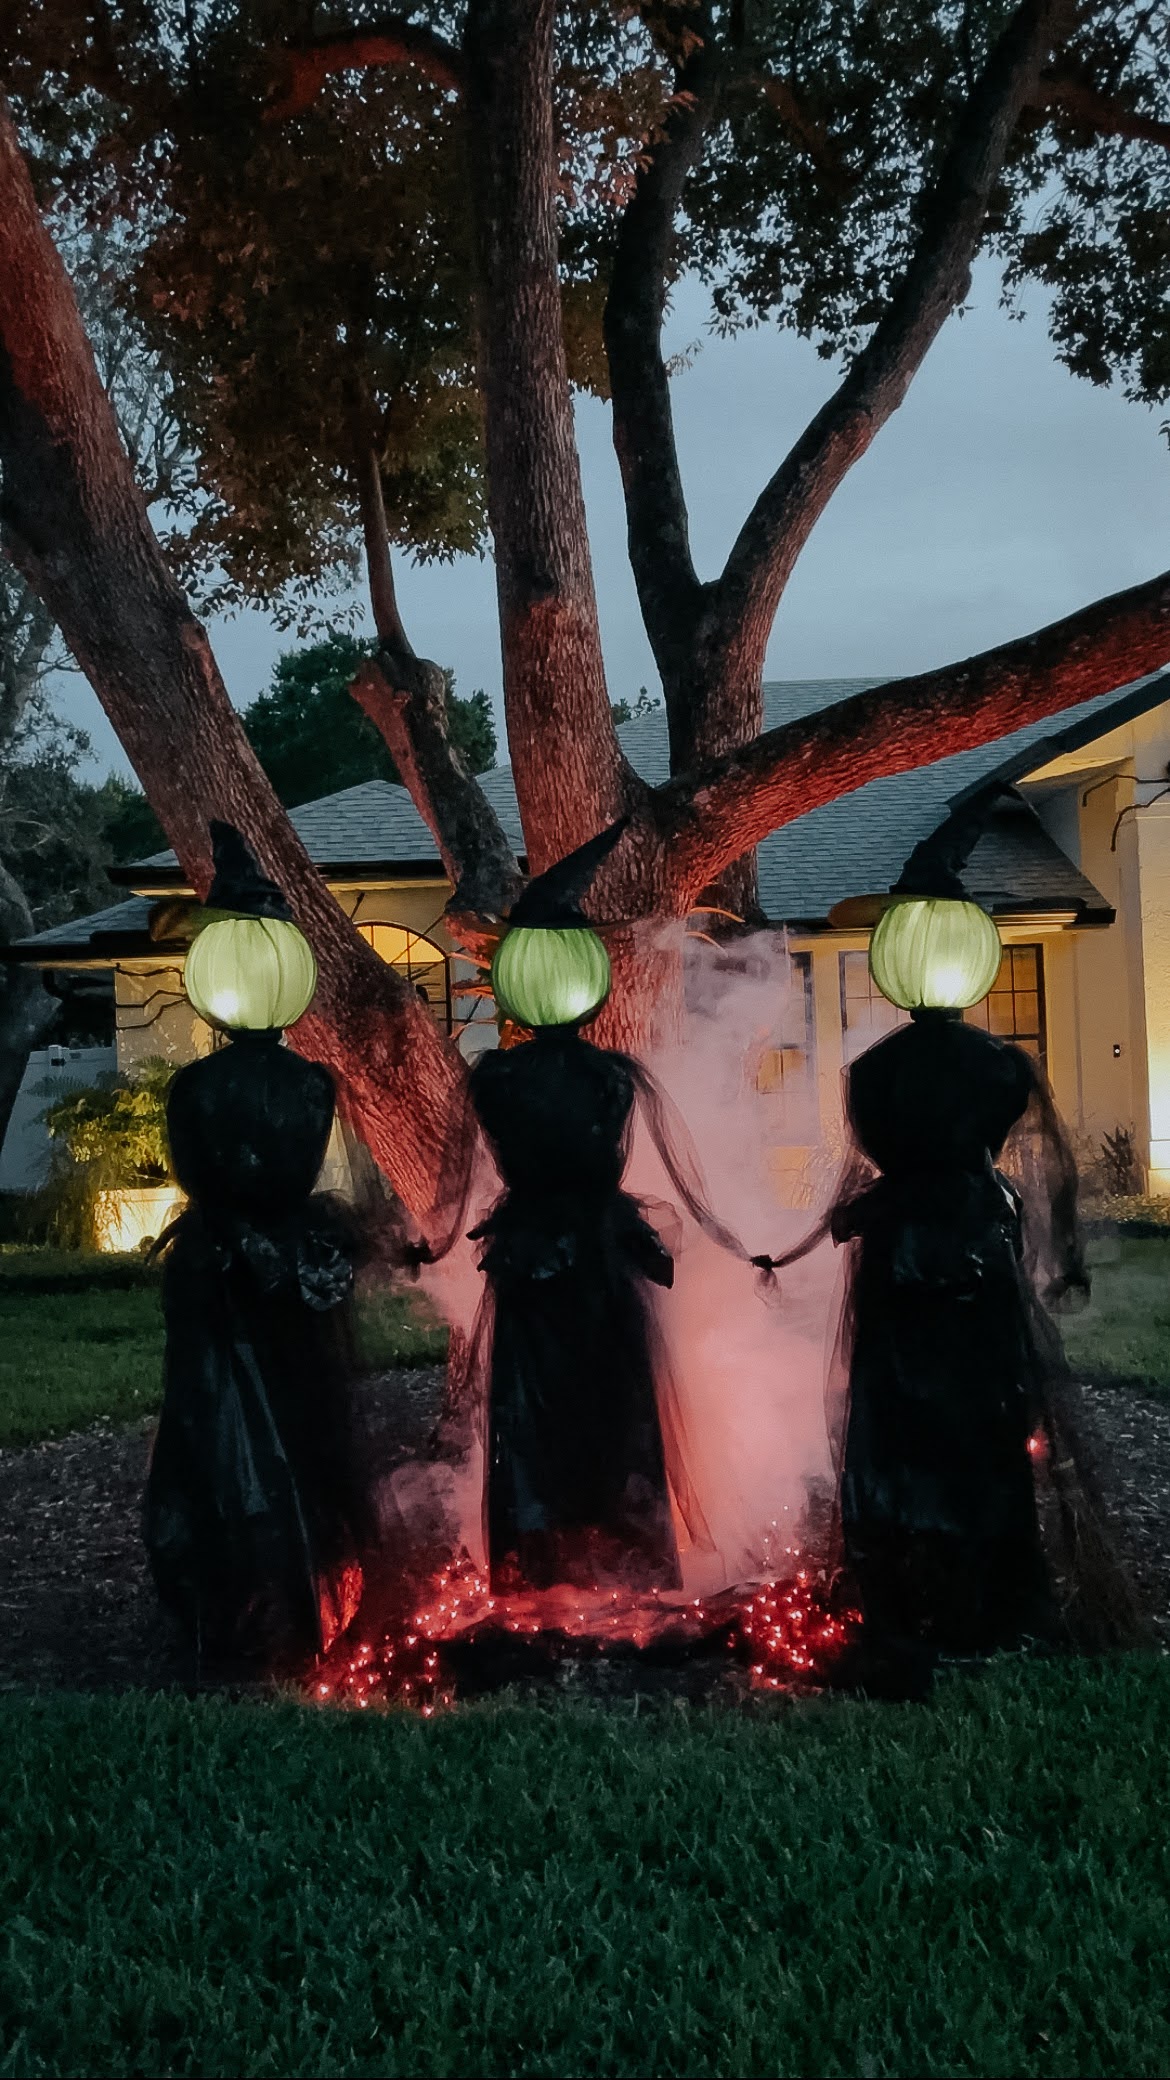
Every spooky season has its star, and for me, it’s always been the witches. These spooky-cute ladies are the OG members of my Within the Grove School of Witches. They were the project that started it all a few years ago. Back then, I wanted something whimsical for my front yard that was spooky enough for Halloween, but still cute enough that kids (and my own family) wouldn’t be totally freaked out.
The result? Three tall, mysterious witches that light up at night, gather around their cauldron, and look like they just stepped out of a whimsical Halloween storybook. They’ve become so popular that neighbors start asking about them by late September. And now, I’m finally sharing how to make them! These DIY Halloween Witches are so easy to do, and can be used year after year!

Why You’ll Love These DIY Halloween Witches
- They’re budget-friendly — made with things like tomato cages, plastic fish bowls, and garbage bags.
- They’re lightweight but sturdy, so you can store them and reuse them year after year.
- They give you instant Halloween yard decor without being gory or scary.
- They’re customizable! Make one witch or a whole coven.
- They’re okay to be outside with the materials that are used.
Supplies You’ll Need
- Tomato cages (one per witch)
- 4 x 4 piece of 1/2” wood
- Epoxy resin
- Drill with drill bits
- Nut and bolt (one set per witch)
- 3-gallon clear plastic fish bowl (one per witch)
- Frosted spray paint
- Hot glue gun & glue sticks
- Black tulle (about 2–3 yards per witch)
- Large black garbage bags (3–4 per witch)
- Plastic grocery bags (for stuffing shoulders)
- Clear shipping tape
- Black zip ties (small and large)
- Black velcro strips
- Witch hat (one per witch)
- Remote controlled battery-operated puck light (one per witch)

Step-by-Step Instructions
Step 1: Create the Head Base
Attach a 4 x 4 piece of 1/2” wood to the top of your tomato cage. Drill a small hole in each corner (don’t go all the way through) and a hole in the middle for your nut and bolt. Use epoxy resin to secure the wood piece to the cage top.


Step 2: Prepare the Fish Bowl Head
Drill a hole in the bottom of your 3-gallon clear plastic fish bowl. Spray the outside with frosted spray paint for that ghostly glow. Then, hot glue strips of black tulle from the top of the fish bowl down toward the sides — this adds texture and mystery.


Step 3: Build the Torso
Use plastic grocery bags to form shoulders and upper torso. Tape them in place with shipping tape.

Step 4: Shape the Hips
Wrap large black garbage bags below the torso to create the hips. Secure with shipping tape.

Step 5: Add the Skirt Base
Cut open the side and bottom of 1–2 large black garbage bags. Loosely wrap them around the hips to create the skirt shape. Secure with shipping tape at the waist. Cut to the length you want the skirt. I had mine just touch the ground.


Step 6: Add the Tulle Overlay
Wrap black tulle around the skirt and secure with hot glue. Cut additional strips of tulle and attach them around the skirt waist for a layered, ragged look.

Step 7: Drape the Head Base
Cut open a garbage bag and drape it over the wooden head base, then layer with tulle. Poke the bolt through both layers.


Step 8: Define the Neck and Waist
Tighten a small zip tie below the wooden head base for the neck, and a large zip tie at the waist to cinch everything together.

Step 9: Add Arms
Cut three strips of tulle for each arm. Knot both ends and hot glue one end to the shoulders.

Step 10: Assemble the Head
Attach the fish bowl to the top of the wood base using the nut and bolt. Place a battery-operated puck light inside for that haunting glow. Velcro the witch hat to the top of the fish bowl.


Styling Your Witches
The magic is in the details. I like to group three witches together around a “cauldron” (a black plastic cauldron from the party store works great). Add some green LED lights or a fog machine inside the cauldron for extra drama. Scatter faux spell books, potion bottles, or brooms nearby.

You can also:
- Add a patterned scarf under the witch hat.
- Use purple or green tulle for a twist.
- Give each witch a different hat style for personality.

These witches are the ones that started it all for me — the original DIY that turned into my School of Witches. Every year, they’re the first thing I pull out when the Halloween bins come down. And every year, they make my yard feel like a magical, slightly spooky, and very fun place to be. See? I told you these DIY Halloween Witches were something you could tackle! I can’t wait to see yours!
And if you’re a visual person like me, you can watch Part 1 and Part 2 videos on how I made these!
So grab your tulle, a tomato cage, and your inner witchy spirit… and get crafting. Your yard is about to become the talk of the neighborhood.
