• Home
  • ABOUT
  • WORK WITH ME
  • Paint Colors
  • Shop Our House
    • Guest Bedroom
    • Front Living Room
    • Living Room with Fireplace
    • Previous Second Living Room
    • Current Playroom
    • Prior Playroom
    • Dining Room
    • Laundry Room
    • Oliver’s Bedroom
    • Guest Bathroom
    • Covered Lanai
    • Patio
    • Master Bedroom
  • CONTACT
    • Facebook
    • Instagram
    • Pinterest

Within the Grove

Join the list to receive occasional news and special updates!

DIY // Painted Kitchen Utensils

September 9, 2015

DIY Painted Utensils for your kitchen

Our kitchen was in need of a pop of color and what better way to accomplish that with something I use every day: cooking utensils.  I love the unique feel and vibrant splash of color painted utensils bring to a space.  Not only are they great for your own kitchen but they are fun to give to your friends at their housewarming party or simply because they rock and deserve a fab gift.

DIY Painted Kitchen Utensils for splash of color

Using my go-to paint in my favorite colors, my wooden utensils, and a few strips of painter’s tape, I have a new set of colorful utensils just waiting to be used in the kitchen!  In just a few easy steps, you can also have a set of your own to keep or give away.

Here’s the how-to:

Supplies:

Wooden Utensils || Craft Paint || Painter’s Tape || Paintbrush || Polycrylic

Optional: Baking rack

Materials-needed-to-paint-kitchen-utensils
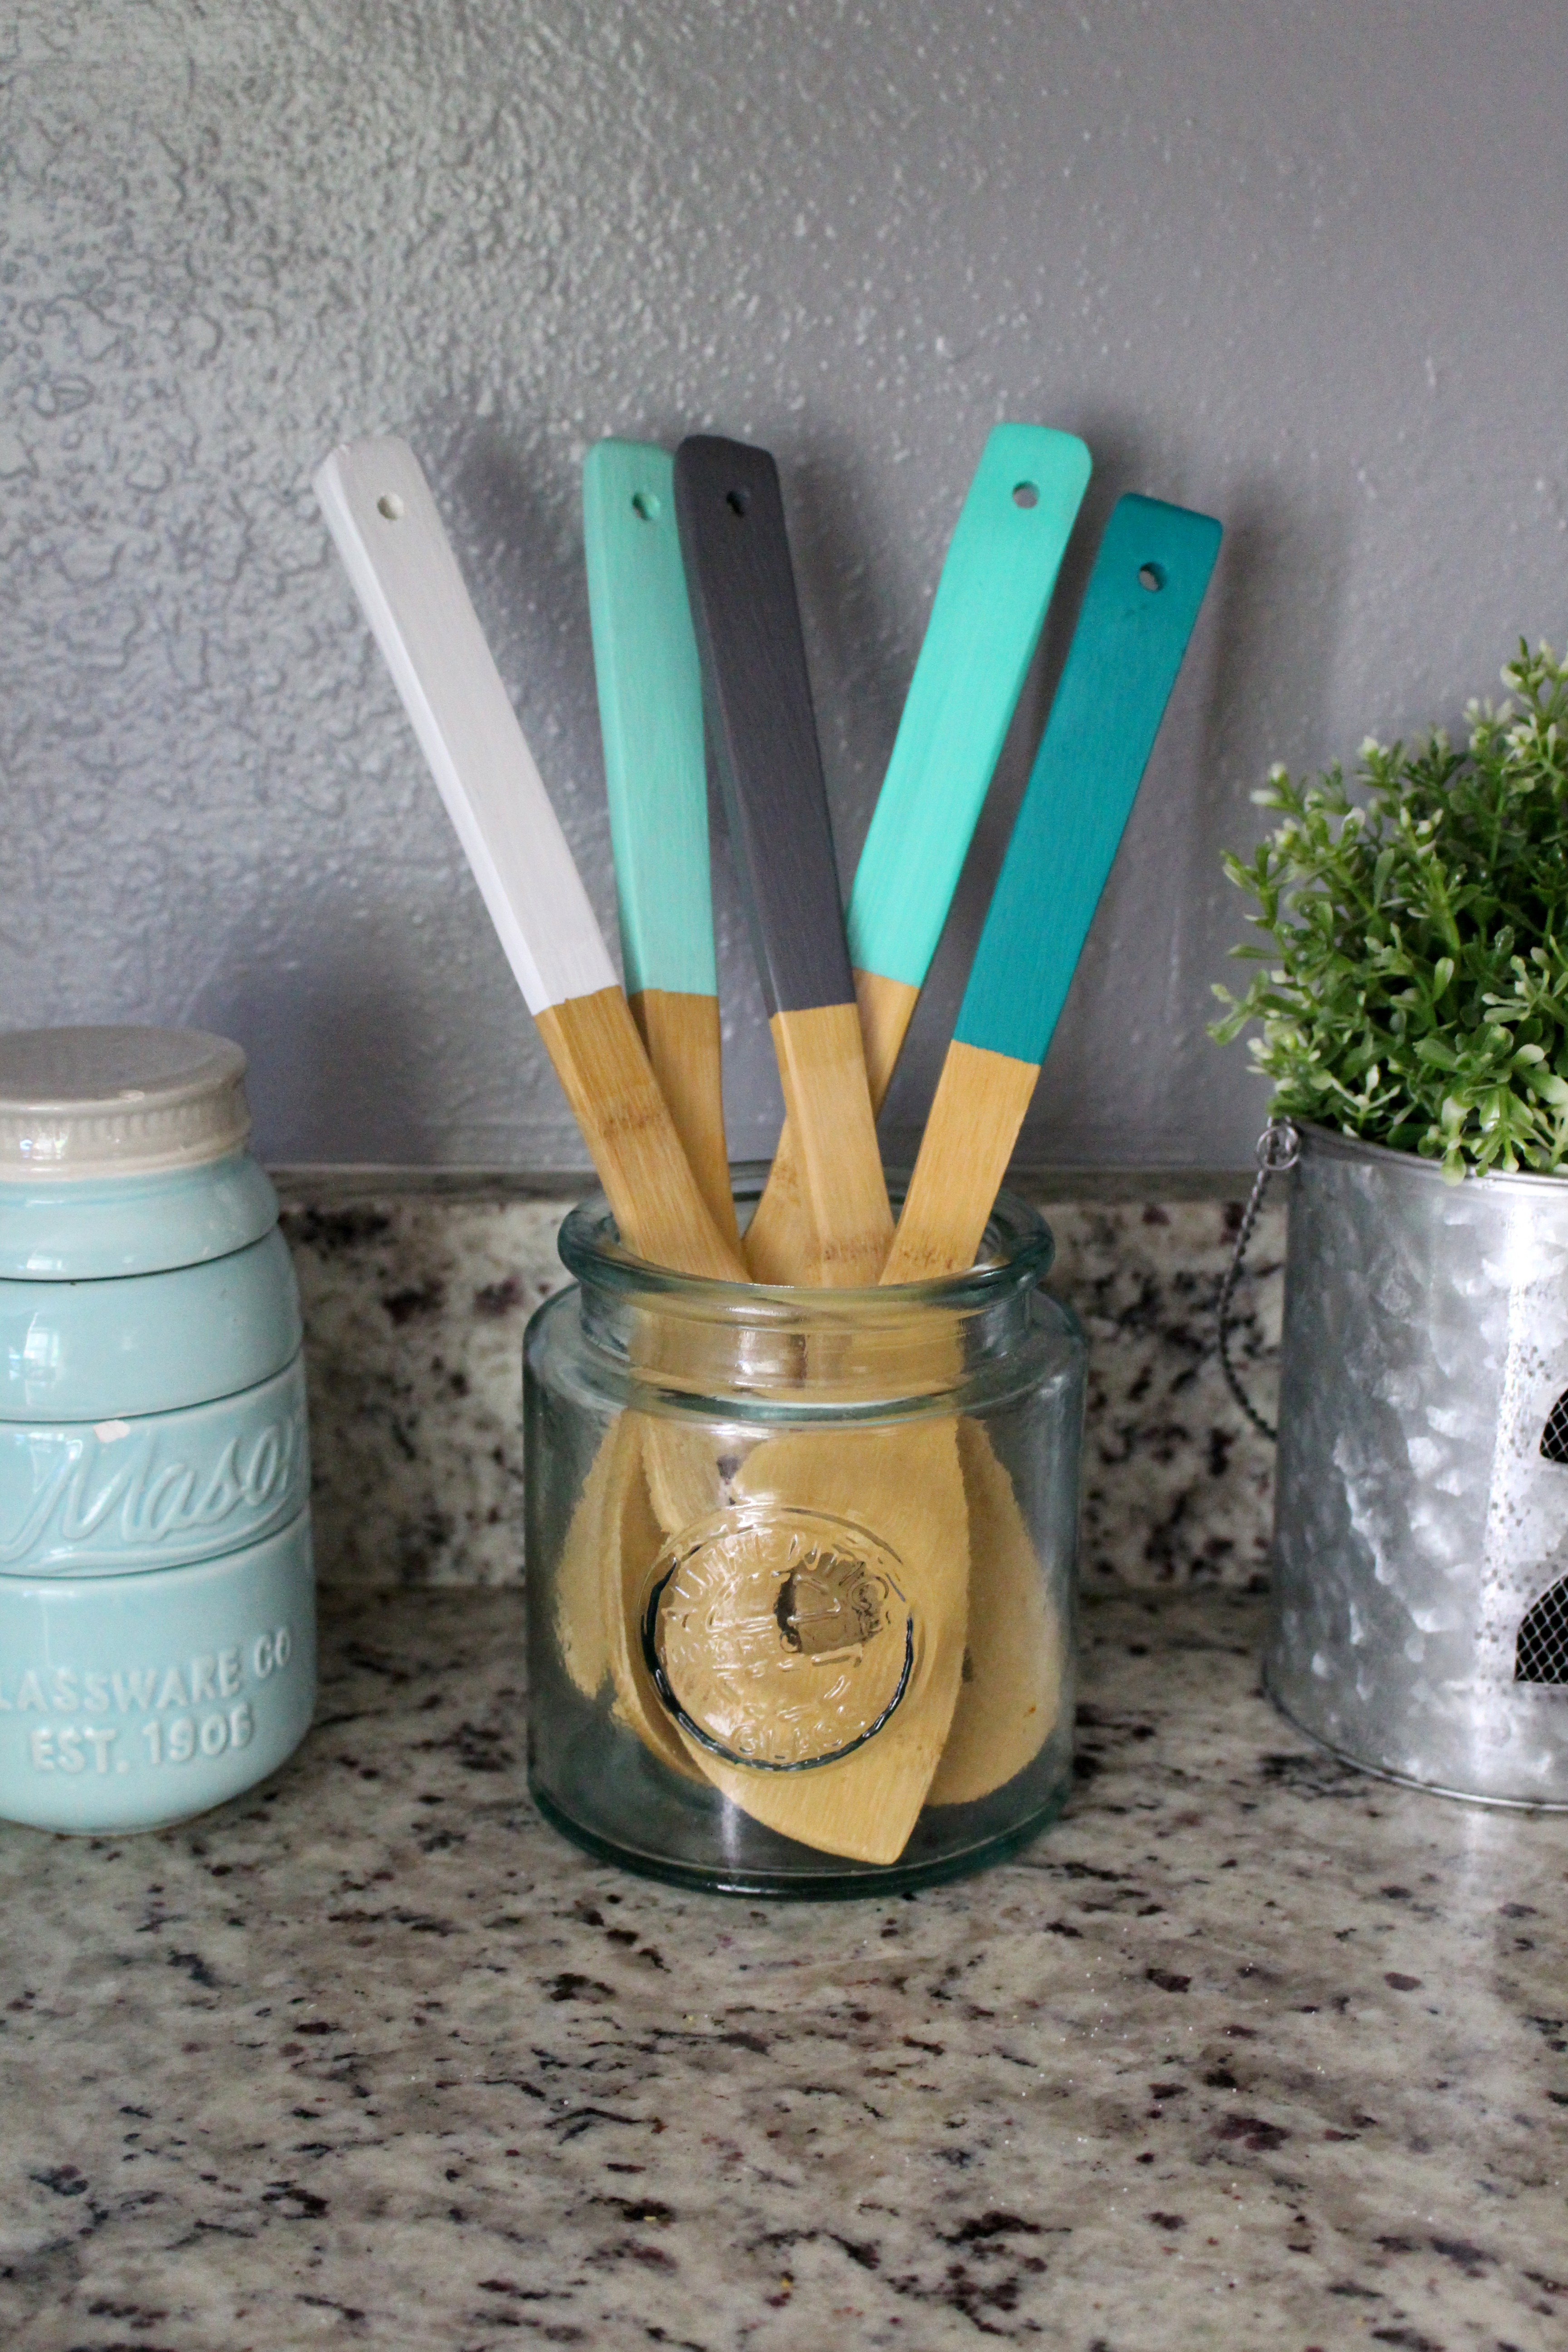
I love to use Martha Stewart Satin Acrylic Paint colors.  You can find these at most craft stores.  I used the following colors: Wedding Cake, Beach Glass, Diving Board, Mermaid Teal, and Arrowhead

Martha-Stewart-Paints-for-an-Ombre-LookStep 1: Starting from the top of the handle, measure down 5 inches.  Make a tiny mark with a pencil.  This is where you will place the top of your painter’s tape.  You will only need about 3 inches of painters tape to wrap around each utensil.

Using-painter's-tape-to-paint

Painting-kitchen-utensils

Step 2: Make sure the painter’s tape is securely wrapped around each utensil and without bubbles by firmly pressing down with your fingers.

Create your own splash of color by painting kitchen utensils.

Step 3:  Using your chosen paint colors, apply the paint to each utensil handle.  Apply the paint by brushing away from the painter’s tape to avoid paint getting underneath the tape.

Martha Stewart Paint for Kitchen Utensils

DIY: Painting Kitchen Utensils

|| Tips ||

I used a baking rack to place my utensils on while they dried.  This allowed me to paint both sides at once and for a quicker drying time.

DIY Kitchen Utensils using Paint

Using a smaller paintbrush, you are able to paint inside the opening of the handle for seamless color throughout.

diy tutorial on painting utensils

Step 4: After the first coat is dry, apply a second coat.  Depending on your colors you may need to apply a third coat.

Step 5:  Once you have painted your last coat, immediately and carefully peel off the painter’ tape.  This will prevent the paint from sticking and peeling off with the paint when removed.

DIY Painted Kitchen Utensils

Step 6:  Allow the craft paint to fully dry.  Once dry, apply two coats of polycrylic to help protect the paint. Make sure to apply the polycrylic about half an inch past the paint to make sure the paint is fully covered and protected.

Sealing your painted kitchen utensils

It’s best to wash the utensils by hand to allow the paint to last longer.  I don’t recommend placing them in the dishwasher.  Tag me on Instagram using the #WTGtutorial if you give this DIY project a try!

Painted Kitchen Utensils DIY

DIY Painted Utensils

Let’s keep in touch!

We have a brand new community over on Facebook, House & Home, where we’ll be chatting, sharing, and helping one another when it comes to home decor and projects. Come join us! Check it out here.

Like on Facebook || Follow on Instagram || Follow on Pinterest

Share this:

  • Click to share on Twitter (Opens in new window)
  • Click to share on Facebook (Opens in new window)

Related

Filed Under: DIY Tutorial, Food

« September 2015 Wallpaper // Free Download
WTG Explores // Modern Calligraphy Workshop »

Leave a Reply Cancel reply

Your email address will not be published. Required fields are marked *

This site uses Akismet to reduce spam. Learn how your comment data is processed.

Looking for something?

withinthegrove

This pretty much sums up the progress of making 25 This pretty much sums up the progress of making 250 cement tiles. But I’m halfway through! The moment I finish the last tile is the moment I knock out the old tile. Let’s do this!
Time to bet on my DIY skills! I’m attempting to Time to bet on my DIY skills! I’m attempting to make my own cement tiles for our outdoor front door area. Mainly because of what I’m saving vs buying them. Won’t be saving much on time but I’M MAKING TILES! Never thought I’d hear myself say that. Make sure to follow along because if this works out, I have a feeling a lot of you are already eyeing a spot in your home to try your own DIY cement tiles. 
 
Thank you @vintagerevivals and @abby_roadhome for showing it’s possible with your gorgeous bathroom tiles! 

#CementTiles #DiyCementTiles #DiyProject #DIYonABudget #DIYProjects
We got the call that the pool build is starting! W We got the call that the pool build is starting! Which had me scrambling to dig up all the plants that were in the way in an effort to save them. Literally down to the last second before the crew showed up. Exciting day but you know what’s even more exciting? Knowing the next crew will officially be breaking ground with the excavation phase of the build.
This time of year is full of organizing and purgin This time of year is full of organizing and purging to bring spaces back to life. But sometimes all a space needs to feel refreshed is, well, a refresh and a little attention. Your number one requested space was the living room. So I gave mine a refresh with some unique and gorgeous finds from @homesense_us . I found a few fun pots for my houseplants, a gorgeous magnifying glass, and a few other items for our coffee table and couch.

I never know what I’m going to find when I walk into Homesense since it’s always rotating with amazing finds. But I do know I’ll walk out with a few new favorites for my home at affordable prices. If you haven’t yet, I urge you to check and see if you have a Homesense near you! #DiscoverHomesense #HomesensePartner
2022, you were awesome. But I’m determined to ma 2022, you were awesome. But I’m determined to make 2023 even better! And I hope you join me! We can be one of our biggest cheerleaders, but together we’re going to do big things. Go ahead and write down a big, small and a few in-between projects you want to get done this year in your home. Kicking it off with intention and that reminder that we can do this. Ready to get started?! Let me know in the comments the first project you want to tackle!
We finally got the Christmas/winter edition of the We finally got the Christmas/winter edition of the window projection up and running! It was a hit for Halloween and just as fun for this time of year as well. I built frames wrapped with a plastic drop cloth but you can also secure the drop cloth over the windows using command strips. The videos are from @atmosfx and we use a mini projector to play them on the screen. Place a Bluetooth speaker outside and you’re in business! Such a fun addition this time of year for the exterior of your home.
It’s the last little bit of the demo we needed t It’s the last little bit of the demo we needed to do in order to give the green light for the pool to start. And 2,456 pavers later, it’s done! This was exhausting but worth the money we saved doing it ourselves. And why remove them? We’re using a different stone around the pool and we want it to be cohesive up to the house. Don’t worry, someone got one heck of a deal on these pavers, we made a little money, and someone else got them out of our driveway. I’d say that’s a win-win. Stayed tuned for the entire pool process as we enter 2023. It’s going to be pretty exciting to watch!
Our patio space has served us so well over the yea Our patio space has served us so well over the years and now it’s time for a change because we’re getting a POOL!! Sharing this with you makes it even more real because just a year ago I would have told you it isn’t in the cards for us. We’ll be breaking ground soon but first we have to remove the screen enclosure. Spoiler: we won’t be putting one back up around the pool. It has already made the biggest difference visually and SO much natural light pours into our home now with it gone. It’s going to be so exciting seeing this all unfold so stay tuned! Up next: removing the pavers.
This holiday season we were able to travel to my h This holiday season we were able to travel to my hometown for the first time in awhile. We were greeted by the most beautiful sunset on the beach. Fast forward to this week as I headed to @homesense_us for some holiday shopping, and I ended up finding a few pieces for our home that remind me of that core memory on the beach. The beautiful wicker bench caught my eye first followed by the comforter and toss pillows. Everything at amazing price points while not sacrificing style and quality. #HomesensePartner

Mixing a thrill of a find with a core memory, I guarantee you'll fall in love with your home even more as you go to decorate. Decorating your home isn't grasping on to the newest trend or what you think others would do. It's what YOU want to do. And sometimes that's based on an emotional connection. Oh, the stories your spaces will be able to tell as you decorate each one. Start with seeing if there’s a @homesense_us near you! #DiscoverHomesense #HomesenseSarasota
Load More... Follow on Instagram

Sign up here to have our fresh posts delivered to your inbox!

Enter your email address:

Delivered by FeedBurner

Copyright © 2023 Within The Grove • Customized by Brave Creative Design · Log in

  • Privacy Policy
  • Terms and Conditions
  • Disclosures + Photo Usage
 

Loading Comments...