


You guys!! Where did the utility sink go!? Oh, you mean it’s behind the faux cabinet? This is pretty much what design dreams are made of when you design a piece of furniture and it comes to life and does exactly what it’s meant to do. So, why did we feel the need to hide the utility sink? First, let’s take a look at the before and after.


As we’ve been slowly making over our laundry room, I always knew there was one thing on the list I couldn’t wait to do: hide the utility sink. The more we do to the laundry room, the more it was sticking out like a sore thumb. Yes, it functions, does the job it’s meant to do but it was killing the vibe of the space. The solution? Build a faux cabinet to wrap around the sink.

We started researching what we could do. Everything we found either involved wrapping a curtain around the sink or slats of wood that made it a little too rustic for our style. So, it was to the drawing board to design our own which was modern and simple.

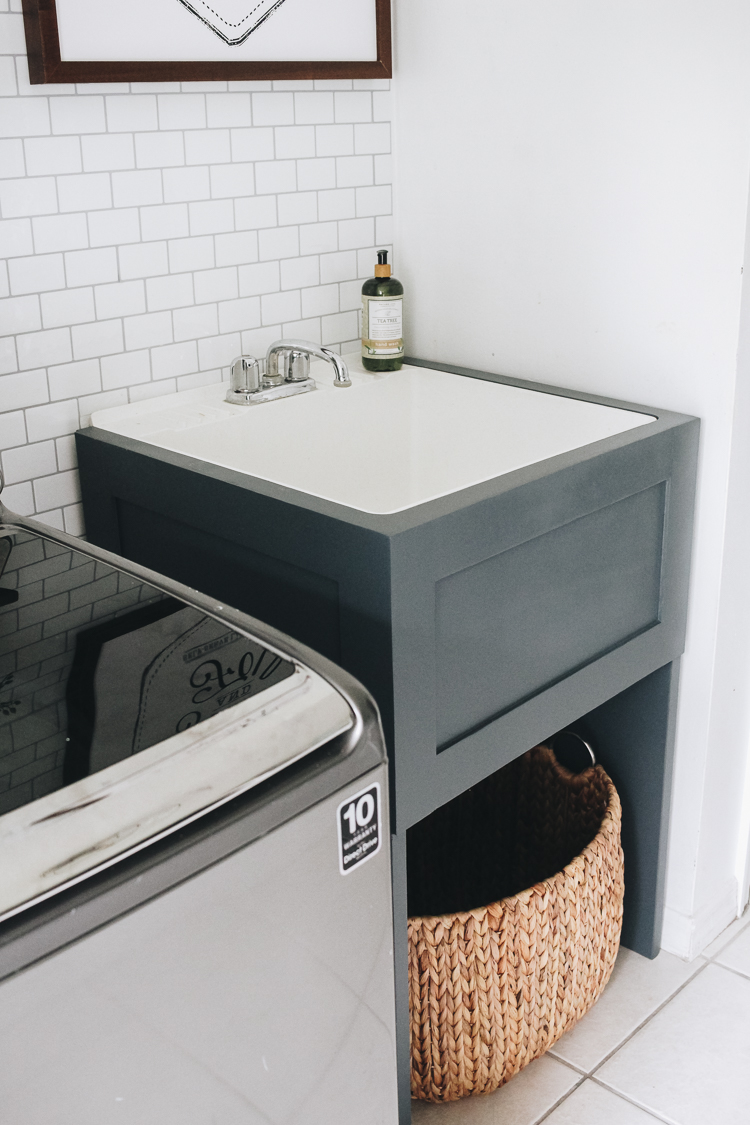
We’re thrilled with how it turned out and it does what it’s suppose to do: it conceals the utility sink. The bottom was left open so we can place a basket underneath for laundry. Especially after we’ve spent a day doing yard work or we’re coming home from the beach.

The faux cabinet was also designed so that it fits perfectly around the sink but you can also easily slide it out just in case we need to work on any of the plumbing. Don’t worry, with a sturdy base that frames the sink, it’s not going anywhere when it’s in place.


Are you now staring at your utility sink wondering why you didn’t think of doing this before? We’re excited to share the plans on how you can build your own faux cabinet. You’ll be amazed at how fairly simple it is and can be built and installed in a weekend. Grab your power tools and let’s get building!

**Affiliate links are used in this post. Thank you SO much for your support. It allows me to keep bringing you great content at no extra cost to you!
Materials
4 x 8 piece of birch plywood
2 x 3 MDF board
Wood glue
Wood screws
Brad nailer
Jig saw
Circular saw
Wood filler
150 and 220 grit sandpaper
Orbital Sander or you can do it by hand
Laminate birch edging
Iron
Caulk
Paint
Paint Sprayer
The How-To
** Please keep in mind these are custom measurements to fit our sink which is why you won’t find actual dimensions. Yours will be built to fit your specific sink.
The very first thing you’ll want to do is cut the front and two side pieces for the cabinet. For the sides, measure from the floor to the top of the sink for the height. This next part is important! Make sure to subtract the thickness of the top you’ll be adding from the overall height (this is the thickness of the birch plywood). If you don’t, your cabinet sides will end up going past your sink once you attach the top. Next, determine the width by measuring from the wall to about one inch past the front of the sink.
For the front piece of the cabinet measure the width of the sink and add about 3 inches. Reason being, you want the sides to be about 1 1/2 inches away from the sink to create the top. And then measure the height which will be the depth of the sink. You won’t need to subtract anything for the counter since this piece won’t touch the floor.

Now that you have your side and front pieces cut out, apply wood glue to one side of the front piece. You’ll then attach a side piece to the front piece by using wood 3-4 wood screws. It’s important to make sure everything is flush. Repeat this on the other side.


For extra support and so your cabinet doesn’t wobble, you’ll want to cut out a strip of birch plywood that’s the interior width of the cabinet and about 4 inches in height. You’ll screw this into place in the back along the bottom the same way you attached the front. **We have the cabinet flipped upside down in the image to make it a little easier to attach this piece.

Now for the top. You’ll want to take your time with this. Take a large piece of the birch plywood that covers the entire top of the sink and goes past the sides and front. You might have to cut a section out so it goes around the faucet like we did. Place it on top of the sink and trace the perimeter of the sink from underneath.


Using a jig saw, carefully cut along the the line you just traced. This is the side that will wrap snugly around the sink.

Okay, so stay with me! You’ll go ahead and push your faux cabinet into place around the laundry room sink. Make sure it’s centered and exactly where you want it. Place the piece you just cut out on top of the cabinet so that it fits around the sink as well. Now, the perimeter of the cabinet base along the bottom side of the top piece.

Using your jig saw one more time, carefully cut along the line you just traced. You’ll then have the top of your cabinet that fits right on top of the cabinet base and around the sink. Apply wood glue along the top of the cabinet base, put the top piece in place and attach it by using a brad nailer. The hardest part is officially done!


Next cut the pieces that will be placed on the front and sides of the cabinet. This will be done with the MDF board. Cut 8 strips that are 3 inches in width using a circular saw or a table saw.

Measure the strips one by one according to the side you’re attaching them to. Apply wood glue on the back, make sure it’s flush with all the sides and attache with the brad nailer. Start with the pieces on the sides and then do the top and bottom. You’ll do this on both sides and the front. **TIP: Start with both sides first and do the front last. Reason being, the MDF strips on the front will hide the layers of wood on the side.

Now for the finishing touches before you paint. You’ll want to to fill in all the holes from the brad nailer in addition to the cracks/gaps where the pieces of wood meet and the gaps between the pieces. Pay special attention to the top to help create cohesive look.


Once the wood filler is dry, use a 150 grit sandpaper and sand all the areas down where you applied the filler. Follow with a 220 grit sandpaper for a smooth finish.

You’ll also want to caulk the interior of the MDF boards for a seamless finish. Optional: apply the birch laminate edging along the front edge of the side pieces where you see the layers of the plywood. This will help create a finished look.


You’ve reached the last step! It’s time to paint the faux cabinet in your chosen color. I used the HomeRight Super Finish Max Paint Sprayer for a professional finish. The paint I used was Outerspace by Sherwin-Williams in the Emerald line. This particular paint self levels and doesn’t need a protective coat.

It’s time to slide your cabinet into place! It’s the best feeling seeing the snug fit, watching the utility sink disappear and the design aspect you’ve added to your space. Will you be creating this faux cabinet to hide your laundry room utility sink? I’d love to see your spin on it so please make sure to share. Happy building!

Just in case you’re a visual person, here’s what you’re cabinet will look like after following these steps!


Let’s keep in touch!
We have a brand new community over on Facebook, House & Home, where we’ll be chatting, sharing, and helping one another when it comes to home decor and projects. Come join us! Check it out here.
Like on Facebook || Follow on Instagram || Follow on Pinterest

[…] Image via Within the Grove […]
Were you happy with the finish without using primer first? How many coats did you use of Outerspace paint? Dry time between coats?
Painting today with same sprayer you used. First time trying it.
Where is the basket from?
[…] checked out the blog post with step by step instructions and was ready to go, until I realized that my sink was attached to the side wall and theirs was […]
Hello! I can’t wait to attempt this for our laundry room! Just a quick question for you…what thickness of birch plywood and mdf did you use? When I click on the links you included in the materials list, it doesn’t come up on Home Depot’s website. I’m guessing it’s either the 1/2” or 3/4” thick, but was hoping you could share with me what you used. Thanks in advance!!
[…] Original Source […]
I am going to have my contractor make me a similar cabinet. Did you buy the sink or did it come with your house? All the sinks I find a big box stores are awful.
I echo this comment! I would love to find a similar sink!
Hi was wondering where you ordered the specific sink from ? Thanks!
[…] our home projects? You can check out our AC unit/trash can storage, side yard privacy fence, and our faux cabinet for the utility sink […]
LOVE THIS!
What sink did you start with?
I’d love to know the model sink, as well!
[…] house projects. Up until a few weeks ago, it used to be an eye sore but we fixed that by building a faux cabinet to conceal the sink. Next up was focusing on switching out the faucet to truly make the sink work […]