• Home
  • ABOUT
  • WORK WITH ME
  • Paint Colors
  • Shop Our House
    • Guest Bedroom
    • Front Living Room
    • Living Room with Fireplace
    • Previous Second Living Room
    • Current Playroom
    • Prior Playroom
    • Dining Room
    • Laundry Room
    • Oliver’s Bedroom
    • Guest Bathroom
    • Covered Lanai
    • Patio
    • Master Bedroom
  • CONTACT
    • Facebook
    • Instagram
    • Pinterest

Within the Grove

Join the list to receive occasional news and special updates!

Simplify Your Christmas Gift Wrapping

December 20, 2017

Simplify your Christmas Gift Wrapping

Hey guys! I’m thrilled to be sharing this last holiday blog post with you but also a little sad that this beautiful holiday season is about to come to an end. I have truly enjoyed every moment of it but there hasn’t been enough time to do everything on my holiday list. Is there ever enough time? I didn’t think so.

One of my favorite parts about the holiday season is giving. I honestly believe when giving a gift, it begins with the gift wrapping. How one wraps and decorates a gift can be equally as special as what’s inside. This can actually be quite simple with gorgeous results. So today I’m sharing with you my secrets along with a quick DIY to help you beautifully simplify your gift wrapping this holiday season. Let’s jump right in!

Wrapping Paper

Christmas Gift Wrapping

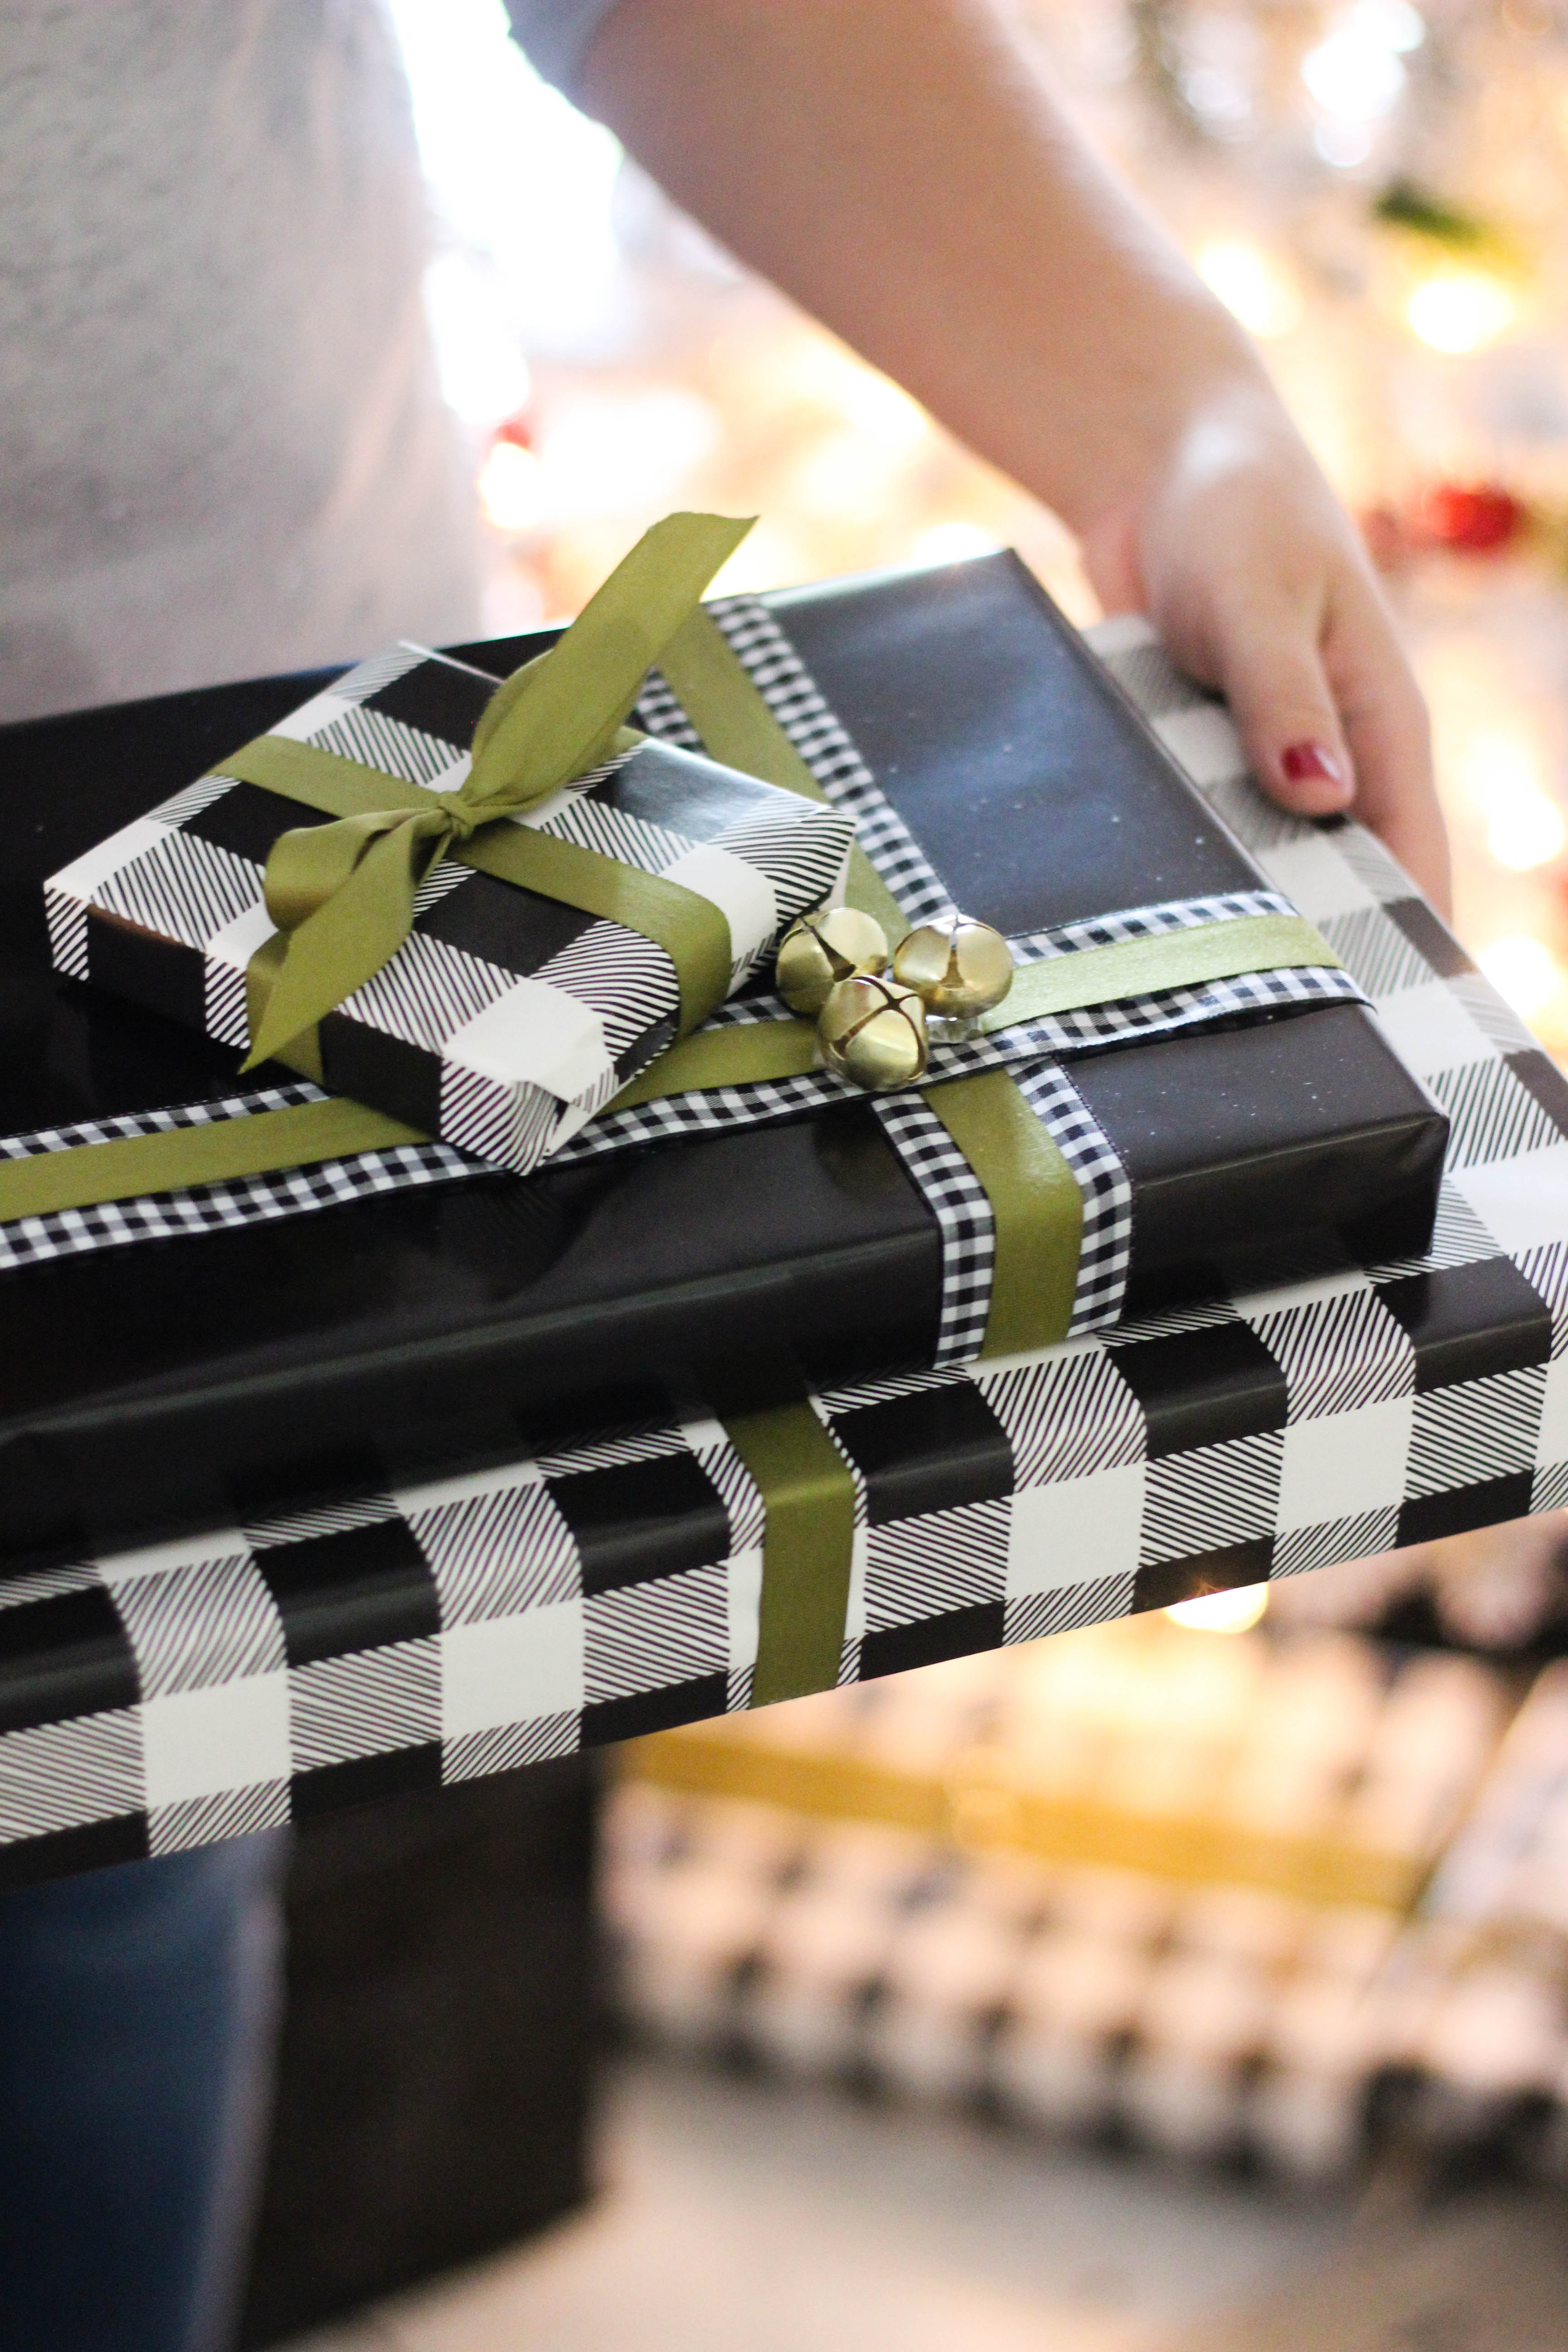
Every year I pick out two different styles when it comes to wrapping paper but they’re both within the same color scheme or at least compliment each other. This year I went with a solid black and a buffalo check in black and white. It’s a little modern and classic thrown together and I love it! I always find the best wrapping paper at my local HomeGoods.

Ribbon and Accessories

Christmas Gift Wrapping

Just like the wrapping paper, pick out ribbon that compliments each other and the gift wrap. For example, I went with a ribbon with the black and white buffalo check pattern for the black wrapping paper and a solid green ribbon for the buffalo check wrapping paper. As far as accessories, find faux Christmas florals, bells, wooden tags, etc. to use on the presents as well.

Layering

Christmas Gift Wrapping

When it comes to attaching your ribbon and accessories, I like to layer. For example, I’ll use one ribbon on top of another. This year I also added bells on top of the ribbon for a festive look. I can’t help but smile when I hear them jingle. I also positioned the ribbon higher up on the present or more to the left or right versus the traditional look of right down the middle.

Handmade Elements

DIY Personalized Christmas Ornament

To make your gift truly stand out, you can attach handmade name tags or an ornament to the gift wrap. This year I used the cutest little ornaments to add a little holiday cheer to each gift. How adorable are these? I decided to create these ornaments after seeing one in the store for $35. I know, I know. I wouldn’t pay that for one ornament either. Which is why I’ve created the tutorial on how to make these! Don’t worry, you don’t need anything but spray paint, ornaments, and stickers. Here’s the quick how to.

Supplies:

Ornaments || Alphabet Stickers || Spray Paint || Skewers || Styrofoam

Create your own personalized ornaments

The How-To:

Step 1: Firmly apply the alphabet stickers to your ornaments. Make sure all the edges are securely pressed down so spray paint doesn’t get underneath.

Step 2: Remove the top of each ornament and place to the side.

Step 1: Remove the top on each ornament and place to the side.

Step 3: Stick the skewers in the Styrofoam and place an ornament on each one. This will allow you to paint all areas of the ornament without the worry of messing another side up.

Create your own personalized Christmas ornaments

Step 4: Lightly spray paint the ornaments. Stay at least a foot away to so that drip marks don’t occur. Apply a second coat after the first one dries.

Step 1: Remove the top on each ornament and place to the side.

Step 5: Allow the ornaments to fully dry and carefully remove the stickers to reveal the wording. Don’t forget to place the top of each ornament back on.

Christmas Gift Wrapping

Use these ornaments as a name tag or as a festive addition to each present with a holiday quote. My favorite? Fa la la has totally won me over! They also turn into a mini gift the recipient can keep to put on their tree. I’m all about a cute ornament. These are just a few ways that I keep my gift wrap simple yet pretty and cohesive. And by simple, I also mean quick and easy! Every year I pick a different color scheme for my presents but how I wrap them stays the same.

Christmas Home Decor

I absolutely loved ending this holiday series with this blog post. Within the past two weeks we’ve covered recipes for a holiday brunch, how to style a table, Christmas home decor, and now gift wrap so you can arrive to the brunch with a beautifully wrapped gift. This was all part of the styled holiday shoot in collaboration with Melissa Creates. You’ve got to head over to her blog post, Simple Modern Farmhouse Christmas, where she brings together all of her blog posts from this styled shoot. We each wrote different blog posts so you get so much from the both of us for this holiday season.  Thank you so much for joining us and Merry Christmas!

Let’s keep in touch!

We have a brand new community over on Facebook, House & Home, where we’ll be chatting, sharing, and helping one another when it comes to home decor and projects. Come join us! Check it out here. 

Like on Facebook || Follow on Instagram || Follow on Pinterest


Share this:

  • Click to share on Twitter (Opens in new window)
  • Click to share on Facebook (Opens in new window)

Related

Filed Under: Uncategorized

« Laundry Room Update with Persil® Trial Size at Target®
Free Printable // Merry and Bright »

Leave a Reply Cancel reply

Your email address will not be published. Required fields are marked *

This site uses Akismet to reduce spam. Learn how your comment data is processed.

Looking for something?

withinthegrove

This pretty much sums up the progress of making 25 This pretty much sums up the progress of making 250 cement tiles. But I’m halfway through! The moment I finish the last tile is the moment I knock out the old tile. Let’s do this!
Time to bet on my DIY skills! I’m attempting to Time to bet on my DIY skills! I’m attempting to make my own cement tiles for our outdoor front door area. Mainly because of what I’m saving vs buying them. Won’t be saving much on time but I’M MAKING TILES! Never thought I’d hear myself say that. Make sure to follow along because if this works out, I have a feeling a lot of you are already eyeing a spot in your home to try your own DIY cement tiles. 
 
Thank you @vintagerevivals and @abby_roadhome for showing it’s possible with your gorgeous bathroom tiles! 

#CementTiles #DiyCementTiles #DiyProject #DIYonABudget #DIYProjects
We got the call that the pool build is starting! W We got the call that the pool build is starting! Which had me scrambling to dig up all the plants that were in the way in an effort to save them. Literally down to the last second before the crew showed up. Exciting day but you know what’s even more exciting? Knowing the next crew will officially be breaking ground with the excavation phase of the build.
This time of year is full of organizing and purgin This time of year is full of organizing and purging to bring spaces back to life. But sometimes all a space needs to feel refreshed is, well, a refresh and a little attention. Your number one requested space was the living room. So I gave mine a refresh with some unique and gorgeous finds from @homesense_us . I found a few fun pots for my houseplants, a gorgeous magnifying glass, and a few other items for our coffee table and couch.

I never know what I’m going to find when I walk into Homesense since it’s always rotating with amazing finds. But I do know I’ll walk out with a few new favorites for my home at affordable prices. If you haven’t yet, I urge you to check and see if you have a Homesense near you! #DiscoverHomesense #HomesensePartner
2022, you were awesome. But I’m determined to ma 2022, you were awesome. But I’m determined to make 2023 even better! And I hope you join me! We can be one of our biggest cheerleaders, but together we’re going to do big things. Go ahead and write down a big, small and a few in-between projects you want to get done this year in your home. Kicking it off with intention and that reminder that we can do this. Ready to get started?! Let me know in the comments the first project you want to tackle!
We finally got the Christmas/winter edition of the We finally got the Christmas/winter edition of the window projection up and running! It was a hit for Halloween and just as fun for this time of year as well. I built frames wrapped with a plastic drop cloth but you can also secure the drop cloth over the windows using command strips. The videos are from @atmosfx and we use a mini projector to play them on the screen. Place a Bluetooth speaker outside and you’re in business! Such a fun addition this time of year for the exterior of your home.
It’s the last little bit of the demo we needed t It’s the last little bit of the demo we needed to do in order to give the green light for the pool to start. And 2,456 pavers later, it’s done! This was exhausting but worth the money we saved doing it ourselves. And why remove them? We’re using a different stone around the pool and we want it to be cohesive up to the house. Don’t worry, someone got one heck of a deal on these pavers, we made a little money, and someone else got them out of our driveway. I’d say that’s a win-win. Stayed tuned for the entire pool process as we enter 2023. It’s going to be pretty exciting to watch!
Our patio space has served us so well over the yea Our patio space has served us so well over the years and now it’s time for a change because we’re getting a POOL!! Sharing this with you makes it even more real because just a year ago I would have told you it isn’t in the cards for us. We’ll be breaking ground soon but first we have to remove the screen enclosure. Spoiler: we won’t be putting one back up around the pool. It has already made the biggest difference visually and SO much natural light pours into our home now with it gone. It’s going to be so exciting seeing this all unfold so stay tuned! Up next: removing the pavers.
This holiday season we were able to travel to my h This holiday season we were able to travel to my hometown for the first time in awhile. We were greeted by the most beautiful sunset on the beach. Fast forward to this week as I headed to @homesense_us for some holiday shopping, and I ended up finding a few pieces for our home that remind me of that core memory on the beach. The beautiful wicker bench caught my eye first followed by the comforter and toss pillows. Everything at amazing price points while not sacrificing style and quality. #HomesensePartner

Mixing a thrill of a find with a core memory, I guarantee you'll fall in love with your home even more as you go to decorate. Decorating your home isn't grasping on to the newest trend or what you think others would do. It's what YOU want to do. And sometimes that's based on an emotional connection. Oh, the stories your spaces will be able to tell as you decorate each one. Start with seeing if there’s a @homesense_us near you! #DiscoverHomesense #HomesenseSarasota
Load More... Follow on Instagram

Sign up here to have our fresh posts delivered to your inbox!

Enter your email address:

Delivered by FeedBurner

Copyright © 2023 Within The Grove • Customized by Brave Creative Design · Log in

  • Privacy Policy
  • Terms and Conditions
  • Disclosures + Photo Usage
 

Loading Comments...