


The best way to have a successful flower or vegetable garden? Planting a butterfly and bee garden alongside it! Learn more about gardening for pollinators in this simple guide to growint your own butterfly and bee garden.
The past two months we’ve been working so hard to create and finish our outdoor garden area. I can’t wait to reveal the whole garden area to you and then again once everything grows in. Meanwhile, you can certainly check out what we’re planting and currently growing with our indoor setup.

In order for all of these vegetables and flowers to flourish, I knew I wanted to include a butterfly and bee garden to bring all the pollinators that we can to our garden. It’s also a great excuse to finally try incorporating an English style garden bed in our yard. It’s something I’ve been wanting to do! We headed to Lowe’s and 6 bags of mulch and 36 plants later, we were ready!
If you want to start your own pollinator garden to attract butterflies, bees and even hummingbirds, keep reading!
What Is a Butterfly and Bee Garden?
Sometimes called a pollinator garden, a butterfly and bee garden is exactly what it sounds like: a garden designed to attract butterflies and bees! These beneficial insects can help pollinate all of the plants in your garden – flowers and vegetables – but sometimes need to be specifically attracted to your garden plot to do so.
Planting a pollinator garden can do just that!
How much space do you need for a pollinator garden?
There’s really no set size needed for a butterfly and bee garden. How big your pollinator garden is will depend on the overall size of your garden plot and your property, as well as the varieties of plants you want to include.
While it’s great to aim for a minimum of 100 square feet for the biggest impact, even a small garden plot of a few planted containers can help attract pollinators to your property!
What time of year should I plant my pollinator garden?
The best time to plant a pollinator garden depends on your local climate and the specific plants you want to include. In most regions, planting a butterfly and bee garden in spring when you’re doing your other spring planting works well. This allows plants to establish roots before the hot summer days. Research the individual flowers you want to include in your garden to ensure you’re planting them at the right time.
Should you mulch a pollinator garden?
There are pros and cons to mulching a pollinator garden bed. While mulch can help retain soil moisture and suppress weeds, it can also limit access to bare soil for ground-nesting pollinators (like some bees). If you do decide to add mulch to your butterfly and bee garden, be sure to use organic options like shredded leaves, straw or compost and apply them sparingly.

Our Butterfly and Bee Garden
We planted the butterfly and bee garden along the entire front of the garden area with the arbor right in the middle. The arbor will (hopefully) be covered in passion flowers. As for the flower bed, I placed landscaping fabric down that was 3 feet wide down the entire length of the garden. Which is about 35 feet to help give you an idea.

I placed my plants and staggered them for a more full look especially as they start to grow and make themselves at home. I also want to add that all the flowers that I bought for this garden are perennial plants. Meaning that they’ll come back year after year versus an annual flower that only lasts one season. I want a beautiful flower garden and one that will age beautifully with time while also saving me money! What exactly did I plant? Here’s the line up and all the details about each plant.

Choosing the Best Flowers for a Butterfly and Bee Garden
There are so many things to consider when choosing plants for a butterfly and bee garden, from the plants that will thrive in your climate zone to the plants that will attract the right pollinators.
Here are a few of the things to consider when choosing flowers for a butterfly and bee garden:
Choose Native Plants
Opt for native plant species whenever possible. Not only are native plants well-adapted to the climate and soil in your area, the pollinators are also familiar with them!
Consider Flowering Period
Planting a variety of flowers that bloom at different times throughout the year is a great way to ensure butterflies and bees visit your garden throughout the spring, summer and fall.
Use a Variety of Shapes and Colors
Different flower shapes and flower colors attract different pollinators. Bees, for example, love flowers with open, tubular shapes that offer easy access to pollen, while butterflies tend to like brightly-colored, flat-topped flowers they can easily land on.
Choose Fragrant Plants
Flowers and flowering plants that have a strong fragrance can also help attract pollinators to your garden, especially butterflies and moths. Plants like lavender, bee balm and heliotrope smell so good they can help guide pollinators to your property.
5 Best Flowers for a Butterfly and Bee Garden
These are the plants we use in our butterfly and bee garden. Be sure to check that they’ll work for your climate zone before planting!
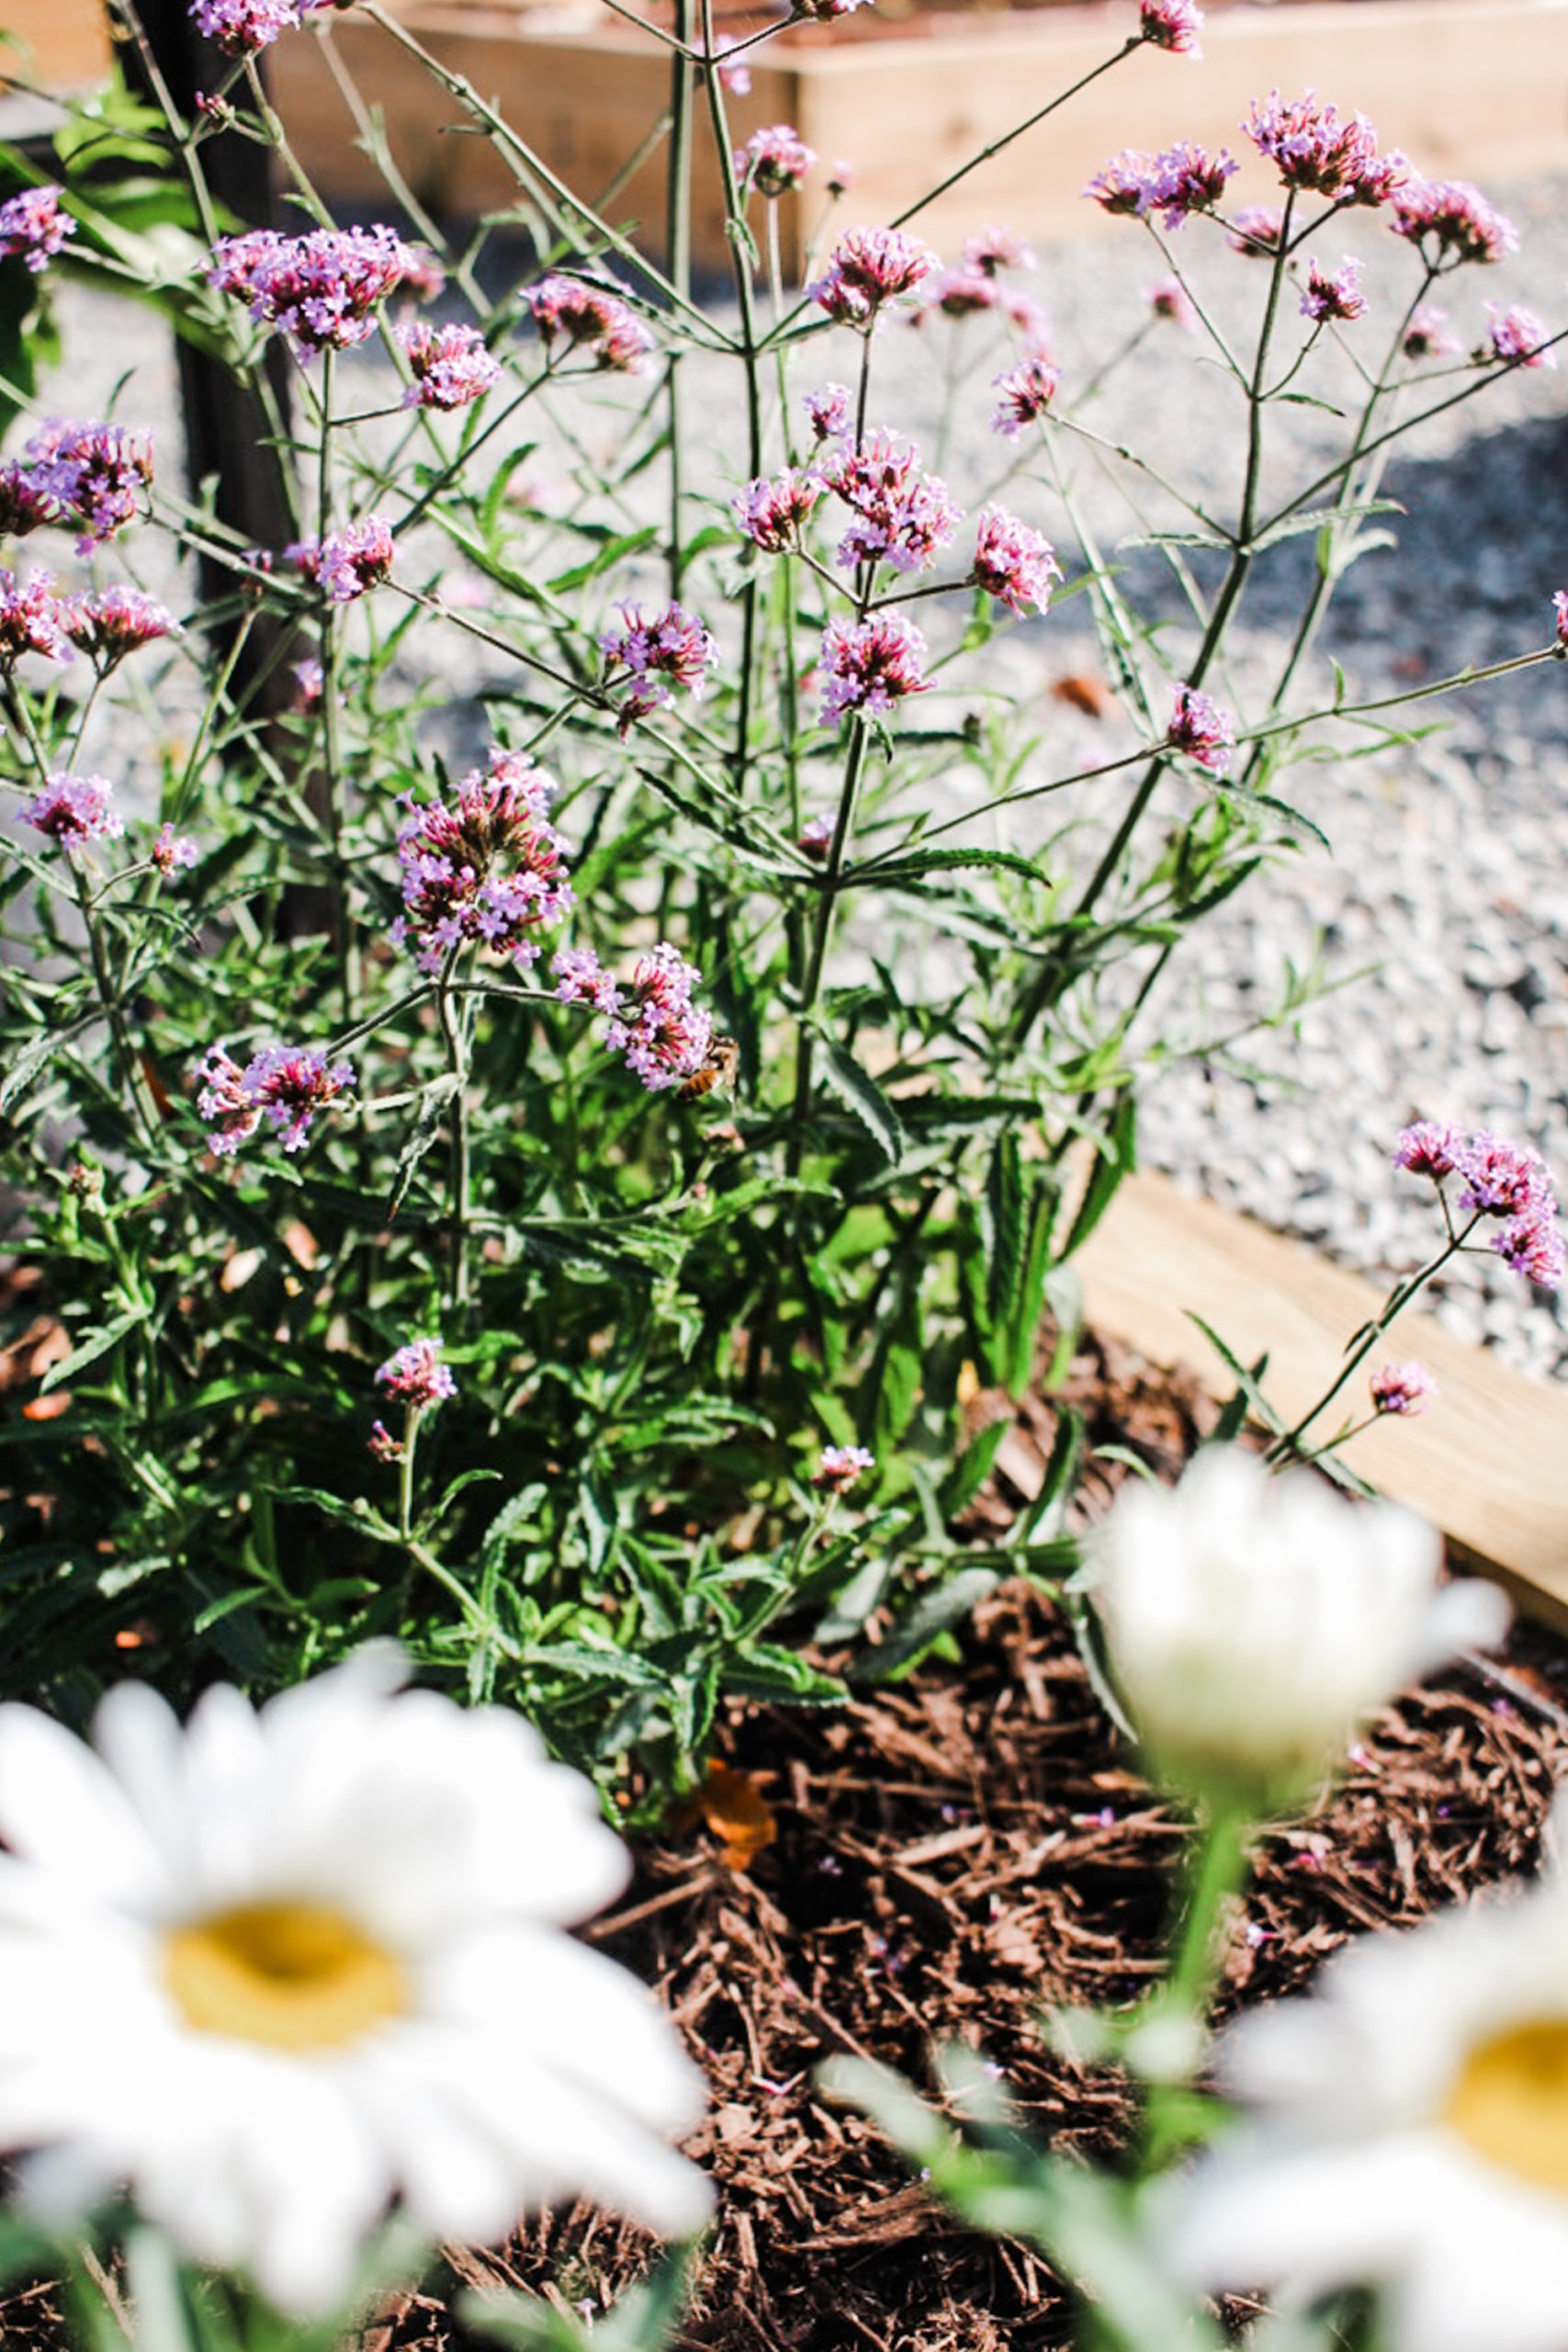
Lollipop Verbena

This lollipop verbena was the first flower that caught my eye when just starting to figure out which flowers I wanted to incorporate in the garden. From a distance, the cluster of purple flowers look like a singular round flower (hence the name) blowing in the wind. There was a certain beautiful air of playfulness about it. I love how there are so many tiny purple flowers and how it bushes out. It will fill a lot of space and add depth to the flower garden.

LOLLIPOP VERBENA QUICK FACTS
Average Mature Size: 18-24″ H x 18-24″ W
Spacing: 18-24″
Water: Keep moist until established. 2 x per week after that.
Sun: 6+ hours
Zones: 7-11
Fertilization: Spring and summer
Fun Fact: Verbenas have been used historically as an ingredient for medicinal purposes, such as herbal tea
Yellow Lantana

I have always incorporated lantana in pots because of their pretty, bold pop of color and how well they do. I was looking for white lantana but very pleased with the yellow with how it goes so well with the purple and blue flowers. I placed each of these along the front so they’ll bloom out of the garden front creating a lot of dimension. I’ll for sure have to keep these trimmed back with how much they’ll grow.

YELLOW LANTANA QUICK FACTS
Average Mature Size: 2-6 feet tall, 3-10 feet – Prune to keep small.
Spacing: 18-24″
Water: 2x per week
Sun: 6+ hours full sun. Try to avoid afternoon sun.
Zones: 7-11
Fertilization: Not necessarily needed. Do so sparingly.
Fun Fact: A single lantana plant can produce 12,000 seeds in one year.
Lucille Grace Shasta Daisy

Since I couldn’t find white lantana, I knew I needed to find another white flower to add to the mix. To be honest, I typically walk right past daisies. But they certainly caught my eye with being white, a perennial and the perfect size I needed to mix in with the other flowers for the bee and butterfly garden. One thing that is already impressing me so much is how many blooms there are on this plant! They are going to be so pretty continuously blooming.

LUCILLE GRACE SHASTA DAISY QUICK FACTS
Average Mature Size: 18-24″ H x 18-24″ W
Spacing: 18-24″
Water: Keep moist until established and then 2x per week.
Sun: 6+ hours of full sun, some light shade
Zones: 4-9
Fertilization: Every 6-8 weeks
Fun Fact: The center of a daisy is actually composed of many small flowers called disk florets.
Blue Diamonds Delphinium

How many blue flowers do you typically see? Not many, right? I saw this flower on Pinterest and thought to myself that my local nurseries and home improvement stores probably wouldn’t have it. I was wrong! Our local Lowe’s had an abundance of the blue diamond delphiniums. I just love the bold pop of the blue color. And it also doesn’t hurt that it’s Oliver’s favorite color. This one will stay relatively the same size as you see it now.

BLUE DIAMONDS DELPHINIUM QUICK FACTS
Average Mature Size: 16-24″ H x 10-12″ W
Spacing: 10″-12″
Water: Keep moist until established then 2x per week.
Sun: 6+ hours full sun
Zones: 5-10
Fertilization: Spring
Fun Fact: Historically, parts of delphinium plants have been used to create blue dyes and inks.
Super Blue Loire

This is the only flower that I got that isn’t for bees and butterflies. This is more of a low, filler plant (that will have flowers blossom) and to add a deep, rich green to the flower bed. These are SO hardy! My biggest tip is to trim them back every year. They’ll come back bigger and healthier.
SUPER BLUE LOIRE QUICK FACTS
Average Mature Size: 15″ H x 20″W
Spacing: 18-20″
Water: Keep moist until established and then 1x per week.
Sun: 3-6 hours morning sun
Zones: 5-11
Fertilization: Spring
Fun Fact: When planted groups, helps with erosion control.

Make Your Own Butterfly and Bee Garden
I found all of these plants at my local Lowe’s, which made it super easy. I bought 6 of each one to cover the long flower bed with room for them to grow in.
You can certainly create a smaller bee and butterfly garden for your yard. There’s also the option of doing a container garden by planting these flowers in pots. So many options!
You’ll have to let me know if you try this in your yard because I’m promise you’re going to love the combination of these plants together. The bees, butterflies and even ladybugs are already making themselves at home.


OMG they look georgeus. But there is a problem because I couldn’t grow different flowers in same place. It’s really difficult they want different things.