• Home
  • ABOUT
  • WORK WITH ME
  • Paint Colors
  • Shop Our House
    • Guest Bedroom
    • Front Living Room
    • Living Room with Fireplace
    • Previous Second Living Room
    • Current Playroom
    • Prior Playroom
    • Dining Room
    • Laundry Room
    • Oliver’s Bedroom
    • Guest Bathroom
    • Covered Lanai
    • Patio
    • Master Bedroom
  • CONTACT
    • Facebook
    • Instagram
    • Pinterest

Within the Grove

Join the list to receive occasional news and special updates!

Delicious Homemade Latte in 3 Easy Steps

January 24, 2017

This shop has been compensated by Collective Bias, Inc. and its advertiser. All opinions are mine alone. #LatteMadeEasy #CollectiveBias

Give me all the coffee goodness and the burst of productivity that comes with it! Every morning my coffee is brewing automatically so I can enjoy that first glorious sip upon waking up with my 4 month old. Let me tell you, most mornings more than 1 cup is needed! Here’s a little side note though. Before I had my son, Oliver Finn, I was a frequent flyer at my local coffee shop. I loved picking up my favorite latte as I was checking off my to-do list around town.

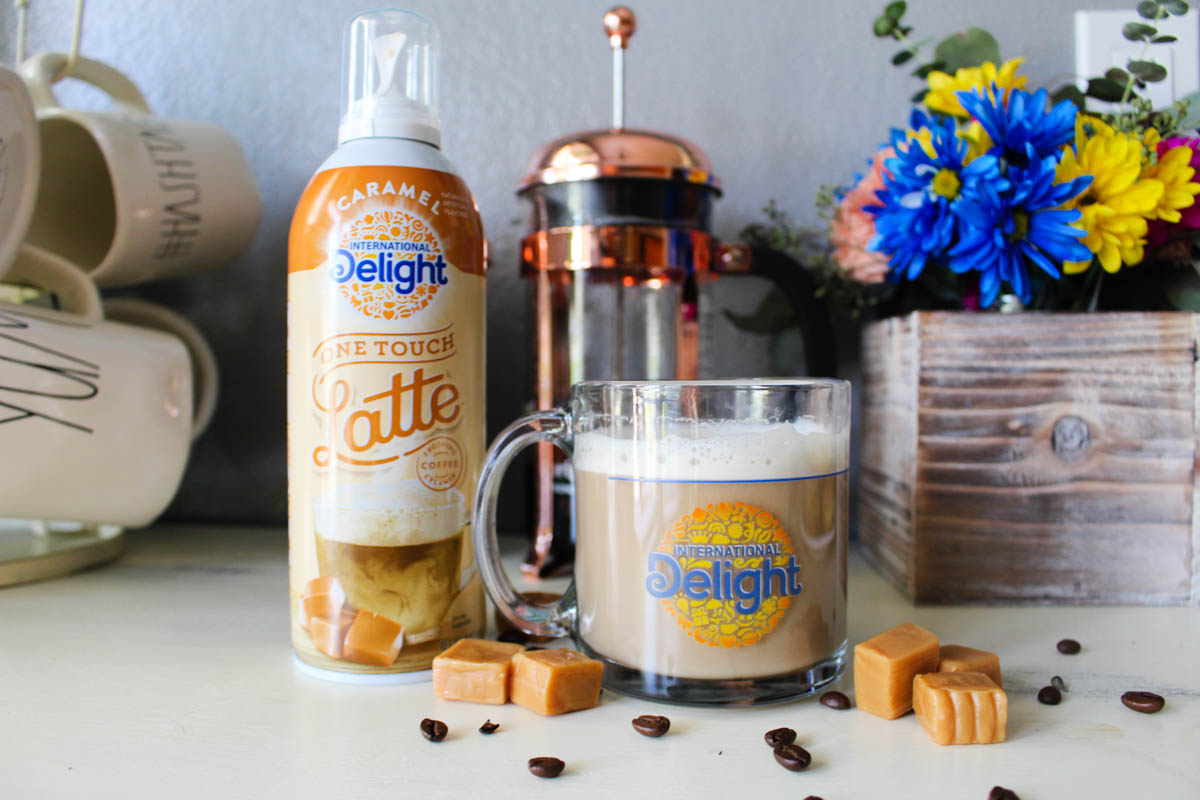
Fast forward to having an infant and officially working from home, I no longer have the time to grab my latte on the go. Let alone pay the price for one. Diapers add up! But then all was right in my latte loving world once again. Let me introduce you to the International Delight® One Touch Latte™. Haven’t heard of it? That’s because it’s brand new! It’s just now debuting on your local Walmart shelves.

But what is the One Touch Latte™? It’s the very first frothing coffee creamer that turns your home-brewed coffee into a delicious latte as if it came from your favorite coffeehouse. That’s right! A homemade latte in as little as 5 seconds and at a great value. Exactly what I was looking for in this new chapter of mommyhood and working from home.

How do you use this party in a can? In just three easy steps where you point, press, and fall in love with your new latte. Let me show you how easy it is. You’re seriously going to be addicted to this new coffee trick by International Delight®.

Step 1: Fill your cup 2/3 with coffee to leave room for the froth.

Step 2: Shake the One Touch Latte™ can.

Step 3: Press and hold the can above your coffee for 5-7 seconds like you see in the video below and enjoy!

Your instant foam-top latte provides such perfect creamy sweetness that you’ll never go back to regular coffee again.

Each can in the flavors of vanilla, mocha, and caramel are good for 7 uses each. So why not start off every day of the week with a flavorful, creamy latte made by you in seconds?

The best part? This is the perfect addition to my coffee bar at home. Ever since Oliver arrived, we’ve had guests stay with us just about once a month. I’m able to provide my guests a flavorful latte to go along with the cute chalkboard sign to guide them. Or they can simply follow the directions on the can. After all, it only takes a few seconds. And let’s not forget. I’m back to checking off my to-do list with a latte in hand and saving money while I’m at it!

Also, here’s a free download where you can display the 3 easy steps for the International Delight® One Touch Latte™ in a 5×7 frame for you and your guests! Just click the image below to download.

Want to see how others started their instant latte party? Come join them here. That is if you’re not already heading to your local Walmart to snag an International Delight® One Touch Latte™ of your own! Which flavor will you be trying out first?

Let’s keep in touch!

We have a brand new community over on Facebook, House & Home, where we’ll be chatting, sharing, and helping one another when it comes to home decor and projects. Come join us! Check it out here.

Like on Facebook || Follow on Instagram || Follow on Pinterest

Share this:

  • Click to share on Twitter (Opens in new window)
  • Click to share on Facebook (Opens in new window)

Related

Filed Under: Food, Free Printable, Home Project

« DIY // Honeycomb Tote Bag for the New Year
Planning Our 1st Valentine’s Day Breakfast as a Family of 3 »

Comments

  1. Ashlyn says

    January 31, 2017 at 8:59 am

    Such a fun post!! I LOVE all the staging and photos. I will have to try this, I love lattes!

    Reply
  2. Kathy Hubbard says

    January 30, 2017 at 11:25 pm

    Was excited to try this product. BIG DISSAPOINTMENT. Got the vanilla and carmel. You might as well squirt ready whip on top of your coffee. Vanilla worked once, then turned watery. Carmel lasted for two cups then watery. But by no means does it make your coffee like a latte It is really like ready whip. I will just stick with my flavored creamer. Much better

    Reply
    • ElizabethRishel says

      January 31, 2017 at 8:07 am

      Oh no Kathy! I’m so sorry to hear this! I just went and bought my second can of vanilla, too. I do know that it’s best to spray the product right away when the coffee is hot with the nozzle almost in the coffee. If there are a few lumps, they usually melt into the coffee within a minute or two. Thank you for stopping by and giving it a try! I hate that it didn’t work out for you. One thing I do know, we both love our coffee. Happy Tuesday!

      Reply

Leave a Reply Cancel reply

Your email address will not be published. Required fields are marked *

This site uses Akismet to reduce spam. Learn how your comment data is processed.

Looking for something?

withinthegrove

Round 2 (and final!) for the grass install in our Round 2 (and final!) for the grass install in our backyard. Dang, does it feel GOOD to finally say that! It has been a long time coming and a little sweat equity saved us so much by doing it ourselves. Next on the backyard to do list is turning it into a tropical oasis by planting the flower beds. Think huge birds of paradise! Time to start planning.
It has been 6 years since we moved into our home a It has been 6 years since we moved into our home and visualized the potential our backyard would one day have. The first few years were spent clearing out and claiming our property back . Two years ago we built our dream garden, last year we built the play area that feels more like a magical treehouse, and this year we added a pool (still pinching myself every day). We’re seeing our hard work over the years starting to come together as we approach the finish line of installing grass and landscaping that’s going to bring it all together. As I always say, stay tuned because you know I’m going to share it all with you! And a little reminder for you to keep going because home takes time.
The garden is cleaned up, prepped, and ready for t The garden is cleaned up, prepped, and ready for the summer crop. What started as a single garden box has transformed to this garden space over the past few years. Favorite thing about it: being tucked away in this cozy corner with the winding paths throughout it. One thing I would do differently: using pea gravel instead of the granite rocks we went with. These rocks hurt! Pea gravel is smooth enough to comfortably walk barefoot on.
The grass is in! Saying BUH BYE to the dirt around The grass is in! Saying BUH BYE to the dirt around the pool for the first time since December when we broke ground. We spent the past few weeks installing irrigation throughout our backyard and around the pool. Yesterday we finally had the sod delivered and within a few hours it got us one step closer to finishing our backyard oasis. We still have a long ways to go, but my goodness does it feel good to see this part done! And we can finally check off the final inspection for the pool build.
What does it cost to fill a 16,000 gallon pool wit What does it cost to fill a 16,000 gallon pool with a garden hose? Our total came to $229! Does this total surprise you? This of course can greatly vary depending on where you live and your situation. For us, we live in Florida and on county water. We only pay water fees and not sewage. The water company did not give us a discount. We filled the pool right at the start of our billing month so this is it! Have you filled up a pool before? I’d love for you to share your cost, pool size, and location if you feel comfortable doing so!
We have a 16,000 gallon pool and filled it up with We have a 16,000 gallon pool and filled it up with a single water hose. And we for sure had some questions! Answering them here:

• Why not use a water truck? We weren’t in a rush, it was the best way to end this project watching it fill up, and it would have been more expensive. 

• Why not use our local fire station? Our local fire department doesn’t do this and it isn’t very common that most do. We wouldn’t ask if they did. 

• Did our water company give us a discount? Nope. Most water companies will take off the sewage fee but we only pay for water and not sewage where we live. We did notify them so they wouldn’t turn our water off thinking it was a leak. 

• What is that on the end of your hose? We added a filter on the hose to help reduce iron, scale, any other heavy metals and containments to help give our pool a fresh start. 

• How long did it take? 51 hours 

I’ll be sharing the cost soon so make sure to add your guess in the comments!
Pizza nights are back! And one thing we’re addin Pizza nights are back! And one thing we’re adding since our screen enclosure is gone, are these Bitefighter LED String Lights by @tikibrandproducts . You’ve seen us use them in our playset area and now for our patio area. They give us the ambiance we need at night while helping to fight off the mosquitoes as a 2 in 1 solution. There’s no odor, no mess, and they will last all season long. Cheers to the summer nights ahead! #ad #TIKIbrand
Protecting outdoor furniture for the summer!

It’s time to give your outdoor furniture the best start for summer and to help it last long term. Here are some things you can do to protect your outdoor furniture as we enter the summer season:

1. If you have wood furniture, it’s time to seal it! I use Thompson’s Waterseal on all my outdoor wood furniture except for teak. This protects it from moisture, sunshine, and mold/mildew.

2. Easiest way to help keep cushions clean is by spot cleaning throughout the season. I use 30 Seconds Outdoor Cleaner for quick, fresh looking cushions. 

3. To really protect cushions, Shield H2O provides a water repellent treatment that repels moisture and spills, which in return helps prevent mold and mildew. 

4. Have teak furniture? Use a teak SEALER and not an oil. Teak oil is a short term solution and easily washes out with rain. Time to seal it to last long term! 

I have everything I used in my Amazon storefront under outdoor.
We were told 16 weeks for our pool install but it We were told 16 weeks for our pool install but it ended up taking exactly 12 weeks. Broke ground on December 16th and started filling it with water on March 16th. I’m sharing all the pool details over on my blog. Including the answer to the number one question: How much did this cost? Covering how we picked a pool builder, the construction process, the materials we went with and why, what we splurged on and where we saved, and so much more. Save it for future reference! It’s a good one!
Load More... Follow on Instagram

Sign up here to have our fresh posts delivered to your inbox!

Enter your email address:

Delivered by FeedBurner

Copyright © 2023 Within The Grove • Customized by Brave Creative Design · Log in

  • Privacy Policy
  • Terms and Conditions
  • Disclosures + Photo Usage
 

Loading Comments...