• Home
  • ABOUT
  • WORK WITH ME
  • Paint Colors
  • Shop Our House
    • Guest Bedroom
    • Front Living Room
    • Living Room with Fireplace
    • Previous Second Living Room
    • Current Playroom
    • Prior Playroom
    • Dining Room
    • Laundry Room
    • Oliver’s Bedroom
    • Guest Bathroom
    • Covered Lanai
    • Patio
    • Master Bedroom
  • CONTACT
    • Facebook
    • Instagram
    • Pinterest

Within the Grove

Join the list to receive occasional news and special updates!

DIY // Painted Striped Shoes

October 10, 2016

DIY Painted Shoes

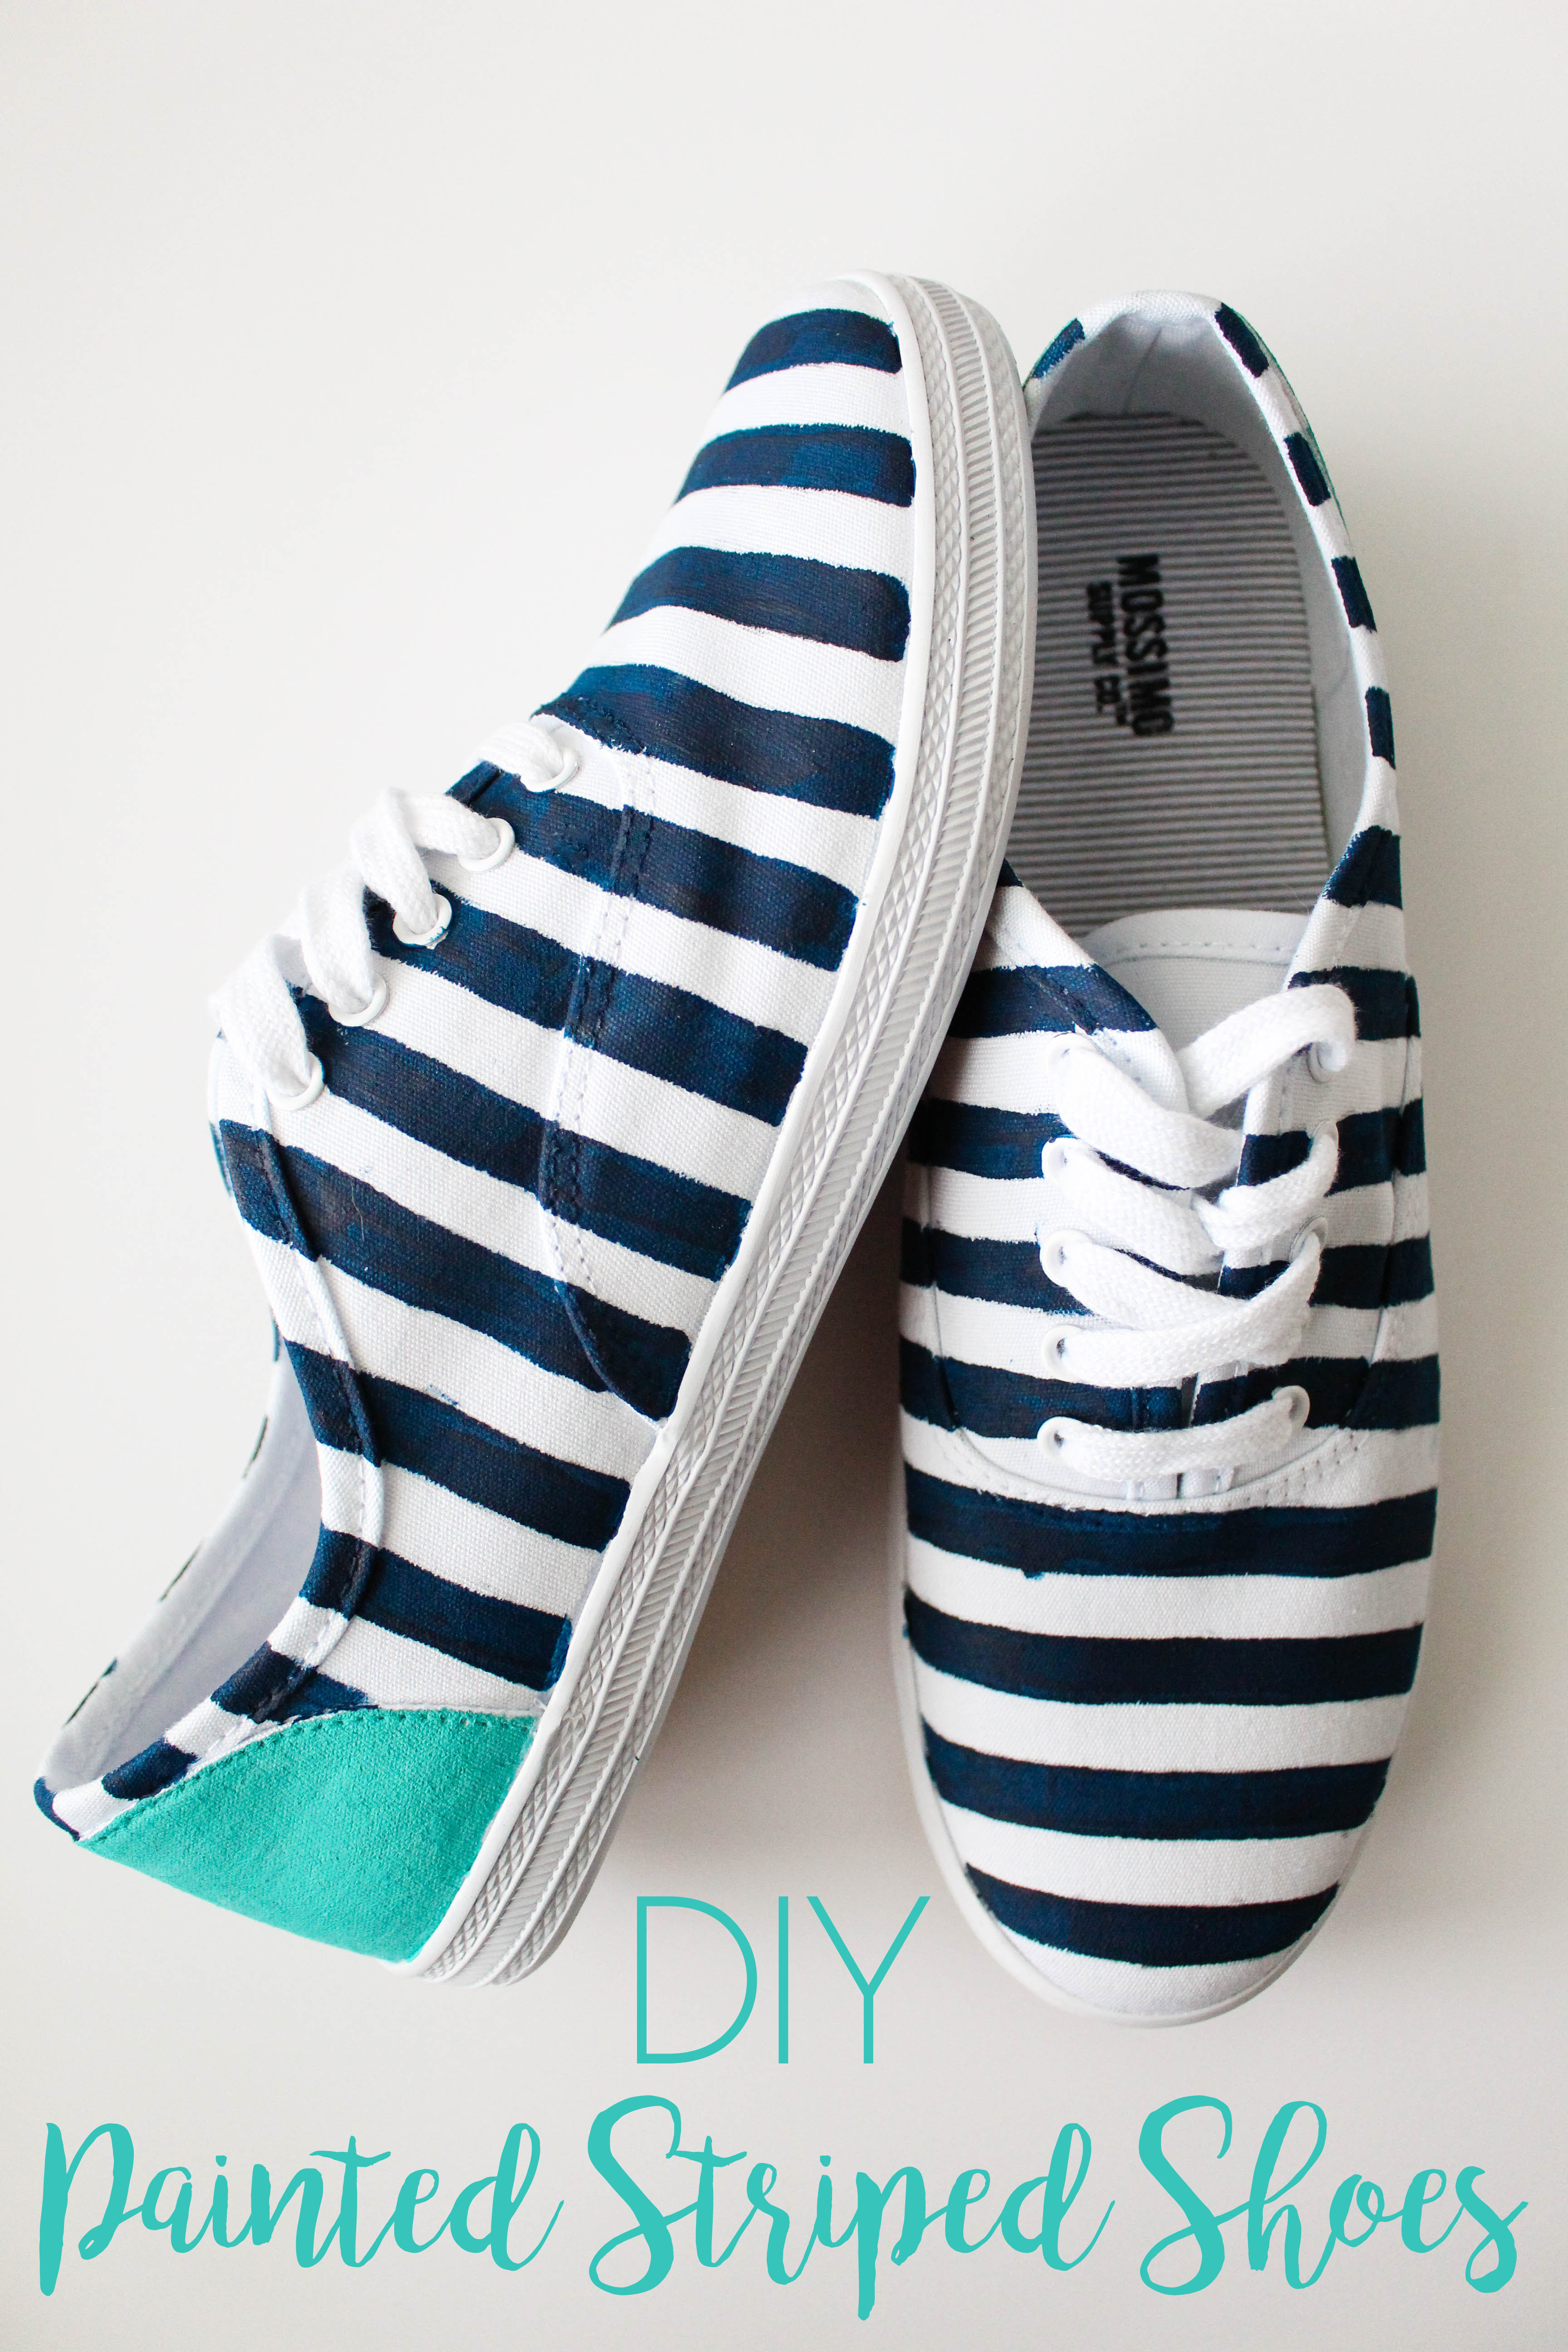
It’s a beautiful morning here in Florida! After Hurricane Matthew paid us a visit this past weekend, we finally have a sunny and beautiful fall day. A morning in the upper 60’s was well overdue! It makes for a perfect day to share my latest DIY tutorial. I don’t get to wear canvas shoes too often living in Florida because of how warm it is year round, but I absolutely love when I do! They are super comfortable, perfect for a day of running around, and often come in fun patterns.  Here’s the truth though. I simply can’t afford all the Keds or Kate Spade shoes my heart desires.  So I’ve decided to take the matter into my own hands.  For around $15 I purchased white canvas shoes from Target, grabbed a few paint colors I had at home, and created my own painted striped shoes with a pop of color.

You don’t have to be artistic to create these shoes but a little patience is needed. These would be great to create during a rainy Saturday afternoon or an evening staying in.  I’m in love with the results and love the fact that I spent half the price {maybe even less than that}! Ready to create a pair of your own?  Today’s DIY post will show you the step-by-step process to easily create a pair of your own for this fall season.

Creating your own pair of patterned striped canvas shoes

Supplies:

White canvas shoes || 2 paint colors of your choice || Paint palette || Paintbrush || Pencil || Painter’s tape || Measuring tape

Tip: Most of my acrylic paints can be used on fabric. Check the back of your bottle to see if yours is too.  If you don’t have any, Martha Stewart paints are perfect for fabric!

Supplies to create your own pair of painted striped canvas shoes

The How-To:

Step 1: Determine the width you want each stripe to be. As you can see in my picture, my lines were a little over 1/4 of an inch. Evenly mark the width of your line using dots. 

Measure the width of each stripe.

Step 2: Using your painters tape, evenly line it up with the dots you just marked on your canvas shoes.  Trace along the edge of the tape with your pencil for a straight line.

Place a piece of painters tape along your measurements.

Trace along the painter's tape to draw a straight line.

Step 3: Remove the painters tape. Repeat steps 1 and 2 until you get to the back of the shoes.

Remove the painter's tape.

Trace stripes down the entire length of the shoe.

Step 4: Carefully paint every other stripe on both shoes.  Take your time with this step to ensure straight lines. You may also need a smaller paintbrush to paint around the eyelets. This is the perfect time to watch your favorite show as you complete this step.

Painting stripes on a pair of shoes

Step 5: Using your second paint color, paint the back section of each shoe.

Paint the back of each show a solid color.

DIY Striped Shoes

That’s it!  Allow your shoes to fully dry before enjoying them.  You can even apply a sealant if you’re concerned about the paint coming off. I love how these shoes are perfect for the fall yet you can go boating in them during the summer.  You can’t beat a great pair of fun, custom shoes for $15.  Try a different pattern or switch up the colors for your own pair.  Football season is here so why not paint them your favorite team’s colors?  Either way, I would love to see what you create!
Canvas Striped shoes you can paint yourself.

Painting your own shoes.

Let’s keep in touch!

We have a brand new community over on Facebook, House & Home, where we’ll be chatting, sharing, and helping one another when it comes to home decor and projects. Come join us! Check it out here.

Like on Facebook || Follow on Instagram || Follow on Pinterest

Share this:

  • Click to share on Twitter (Opens in new window)
  • Click to share on Facebook (Opens in new window)

Related

Filed Under: DIY Tutorial

« Decor Daydreams // Front Porch and Yard Decor
Creating a Daily Routine for a Productive Day »

Leave a Reply Cancel reply

Your email address will not be published. Required fields are marked *

This site uses Akismet to reduce spam. Learn how your comment data is processed.

Looking for something?

withinthegrove

This pretty much sums up the progress of making 25 This pretty much sums up the progress of making 250 cement tiles. But I’m halfway through! The moment I finish the last tile is the moment I knock out the old tile. Let’s do this!
Time to bet on my DIY skills! I’m attempting to Time to bet on my DIY skills! I’m attempting to make my own cement tiles for our outdoor front door area. Mainly because of what I’m saving vs buying them. Won’t be saving much on time but I’M MAKING TILES! Never thought I’d hear myself say that. Make sure to follow along because if this works out, I have a feeling a lot of you are already eyeing a spot in your home to try your own DIY cement tiles. 
 
Thank you @vintagerevivals and @abby_roadhome for showing it’s possible with your gorgeous bathroom tiles! 

#CementTiles #DiyCementTiles #DiyProject #DIYonABudget #DIYProjects
We got the call that the pool build is starting! W We got the call that the pool build is starting! Which had me scrambling to dig up all the plants that were in the way in an effort to save them. Literally down to the last second before the crew showed up. Exciting day but you know what’s even more exciting? Knowing the next crew will officially be breaking ground with the excavation phase of the build.
This time of year is full of organizing and purgin This time of year is full of organizing and purging to bring spaces back to life. But sometimes all a space needs to feel refreshed is, well, a refresh and a little attention. Your number one requested space was the living room. So I gave mine a refresh with some unique and gorgeous finds from @homesense_us . I found a few fun pots for my houseplants, a gorgeous magnifying glass, and a few other items for our coffee table and couch.

I never know what I’m going to find when I walk into Homesense since it’s always rotating with amazing finds. But I do know I’ll walk out with a few new favorites for my home at affordable prices. If you haven’t yet, I urge you to check and see if you have a Homesense near you! #DiscoverHomesense #HomesensePartner
2022, you were awesome. But I’m determined to ma 2022, you were awesome. But I’m determined to make 2023 even better! And I hope you join me! We can be one of our biggest cheerleaders, but together we’re going to do big things. Go ahead and write down a big, small and a few in-between projects you want to get done this year in your home. Kicking it off with intention and that reminder that we can do this. Ready to get started?! Let me know in the comments the first project you want to tackle!
We finally got the Christmas/winter edition of the We finally got the Christmas/winter edition of the window projection up and running! It was a hit for Halloween and just as fun for this time of year as well. I built frames wrapped with a plastic drop cloth but you can also secure the drop cloth over the windows using command strips. The videos are from @atmosfx and we use a mini projector to play them on the screen. Place a Bluetooth speaker outside and you’re in business! Such a fun addition this time of year for the exterior of your home.
It’s the last little bit of the demo we needed t It’s the last little bit of the demo we needed to do in order to give the green light for the pool to start. And 2,456 pavers later, it’s done! This was exhausting but worth the money we saved doing it ourselves. And why remove them? We’re using a different stone around the pool and we want it to be cohesive up to the house. Don’t worry, someone got one heck of a deal on these pavers, we made a little money, and someone else got them out of our driveway. I’d say that’s a win-win. Stayed tuned for the entire pool process as we enter 2023. It’s going to be pretty exciting to watch!
Our patio space has served us so well over the yea Our patio space has served us so well over the years and now it’s time for a change because we’re getting a POOL!! Sharing this with you makes it even more real because just a year ago I would have told you it isn’t in the cards for us. We’ll be breaking ground soon but first we have to remove the screen enclosure. Spoiler: we won’t be putting one back up around the pool. It has already made the biggest difference visually and SO much natural light pours into our home now with it gone. It’s going to be so exciting seeing this all unfold so stay tuned! Up next: removing the pavers.
This holiday season we were able to travel to my h This holiday season we were able to travel to my hometown for the first time in awhile. We were greeted by the most beautiful sunset on the beach. Fast forward to this week as I headed to @homesense_us for some holiday shopping, and I ended up finding a few pieces for our home that remind me of that core memory on the beach. The beautiful wicker bench caught my eye first followed by the comforter and toss pillows. Everything at amazing price points while not sacrificing style and quality. #HomesensePartner

Mixing a thrill of a find with a core memory, I guarantee you'll fall in love with your home even more as you go to decorate. Decorating your home isn't grasping on to the newest trend or what you think others would do. It's what YOU want to do. And sometimes that's based on an emotional connection. Oh, the stories your spaces will be able to tell as you decorate each one. Start with seeing if there’s a @homesense_us near you! #DiscoverHomesense #HomesenseSarasota
Load More... Follow on Instagram

Sign up here to have our fresh posts delivered to your inbox!

Enter your email address:

Delivered by FeedBurner

Copyright © 2023 Within The Grove • Customized by Brave Creative Design · Log in

  • Privacy Policy
  • Terms and Conditions
  • Disclosures + Photo Usage
 

Loading Comments...