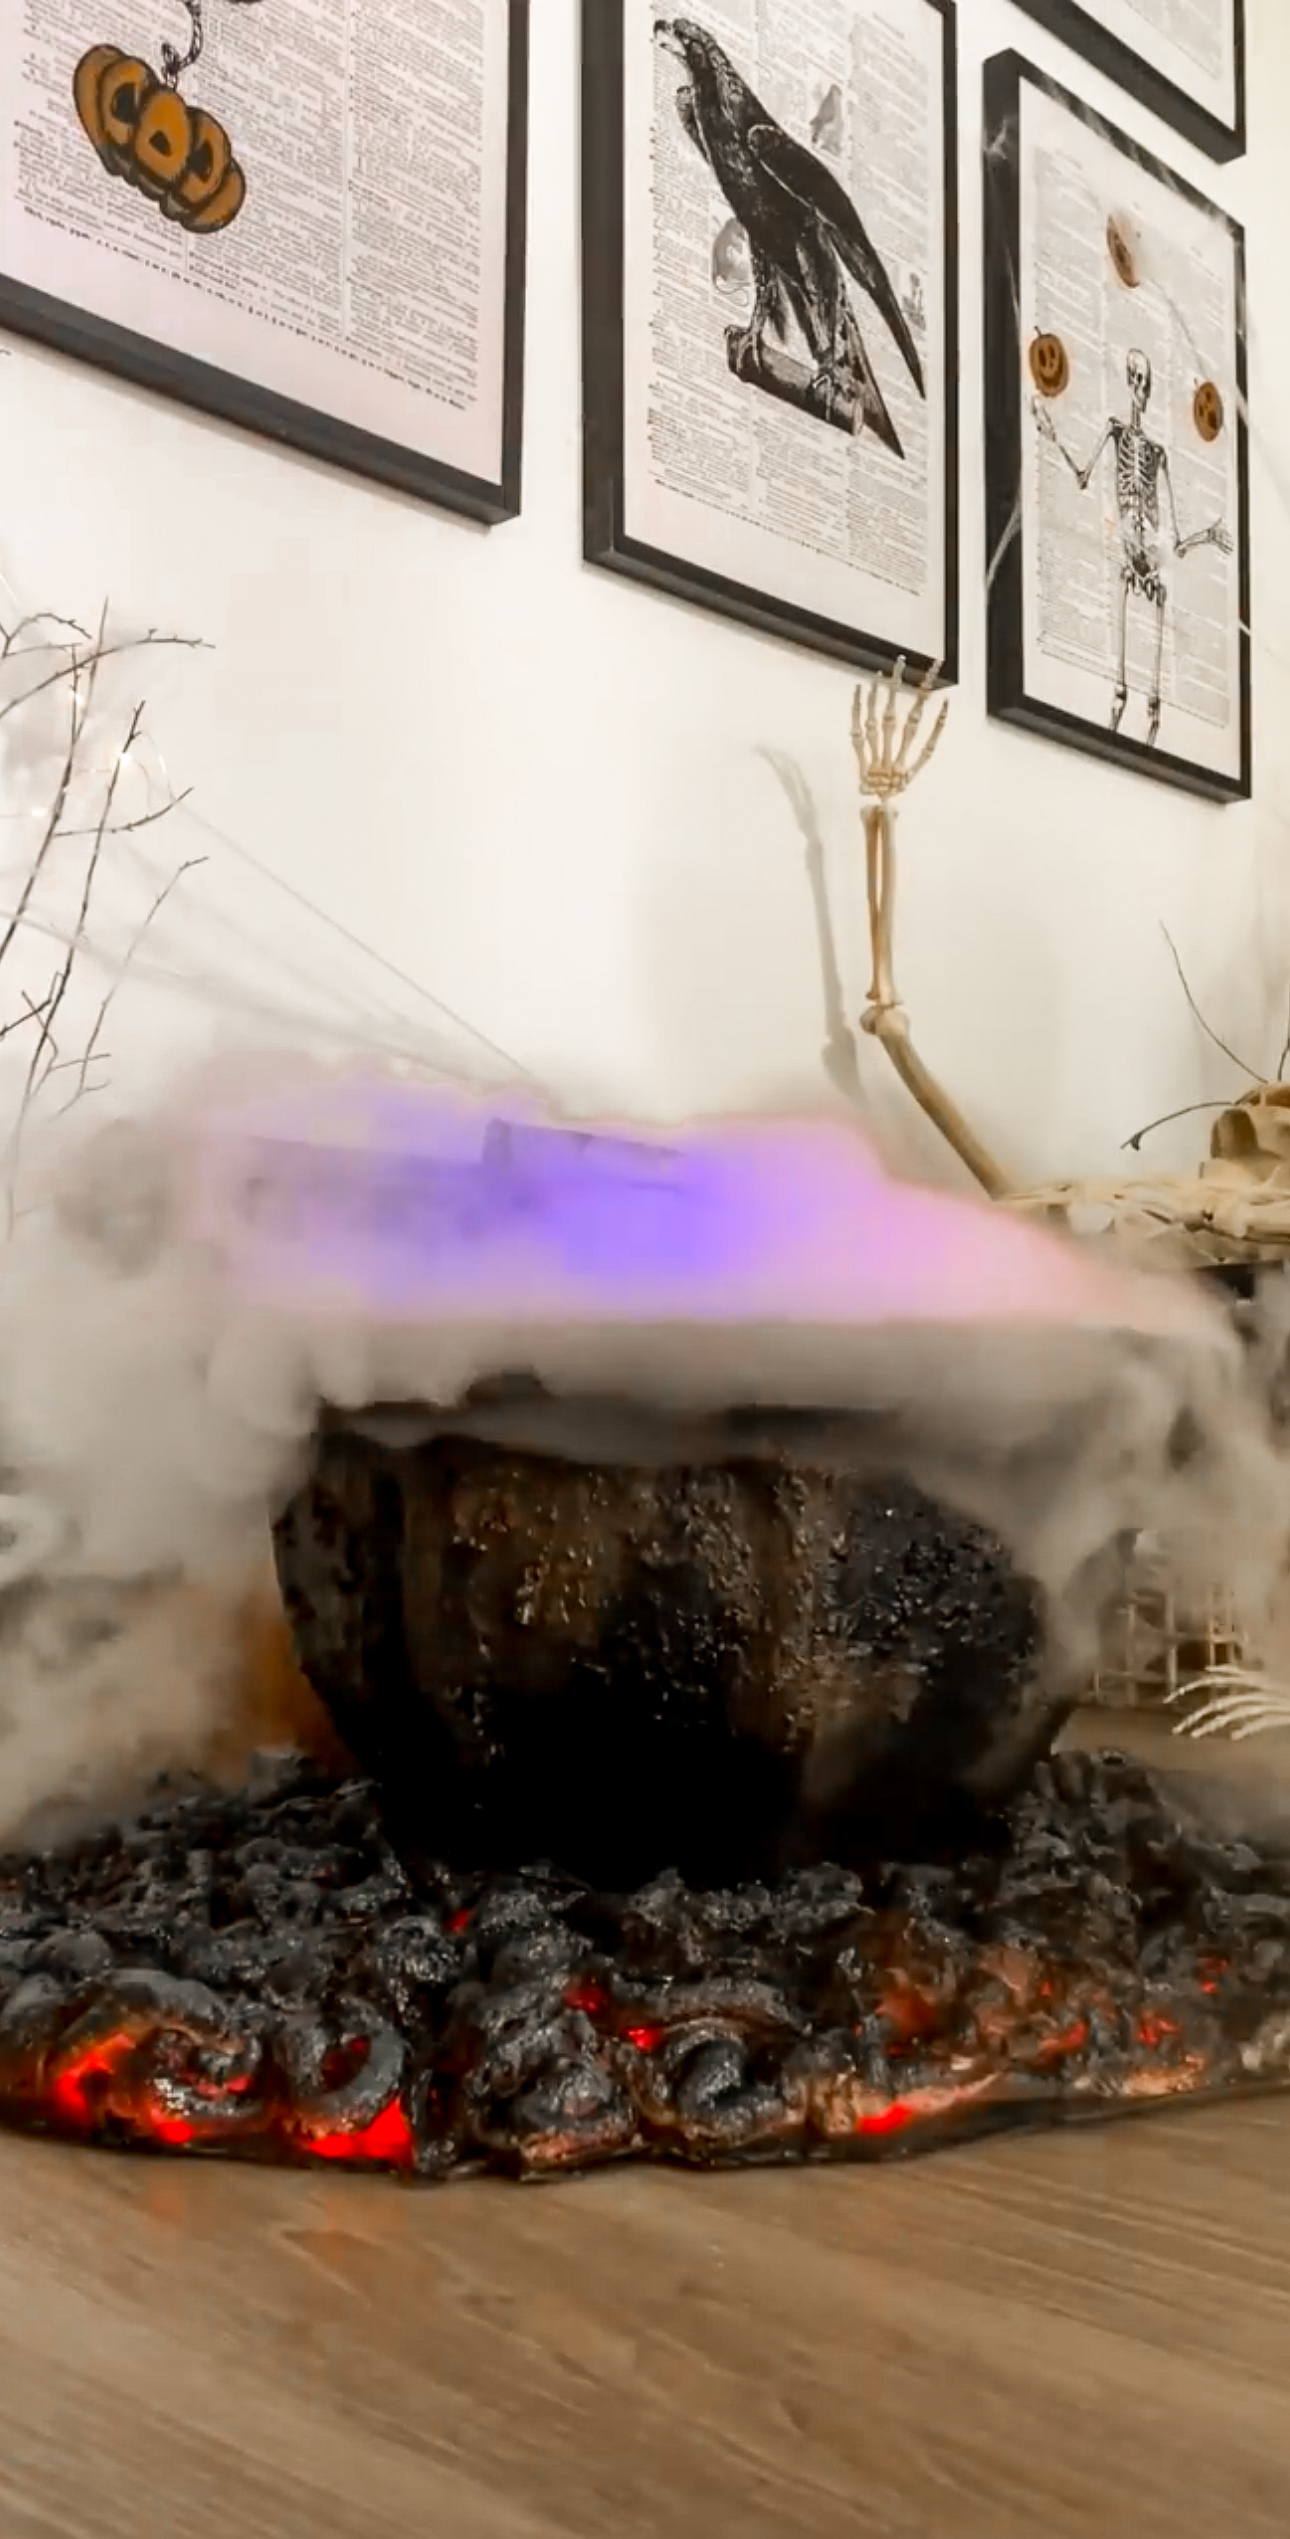
Let’s make an easy DIY Cauldron for our Witches!
Every witch and coven needs a cauldron. Especially the ones hanging out on your front lawn. And not just any cauldron, I’m talking glow from the inside, bubbling with spells, and straight out of the School for Witches kind of magical cauldron. This DIY Witch Cauldron is one you’re going to love!
This DIY witch cauldron looks like it’s been brewing potions for centuries, and the best part? It’s easier to make than it looks, using basic materials like dirt (yes, dirt), spray paints, and a little Halloween creativity.

Haven’t made the DIY witches yet? Start with this tutorial. They’re the stars of the show, and this cauldron is their main accessory.

What You’ll Need to Make Your DIY Cauldron:
- A round black planter pot (something that already looks like a cauldron)
- Textured black spray paint
- Dirt (straight from your backyard witchery)
- Mod Podge
- Paint brush
- Dried foliage (crushed flowers or leaves)
- Orange outdoor string lights
- Spray foam insulation
- Orange, red, and black spray paint
- Gray and gold acrylic paint
- Cardboard
- Plastic wrap or trash bag
- Bowl filled with water
- A mister (or two — double, double, the more the trouble)
Let’s Brew a DIY Witch Cauldron: Step-by-Step Tutorial
Step 1: Prep Your Cauldron
Even if your planter is already black, spray paints a coat of textured black spray paint and it will instantly give it that worn, forged-in-fire finish.


Step 2: Make Witchy Potion Grime
Mix Mod Podge and dirt together until it has a paste-like consistency. Using a paint brush, slather it around the top and sides of the cauldron. This is your faux potion spillage — old spells bubbling over from the past.


Step 3: Add the “Bubbling” Texture
While the mixture is still wet, press small foliage like crumbled flowers and leaves into the gluey mess. This adds age, dimension, and makes it look like this cauldron has been through a few full moons.

Step 4: Repaint Everything
Once that dries, hit it with another coat of textured black spray paint to pull it all together and deepen the aged effect.


Step 5: Add Some Rusty Charm
Using a dry brush, apply gold acrylic paint around the rim and randomly on the sides. It gives the perfect aged, rusted, “I’ve been stirring trouble for 300 years” look.

Now for the Glowing Coals
Step 6: Set the Stage
Place your cauldron, wrapped in plastic (a trash bag works great), on a piece of cardboard. You’re about to make faux burning coals. Arrange the oranger outdoor string lights around the base of the cauldron.

Step 7: Add the Lights + Foam
Then go in with spray foam insulation and apply it in zig-zag it around the lights like bubbling, uneven coals. You want to fully cover the lights but not so much to where they won’t shine through. Make sure to keep the battery pack out!


Step 8: Paint the Fire Magic
Once the insulation foam is dry, remove the cauldron and spray the foam with orange, red, and black paint. Add gray acrylic touches for a charred effect. You’ll be surprised how realistic it looks.


Step 9: Cut + Return the Cauldron
Trim the cardboard so only the “coals” remain. Place your cauldron right back in the center, now surrounded by your glowing, fiery creation.
Step 10: Add the Smoke Show
Fill a bowl with water and drop in your mister. Nestle it inside the cauldron — and just like that, you’ve summoned an eerie, smoky potion effect. Add two misters for a truly spellbinding fog. If you find the mist isn’t going over the edge of your cauldron, you can place the bowl on something inside the cauldron to get it closer to the top.

You now have a DIY witch cauldron that smolders, bubbles, and looks like it’s brewed up more than a few mischief-filled potions over the years. Paired with your DIY witches, it instantly levels up your Halloween display. It’s spooky, whimsical, and just the right amount of dramatic.


Check out my Instagram Reel to see it in action!
