


Looking for a witchacular way to add Halloween decor by adding some witch brooms around your home? Using what you can find in your yard, you can make an authentic looking DIY witch broom!

How to Make a DIY Witch Broom
What You’ll Need to Make a Witch Broom
- Tree branches 3-4 feet long
- Small, thin twigs or sticks. Find anything that works for you from your yard. For example, I also used dead fountain grass leaves for mine. You want to grab enough to create the fullness you want for the broom.
- Twine
- Hot glue gun
- Hot glue sticks
Steps to Making a DIY Witch Broom
1. Make the Broomstick
Start by finding the perfect tree branch for your witch broom. The wonkier the better when it comes to the tree branches for this witch broom! You can either find a branch that has fallen or use a hand saw to cut a low branch down. You want it it to be at least 1 inch thick in diameter. Can’t find one in your yard? Head to a local park and see what you can find or what neighbors put out on yard waste day. Or you can head to your local Dollar Tree to see what handle you can find. You might even stumble upon some of their Halloween decor where you can enhance one of their broomsticks.

Once you find your branch for the broom handle, clean off any twigs or leaves sticking off of it and to the length you want your broomstick. You may have to use a reciprocating saw or a hand saw depending on the thickness of your branch.

2. Attach the Broom Bristles
Using a hot glue gun, attach the small twigs or long grass to the around the bottom of the tree tree branch until your desired thickness. You want it to be full!


Once the twigs are attached, you’ll wrap twine around the top of the twigs and secure with the hot glue. This can also be a way you can add more twigs if you want to be securing them as you wrap the twine around.

If you used fountain grass like me, you might need to shape and trim the grass as needed to make it look more broom like. If using twigs, you might have to snap a few along the bottom until you reach your desired shape.


3. Display Your DIY Witch Brooms
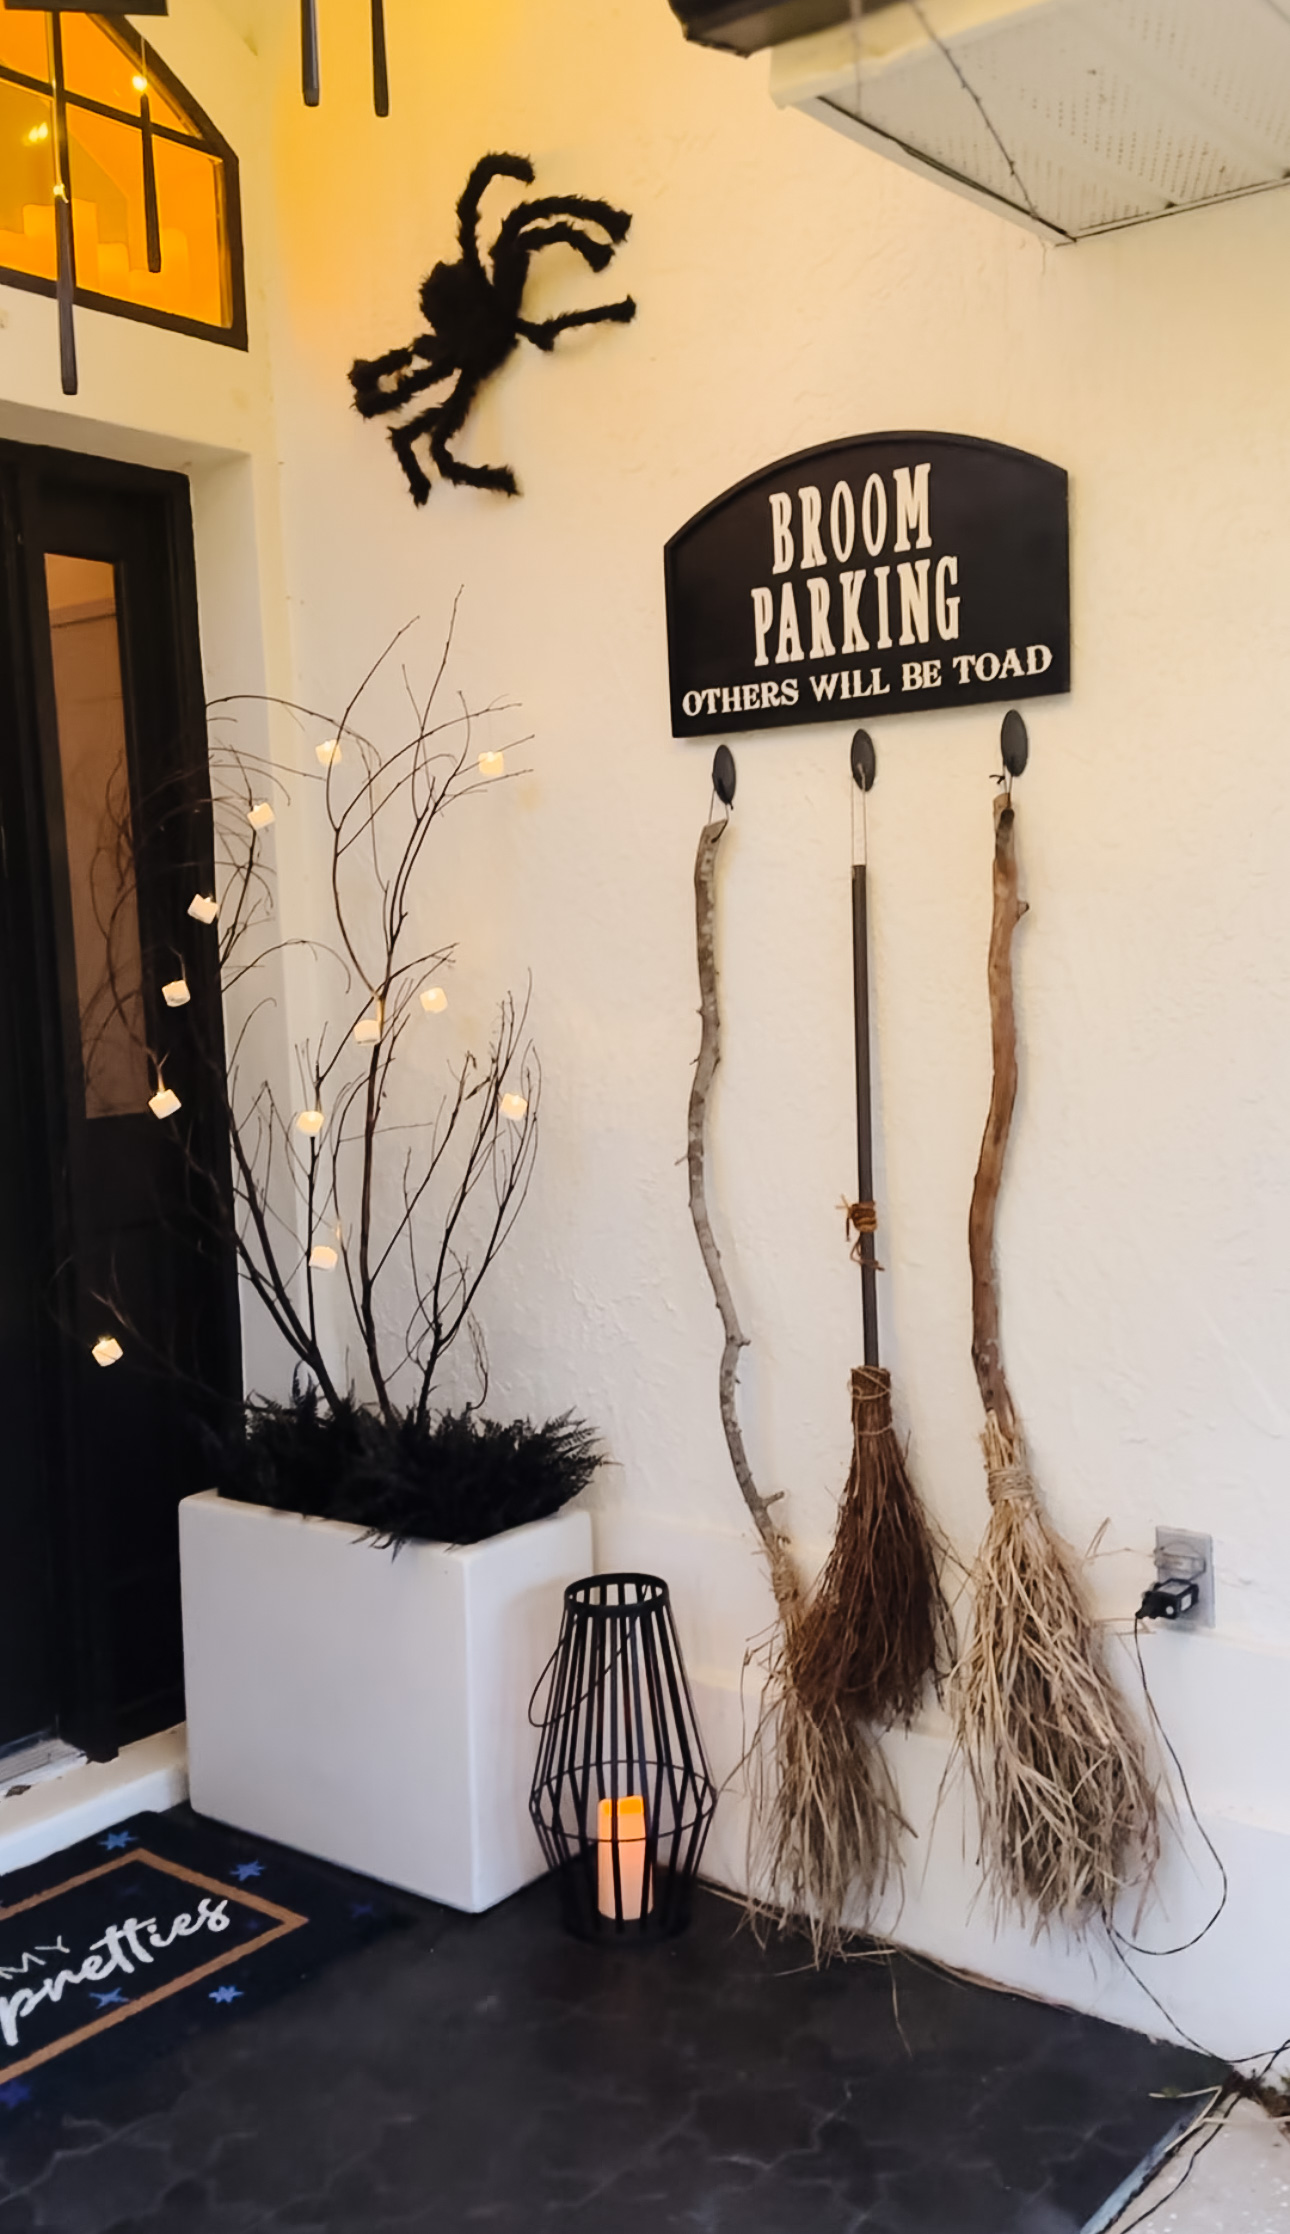
You now have a witch broom to display as Halloween decor for the inside or outside of your home. An easy way to display them is by drilling a small hole using a drill and drill bit at the top of the broom handle and making a loop with the twine. You can then hang your witch broom. See how to make a Broom Parking Sign to do just that.


How to Decorate a Homemade Witch Broom
If you want to put even more of a twist on your DIY witch broom, you can customize it even more. You can use a piece of black or purple tulle and tie a bow above the bristles of the broom. You could even use tulle instead of fountain grass or sticks to create the bristles. If you do use sticks or fountain grass, a touch of spray paint could even add some color to the DIY witch broom. This can be classic Halloween colors or a color that you’re incorporating within your Halloween decor.
Creative Ways to Display your DIY Witch Broomstick
Looking for ways to display your DIY Witch broom? Here are a few suggestions:
- Hanging below a “Broom Parking Sign” by your front door. If you don’t want to make one, here’s one already made for you.
- Place along side or on top of a mantle with other witchy decor.
- If you don’t want to hang it by your front door, you can lean it against your front door or mixed upon your fall potted plants.

Check out some of my other Halloween inspired projects:
Halloween Artwork for a Smart TV
Halloween Front Porch Decor
Halloween Party Decor
