• Home
  • ABOUT
  • WORK WITH ME
  • Paint Colors
  • Shop Our House
    • Guest Bedroom
    • Front Living Room
    • Living Room with Fireplace
    • Previous Second Living Room
    • Current Playroom
    • Prior Playroom
    • Dining Room
    • Laundry Room
    • Oliver’s Bedroom
    • Guest Bathroom
    • Covered Lanai
    • Patio
    • Master Bedroom
  • CONTACT
    • Facebook
    • Instagram
    • Pinterest

Within the Grove

Join the list to receive occasional news and special updates!

Our Design Plans for the Navy Wall in our Foyer

June 8, 2018

Painting the Wall Mount Etna by Sherwin-Williams

We (really I mean myself), don’t know how to sit still. We’re either out exploring our little town or we’re in over our heads with a house project or two. Ryan had the Friday leading into Memorial weekend off which meant a four day weekend. With zero plans, it was our goal to knock a few things off our home to-do list. You know, the things you keep putting off. For example, washing the patio cousin covers, installing outdoor fans, figuring out why a light switch isn’t working, and de-cluttering the only room you haven’t gotten to.

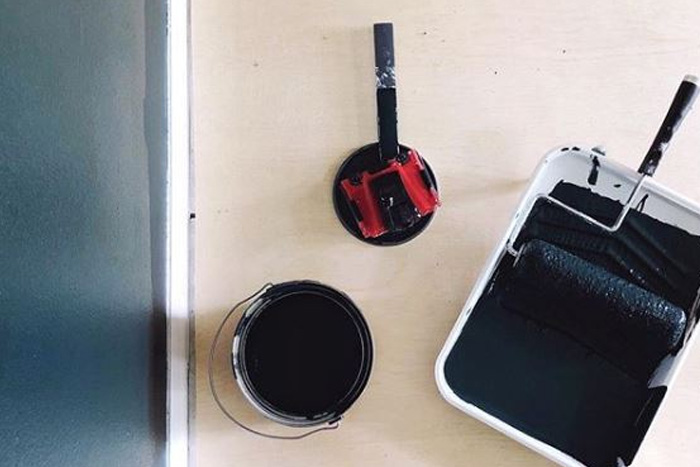
Between all the checking off our list moments, I did find time to start a new project. This was an impulse project with dramatic results. It’s 100% out of my comfort zone but now that’s where I want to stay. We painted the large wall in the entrance of our home navy. A deep, make you look twice navy. We have gray, white, or light beige on every wall in our home and I was itching to try a splash of color. Since this area receives so much natural light, we knew this would be the perfect spot to try this color. Which is Mount Etna by Sherwin-Williams.

Painting the wall navy

It’s bold, dramatic, and exactly what I’ve been looking to do in our home. Just didn’t know it until this weekend. Luckily, Ryan was also on board. The wall isn’t going to stay like this. I have big plans for it to make it truly an area that draws you in the second you walk into our home. It will add to the design of our home and will be a funtional space since it will be a place to take off and on shoes. Here’s my design board of what we have planned:

Foyer Statement Wall Design Board

Picture Frames || Lighting || Fiddle Leaf Fig Tree || Bench || Pillow 1 || Pillow 2 || Pillow 3

1. The focal point of the wall will be the large picture frames with black and white images that will create a gallery wall. Our main objective is to bring a little brightness to the space and use some of our favorite photos of our family to make it personal. It will be dramatic just like the color.

2. Three lights will be added above the frames without us running electrical. We plan on using battery operated light bulbs to save time and money. Plus, we don’t know if this wall will always be what we’re designing it as which will make the ease of removing the lights that much easier. 

3. I’m on the hunt for a natural wood bench with a back. I love this one from West Elm but it doesn’t agree with my budget for this space.  A bench will provide a place to take on and off shoes in comfort.

4. Of course I’d love to add a fiddle leaf fig or greenery of some sort. I’m always looking for ways to incorporate more house plants. In addition, the pop of greenery will look gorgeous with the navy paint. 

Well, my friends, that’s the plan for this space and it all started with a navy wall. Painting it might have been an impulse decision, but I’ll be taking my time to find the decor pieces so I can stay within budget and keep the cost low. You can see more behind the scenes of my process over on Instagram as I share through my stories.  If you have any suggestions on lighting, picture frames, and a bench, please send them my way! Can’t wait to share this space with you one project at a time. 

Let’s keep in touch!

We have a brand new community over on Facebook, House & Home, where we’ll be chatting, sharing, and helping one another when it comes to home decor and projects. Come join us! Check it out here. 

Like on Facebook || Follow on Instagram || Follow on Pinterest

Share this:

  • Click to share on Twitter (Opens in new window)
  • Click to share on Facebook (Opens in new window)

Related

Filed Under: Home Inspiration, Home Project, Our Home Improvements

« Giving our Front Door a Refresh with a New Pop of Color
Creating a Patio That’s an Extension of Your Home »

Leave a Reply Cancel reply

Your email address will not be published. Required fields are marked *

This site uses Akismet to reduce spam. Learn how your comment data is processed.

Looking for something?

withinthegrove

Round 2 (and final!) for the grass install in our Round 2 (and final!) for the grass install in our backyard. Dang, does it feel GOOD to finally say that! It has been a long time coming and a little sweat equity saved us so much by doing it ourselves. Next on the backyard to do list is turning it into a tropical oasis by planting the flower beds. Think huge birds of paradise! Time to start planning.
It has been 6 years since we moved into our home a It has been 6 years since we moved into our home and visualized the potential our backyard would one day have. The first few years were spent clearing out and claiming our property back . Two years ago we built our dream garden, last year we built the play area that feels more like a magical treehouse, and this year we added a pool (still pinching myself every day). We’re seeing our hard work over the years starting to come together as we approach the finish line of installing grass and landscaping that’s going to bring it all together. As I always say, stay tuned because you know I’m going to share it all with you! And a little reminder for you to keep going because home takes time.
The garden is cleaned up, prepped, and ready for t The garden is cleaned up, prepped, and ready for the summer crop. What started as a single garden box has transformed to this garden space over the past few years. Favorite thing about it: being tucked away in this cozy corner with the winding paths throughout it. One thing I would do differently: using pea gravel instead of the granite rocks we went with. These rocks hurt! Pea gravel is smooth enough to comfortably walk barefoot on.
The grass is in! Saying BUH BYE to the dirt around The grass is in! Saying BUH BYE to the dirt around the pool for the first time since December when we broke ground. We spent the past few weeks installing irrigation throughout our backyard and around the pool. Yesterday we finally had the sod delivered and within a few hours it got us one step closer to finishing our backyard oasis. We still have a long ways to go, but my goodness does it feel good to see this part done! And we can finally check off the final inspection for the pool build.
What does it cost to fill a 16,000 gallon pool wit What does it cost to fill a 16,000 gallon pool with a garden hose? Our total came to $229! Does this total surprise you? This of course can greatly vary depending on where you live and your situation. For us, we live in Florida and on county water. We only pay water fees and not sewage. The water company did not give us a discount. We filled the pool right at the start of our billing month so this is it! Have you filled up a pool before? I’d love for you to share your cost, pool size, and location if you feel comfortable doing so!
We have a 16,000 gallon pool and filled it up with We have a 16,000 gallon pool and filled it up with a single water hose. And we for sure had some questions! Answering them here:

• Why not use a water truck? We weren’t in a rush, it was the best way to end this project watching it fill up, and it would have been more expensive. 

• Why not use our local fire station? Our local fire department doesn’t do this and it isn’t very common that most do. We wouldn’t ask if they did. 

• Did our water company give us a discount? Nope. Most water companies will take off the sewage fee but we only pay for water and not sewage where we live. We did notify them so they wouldn’t turn our water off thinking it was a leak. 

• What is that on the end of your hose? We added a filter on the hose to help reduce iron, scale, any other heavy metals and containments to help give our pool a fresh start. 

• How long did it take? 51 hours 

I’ll be sharing the cost soon so make sure to add your guess in the comments!
Pizza nights are back! And one thing we’re addin Pizza nights are back! And one thing we’re adding since our screen enclosure is gone, are these Bitefighter LED String Lights by @tikibrandproducts . You’ve seen us use them in our playset area and now for our patio area. They give us the ambiance we need at night while helping to fight off the mosquitoes as a 2 in 1 solution. There’s no odor, no mess, and they will last all season long. Cheers to the summer nights ahead! #ad #TIKIbrand
Protecting outdoor furniture for the summer!

It’s time to give your outdoor furniture the best start for summer and to help it last long term. Here are some things you can do to protect your outdoor furniture as we enter the summer season:

1. If you have wood furniture, it’s time to seal it! I use Thompson’s Waterseal on all my outdoor wood furniture except for teak. This protects it from moisture, sunshine, and mold/mildew.

2. Easiest way to help keep cushions clean is by spot cleaning throughout the season. I use 30 Seconds Outdoor Cleaner for quick, fresh looking cushions. 

3. To really protect cushions, Shield H2O provides a water repellent treatment that repels moisture and spills, which in return helps prevent mold and mildew. 

4. Have teak furniture? Use a teak SEALER and not an oil. Teak oil is a short term solution and easily washes out with rain. Time to seal it to last long term! 

I have everything I used in my Amazon storefront under outdoor.
We were told 16 weeks for our pool install but it We were told 16 weeks for our pool install but it ended up taking exactly 12 weeks. Broke ground on December 16th and started filling it with water on March 16th. I’m sharing all the pool details over on my blog. Including the answer to the number one question: How much did this cost? Covering how we picked a pool builder, the construction process, the materials we went with and why, what we splurged on and where we saved, and so much more. Save it for future reference! It’s a good one!
Load More... Follow on Instagram

Sign up here to have our fresh posts delivered to your inbox!

Enter your email address:

Delivered by FeedBurner

Copyright © 2023 Within The Grove • Customized by Brave Creative Design · Log in

  • Privacy Policy
  • Terms and Conditions
  • Disclosures + Photo Usage
 

Loading Comments...