


Giving our Front Door a Refresh with a New Pop of Color

This post has been sponsored by BEHR® . All thoughts and opinions are my own.

You guys, we gave our front door a huge makeover! This is a home project that has been at the top of my list ever since we closed on our home a year ago. What took us so long? I honestly have no idea but I can’t tell you how thrilled I am to be sharing this reveal with you today! And honestly, I’m kicking myself for not doing it sooner.

Our front door was a hunter green color with a lot of holes, chipped paint, and areas that were fading. In general, it didn’t look good at all. And thing is, your front door is the first impression of your home for anyone passing by and those friends and family coming for a visit. So, you tell me. Do you want a door that screams help or a door that will have your guests asking how you transformed it into such a statement piece for your home? Here’s what we started with:

Today we’re heading outside and I’m taking you with me as I show you step-by-step how you can also transform your front door. And if your door is like mine, you’ll be painting the trim and around the windows on both sides of the door. So many of you voted over on Instagram Stories with trying to decide if I should paint it all the same color or not. Well, you can see that we went with two different colors that are modern and will go with just about any house color since we’re planning on painting our home in the near future. Either way we knew we’d be using BEHR MARQUEE® Exterior Paint and Primer.

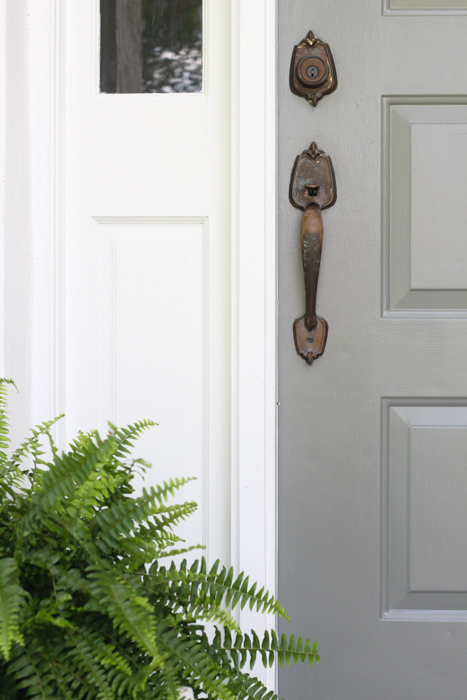
We decided on Behr Marquee Exterior Paint & Primer in Naturalist Gray for the door and Behr Marquee Exterior Paint & Primer in Arcade White for the trim and around the windows. Best. Decision. Ever.

By using Behr Marquee Paint, our time spent painting was cut in half since it’s paint and primer in one. It also gave us a peace of mind because it is stain blocking and resists dirt, fading, and mildew. Remember how I mentioned before our door was fading in certain spots? Well never again because our door will certainly look fresher for a longer period of time. We’ve turned to Behr Paint time and time again for home projects in the past with great results and knew this time wouldn’t be any different. You can pick up your Behr Paint products at your local Home Depot, and I had the best little helper when getting ours!

With just a few easy steps and a little bit of your time this weekend, you’ll also have a new front door to greet you as you come home. So, what are we waiting for? Let’s get started!
Here’s What You’ll Need:
- Behr Marquee Exterior Paint & Primer in Naturalist Gray, satin finish
- Behr Marquee Exterior Paint & Primer in Arcade White, satin finish
-OR- Head on over to Behr’s website to pick out your own color! - Wood filler (if needed)
- 180 grit sandpaper
- Items to clean door with
- Paint brush
- Paint tray Painter’s tape
- BEHR SWIPES™Interior Wall Swipes
Let’s Do This!
Step 1: First, take a good look at your door and trim to see if there are any holes or deep scratches that need to be filled in. This can easily be done with wood filler. Allow it to dry according to the package directions and then you’re ready for the next step.

Step 2: Lightly sand your door using a 180 grit sandpaper. You want create enough texture for the paint to adhere but not so much it leaves scratches. You’ll also sand the trim, any paint that’s chipping, and the wood filler until it’s a smooth, level surface.

Step 3: Wipe down your front door and trim to remove dirt, dust, and grease so you can start with a clean surface. We used a mixture of warm water and dish soap and followed behind with a clean wet rag to get off any remaining residue.

Step 4: Place painter’s tape around the hardware on the door. Of course, if you’re planning to replace yours and want to remove it to paint, go right ahead!

Step 5: Since the Behr Marquee® Exterior Paint includes primer properties, there’s no need for you to prime your door and trim first. It will adhere and block stains as you paint with fewer coats needed. For this particular paint, it’s best to use an angled nylon/polyester brush.

Start painting your door in the order shown below. If you’re painting a wooden door, always paint in the same direction as the wood grain.

Step 6: When you get to the outer edges, you’ll need to open your door to ensure that you paint the entire area. Keep your door open for at least 4 hours to allow the paint to fully dry. If you close the door too early, you risk it sticking and damaging the paint.


Step 7: While you’re waiting on your door to dry, take this time to paint your trim. This is where we used the Arcade White. And if your door is like ours with windows on both sides, you’ll want to apply painter’s tape around the windows so you can paint that area white as well. You’ll apply the paint using another angled nylon/polyester brush. Of course, you can rinse out your other brush but make sure it’s dry before using it.

Now, this is where I say that’s it. Because, it’s true! That’s all it takes to give your door a complete transformation simply by using paint. This was my first time using this product and I’m happy to report it only took one coat of paint on the front door. As for the windows and trim, I went ahead and applied two coats since I was going from a hunter green color to a bright white. Here’s the before and after:


And I already know what you’re thinking. With all that hard work, what happens when dirt or smudges get on the freshly painted door? First, that’s why I used Behr Marquee Exterior because it resists dirt while the rain and wind take care of what little bit is left behind. But sometimes those pesky smudges show up from coming and going every day.

I’m about to spill a secret that’s going to be life changing when it comes to home projects and keeping paint fresh. You need to grab yourself BEHR SWIPES™Interior Wall Swipes when you purchase your paint at Home Depot. These wipes safely wipe away dirt, fingerprints and other stains without taking off or dulling the sheen of the paint. I leave this container of wipes in a basket in the foyer just to use on the interior of my front door (or other dirty surfaces in the house!).

Before you go running off to paint your own front door (which I don’t blame you), here are a few of my favorite tips on how to decorate and style your front porch to help highlight your freshly painted door.

- Add plants – Flowers and greenery are a great way to soften the space and add beautiful texture. Stick with greens and a little pop of color within the flowers for a classic look that will also go with any door color.
- Layer– Create layers with your plants by placing them in or on items that will provide varying heights in the space. This will make any guest view the porch as a whole, which will give a bigger wow factor with your new paint color.
- Neutral doormat—Go with a natural wood doormat to help bring everything together. It’s a warm and inviting touch that can, once again, go with many different door colors.
- Keep it simple – If you style your front porch with too many items and/or plants, it will suffocate the space and take away from the entrance.
Well, my friends, with a little bit of time and patience, you can also have a brand-new door. I often tell you how paint can transform any space while staying within a budget. Once again, this proves it! As you knock this project off your DIY home improvement list, please make sure to share with me your front door refresh. If it’s using Naturalist Gray or another Behr color, I’d love to see!
Let’s keep in touch!
We have a brand new community over on Facebook, House & Home, where we’ll be chatting, sharing, and helping one another when it comes to home decor and projects. Come join us! Check it out here.
Like on Facebook || Follow on Instagram || Follow on Pinterest

[…] seen this makeover, you can also see other front door transformations we’ve completed here, here, and here. This post does include affiliate links for your shopping convenience. Thank you for […]
[…] And the after. You can also see our tutorial for this project here. […]
Beautiful job
Looks great, I have to do mine. A suggestion I learned from a painter, is to use masking tape on the weatherstripping so when you close your door and it isn’t totally dried it won’t stick. Your door is closed on the non sticky side of the tape.
Wow… this is lovely. I liked this front door refreshment with the color. Thanks a lot for sharing this post.
Liz, I love it so much!! I want a new front door so bad bc we don’t have side lights and it’s so dark in the foyer but I can’t stomach spending that much money on a door right now… maybe I’ll just paint it instead!
It looks SO good! I love that colors. Now you have me wanting to paint my front door!
Oh my gosh, this color is amazing! Your door looks so good, and I love the planter you have with the fern inside!
The color you chose is so pretty!!!
Love this! Your new door looks fresh and inviting! Thanks for the details!