


This year was the second year I organized and hosted a community yard sale (first one in my new neighborhood). I started this annual event because I always found myself de-cluttering after the holidays and as a new year began. I knew I couldn’t be the only one. So, I took a chance and asked all of my neighbors to participate with a great response both years! I also host this event as a way to get the community out, meet new neighbors, and simply have a fun day. It also doesn’t hurt that whoever participates makes a little money and gets to clean out their home.
I had several of you ask over on Instagram how I organized the community yard sale (or garage sale depending on where you live) and had such a great turn out while spending very little money. Hundreds of people attended this event! I’d love to share the process with you. I’m giving you the materials you need and the step-by-step guide so that you can also host your own community yard sale. I take all of the guess work out, tell you when to do certain things, and give you the templates you need. So, are you ready to de-clutter and host your first annual community yard sale?

How to Host a Community Yard Sale
Step 1: Decide on a Date, Time and Obtain a Permit
Take a look at the calendar and decide on a date to host your event. We do ours in February every year because the weather in Florida is in the 60’s or 70’s that time of year. So take into account the weather, don’t pick a date that falls on the same weekend as a holiday, and of course pick a Saturday. Then pick a time. I scheduled ours from 8:00 a.m. – 2:00 p.m. Last year I ended it at 1:00 p.m. and traffic slowed down at 11. This year it slowed down around 12:30/1:00 by pushing the time back. Also, call your city office to see if a permit is required and if one permit will cover all the homes involved. It’s usually only a few dollars to obtain one.
Step 2: Create Flyer and Pass Out to Neighbors
If you want to give all your neighbors the chance to participate, you’ll want to create a flyer to pass out to everyone. Keep in mind, the more neighbors that participate, the bigger the crowd that shows up to shop. Of course, if you don’t mind spending money, you can mail this flyer to your neighbors. As for me, we hand delivered each flyer to all 120 homes in my neighborhood one month before the community yard sale. You want to give families plenty of time to go through their homes! Simply stick it under their doormat where they’ll see it. You don’t want to ever open anyone’s mailbox.
Here’s the template for the flyer I used to pass out to my neighbors. It includes the date and time, how to sign up including the deadline, my contact information, and participation details. It’s important to have a deadline (usually 1 week before the community yard sale) so you’ll know how many yard sale signs to make and which homes to mark on the map.

Step 3: The Waiting Game and Advertisements
The first couple of weeks you’re waiting to see which homes will sign up. As they call, text, or email their information, create a word document, Trello board, or write in a notebook their name, phone number, address, and main ticket items. Make sure to thank them for participating and amp up the excitement!
Also, during this time create a Facebook event page for your community yard sale and start spreading the word. Invite friends, ask others to share, and share it to your community pages. Make sure to write updates, big ticket items they can find, etc. throughout the week to keep the momentum going. Here’s a screenshot from mine:

Step 4: Placing Ads Online
1 week prior: Once you reach your deadline, you’ll want to start placing your ads (all free) for your community yard sale online ASAP. The reason you wait for the deadline, is that you want to have all of the big ticket items to place in the ad and the final list of the homes to add to the yard sale map to also use in the ads. The yard sale map is optional but worth it! I hand draw (nothing fancy) all the roads in my neighborhood and draw the homes participating with the house number. At the bottom of the image, I type in each physical address. This is a great image to add to all of the advertisements, it certainly catches the attention of people, and it’s easy to pull up on smart phones when they attend the community yard sale. We actually had a few families that printed it out to carry around during the yard sale.

Where to Advertise
Here are the websites, groups, and apps you’ll want to advertise on. It only takes a few minutes and you can also upload the yard sale map image. These are all free! Here’s an image of one of my advertisements to help you with the wording on your own. I always put my title of the ad in capital letters and included the number of homes.

gsalr.com
yardsales.net
YardSaleSearch.com
GarageSaleFinder.com
GarageSales.com
Craigslist – When you post on Craigslist, it automatically adds your yard sale to GarageSalesTracker.com and Garage Sales Everywhere App
OfferUp App
LetGo App
Nextdoor App
All of your Community Facebook groups for your area and surrounding areas (include your event page)
Facebook Yard Sale Groups for your area and surrounding areas (include your event page)
The Wednesday before the community yard sale, start posting every day on these: Craigslist, OfferUp, and LetGo
The Friday before the community yard sale post on all of your Facebook groups one more time and the Nextdoor App. It’s a great reminder!
This may seem like a lot, but with a quick copy and paste, you’ll have them done in no time and it doesn’t cost you anything! To make things a little easier, you’ll only be posting your ad on the yard sale websites once, so make them count! Make sure to include the image of your yard sale map or at least a list of all of the participating homes.
Step 5: Prepare and Pass Out Yard Sale Signs

Create a small yard sale sign for each home that’s participating. I took neon yellow poster board, cut them into 4 pieces, and wrote Yard Sale with a sharpie. I then stapled the sign to a wooden stake. You can get 25 wooden stakes for $8 at Lowe’s. Pass them out to each participating family the day before. I attached the following note (printed on bright paper) to each sign giving the families instructions and that I’ll be picking them back up at the end of the event to use the stakes for next year. These were placed in each yard so those attending could easily spot the homes participating as they walked or drove around.

You’ll also want to create a large sign for the entrance of your neighborhood. We had extra plywood (thank you hurricane season) that I painted and wrote on. You can also use poster board for this. Don’t forget about placing small signs throughout your neighborhood to guide those coming to shop. Put them out the morning of the event or a day or two before if your city codes allow you to.
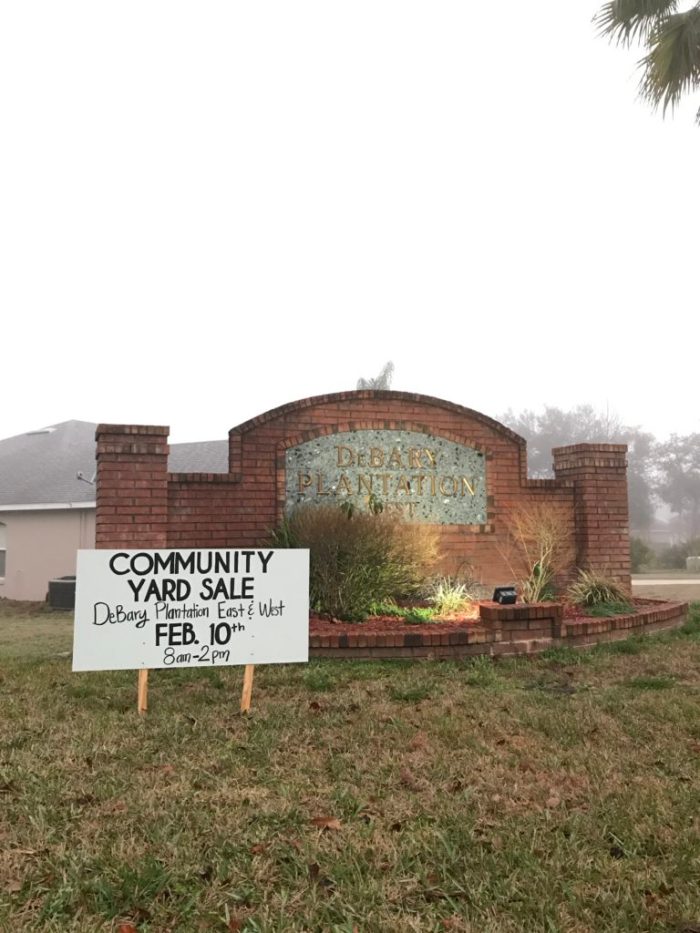
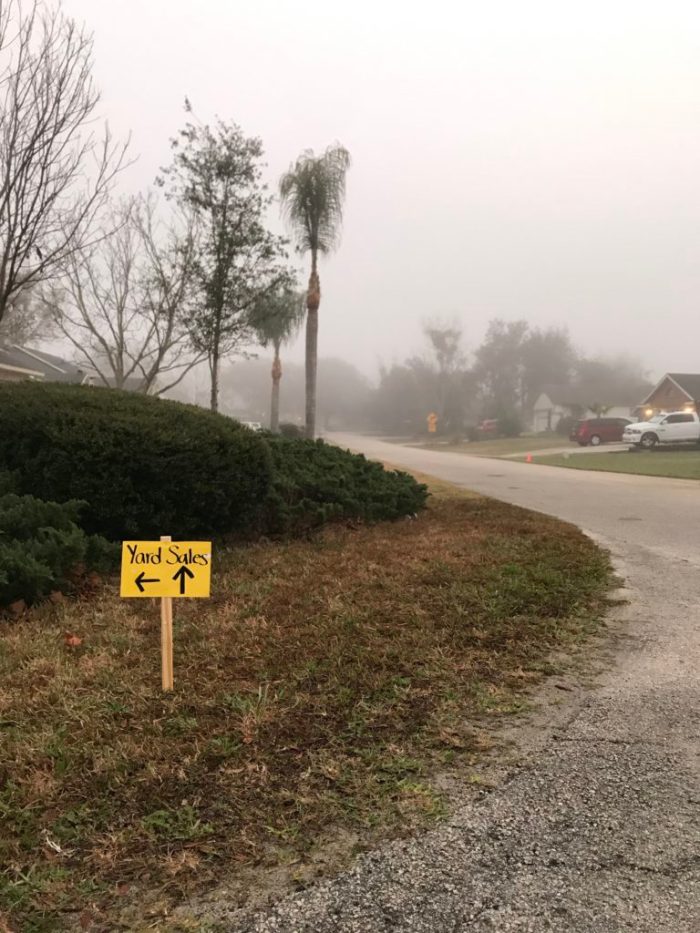
Don’t forget to place signs on the main roads that will send more people your way.

Step 6: Enjoy Your First Annual Community Yard Sale!
You did it!! You made it to the big event! I’d say sit back and relax, but the truth is people will start showing up at 7 am (even though you advertised 8 am) and won’t slow down until well after lunch. It’s such a fun day to spend outside, shop multiple yard sales (we had over 25 participate), meet new people, and see the community truly come together.

This may seem like a lot of work but it truly isn’t with how spread out it is. The hardest part is passing out all of the initial flyers but have your whole family join in! By having my mom help, it cut the time in half delivering them. Isn’t it better to do this for a whole community versus advertising a yard sale just for one home? Let me know if you decide to host your very first community yard sale, how it went, or if you have any additional questions. Can’t wait to hear how yours goes!!

Let’s keep in touch!
Like on Facebook || Follow on Instagram || Follow on Pinterest

Great tips! I love the idea of collaborating with neighbors for a community yard sale. It really brings everyone together and makes the event more fun. Can’t wait to try out some of these strategies in my own community!
Thanks so much for all this great info! I am organizing a community yard sale on our street for the first time ever and my neighbors are excited so now I feel the pressure to make this successful- all this info you shared has been so helpful! Thank you!!!!
Thank you! Thank you! THANK YOU! I am SO glad that google sent me to your website. I hosted our first community yard sale and it was a huge success thanks to you. From the yard sale flyer to the neighborhood yard sale signs to the links for advertising to the thank you notes, your step by step recommendations made this process SO much easier. In fact, I started out with just the flyer and the week before the sale came back to see if there were additional tips. Oh how I wish I had read your entire site before then because I would have saved time and money. This is an EXCELLENT how to guide for yard sales. MUCH appreciated.
You make it sound so easy! I want to do this in my neighborhood too! Did you ask your neighbors ahead of time or did you just put the flyer under their door mat?