• Home
  • ABOUT
  • WORK WITH ME
  • Paint Colors
  • Shop Our House
    • Guest Bedroom
    • Front Living Room
    • Living Room with Fireplace
    • Previous Second Living Room
    • Current Playroom
    • Prior Playroom
    • Dining Room
    • Laundry Room
    • Oliver’s Bedroom
    • Guest Bathroom
    • Covered Lanai
    • Patio
    • Master Bedroom
  • CONTACT
    • Facebook
    • Instagram
    • Pinterest

Within the Grove

Join the list to receive occasional news and special updates!

How to Start a Successful Cut Flower Garden

February 25, 2019

Maybe you’re thinking of starting a cut flower garden for the first time or you need a better start compared to your last garden. Either way, I’m hoping this post will guide you in the right direction with giving you a great start on what will hopefully be a successful garden this year. I’m sharing everything on how I plan, what I take into consideration, how I start my seeds and staying organized so that I enjoy the process.

Pre-Plan Your Garden

The first thing you want to do before you purchase a single seed packet or stick your hands in dirt, is plan! Sometimes we get so excited about the final result, that we dive in before thinking of our garden goals. For example, what type of garden layout would you like this year and the size of it? You can choose from a container garden, patio garden, raised garden bed or directly into the soil of your yard.

You can never start the planning too early! For me, as soon as the new year arrives, I’m already planning. This is key to figure out first because it will determine how many flowers you’ll need to start growing from seeds. Keep in mind, you can start planting your seedlings in the ground after your zone’s last frost so you’ll want to start your seeds early.

Deciding What to Grow

Which brings me to my next point: what do you want to grow? Of course we’d all love to grow anything and everything, but you need to take into consideration the zone you live in and what grows best in that zone. For example, I live in zone 9b (find out yours here). As I’m researching flowers, I’m also looking up to see if they’re compatible with my climate. Still not sure? Head to your local nursery and ask what flowers do best in your zone. You’ll also learn what does and doesn’t do well as you try new things in your cut flower garden year after year.

Once you narrow down what you’d like to grow, it’s time to order seeds! Of course, you can find them at your local home improvement store but you can also order them online. Especially if you’re wanting a specialty flower. Remember to take into consideration the size of your garden and the number of different flowers you’d like to grow.

Starting Your Seedlings

Typically you want to plant your seeds 6 weeks before the last frost for your zone. Why? So when that last frost has come and gone, you can transplant your seedlings directly into the ground. But how exactly do you start your seeds?

For the past few years I’ve used peat pellets that come in a tray. You simply add water, the dirt expands and you add your seeds to each one. It’s a very simple start but one wrong move can cause your seedlings not to grow. It’s so important to look up how to plant each seed. For example, you cover cosmo seeds with a thin layer of dirt but with poppies you don’t want to cover at all. I learned this the hard way last year when my poppies didn’t sprout after covering the seeds with too much dirt.

You’ll drop a few seeds in each pellet to give you the best chance of a seedling to sprout. And for that reason, I always plant at least 5 pellets of each flower. You plant more than what you need because you never know how many seedlings will actually sprout. The seeds may all grow or you might get lucky with only one. Better safe than sorry! You’ll place the lid on your container, leave it in a sunny spot and wait for the sprouts to make a appearance. This will be a post for another day on what to do from there.

Get Organized

This is a sponsored post on behalf of Full Circle but all thoughts and opinions are my own.

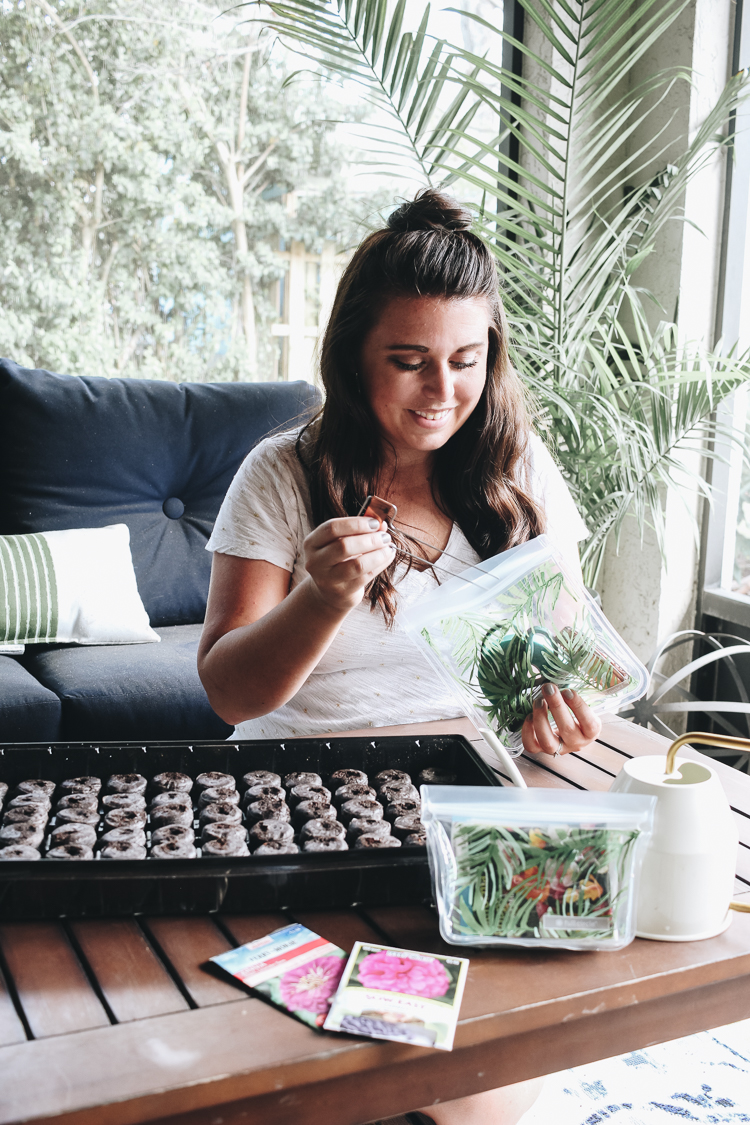
My biggest hope throughout this whole process of growing your own cut flower garden is that you’ll enjoy the process. One of the ways you can do this is by staying organized from the start and throughout growing your garden. I do this by using my Ziptuck bags by Full Circle for all my smaller seeds, gardening tools and resources.

For example, my seeds go into the snack-size Ziptuck bag for a couple of reasons. The obvious reason is to keep them all in one spot but with the air tight seal, I know if any seeds spill out they’ll stay in the bag. Plus, it’s a great storage solution because of the air tight seal and keeping the seeds from going bad due to humidity.

I also love to keep my seeds nearby because of the information you can find on the back of the seed packets. It’s hard to keep track of each flower’s needs. Therefore, I can easily find out the amount of sun, days to maturity, plant spacing and when to pinch the seedling by quickly pulling out packet since they’re all organized in the Ziptuck.

As for my larger Ziptuck, I’ve placed a few gardening tools and items that I frequently need. It can be a little frustrating running around my home and garage trying to find these small items. But with this reusable bag, it’s no longer an issue. In it you’ll find my favorite pair of snipping shears, garden markers, a marker and garden tape. The best part? My smaller bag will even fit inside.

So, I know what you may be thinking. Why not use a regular ziplock bag? They wear out over time and aren’t as durable. These Ziptuck bags are reusable, BPA free, and the biggest perk of all? They’re hand washable. Which is amazing since garden work can be so messy. I place both of these bags on a shelf in the garage and can have everything I need within seconds when heading out to work on my flower garden.

This is how I prep and start my cut flower garden every year to make sure I set myself up for a successful growing season. My hope is that you gain the confidence to do the same and try a garden for the first time. Even if it’s just a small container garden where you start with a few flowers.

Let’s keep in touch! 
We have a brand new community over on Facebook, House & Home, where we’ll be chatting, sharing, and helping one another when it comes to home decor and projects. Come join us! Check it out here.  
Like on Facebook || Follow on Instagram || Follow on Pinterest

Share this:

  • Click to share on Twitter (Opens in new window)
  • Click to share on Facebook (Opens in new window)

Related

Filed Under: Cut Flower Garden, Landscaping

« Where to Find Tile Stencils
Installing a New Faucet for our Utility Sink »

Trackbacks

  1. What We're Planting in Our Spring / Summer Garden - Within the Grove says:
    March 19, 2021 at 12:18 pm

    […] wrote this post about two years ago about how to plan and plant seeds for your own garden. I need to make a few updates to it but it’s a great place to start if you’re wanting […]

    Reply

Leave a Reply Cancel reply

Your email address will not be published. Required fields are marked *

This site uses Akismet to reduce spam. Learn how your comment data is processed.

Looking for something?

withinthegrove

A little garden magic just by adding some solar li A little garden magic just by adding some solar lights. Notice the starburst pattern they give off? My favorite part! These would also work great along a deck railing, the top of a wooden fence, or on the side of stairs. I added both solar lights you see here to my Amazon shop!
Round 2 (and final!) for the grass install in our Round 2 (and final!) for the grass install in our backyard. Dang, does it feel GOOD to finally say that! It has been a long time coming and a little sweat equity saved us so much by doing it ourselves. Next on the backyard to do list is turning it into a tropical oasis by planting the flower beds. Think huge birds of paradise! Time to start planning.
It has been 6 years since we moved into our home a It has been 6 years since we moved into our home and visualized the potential our backyard would one day have. The first few years were spent clearing out and claiming our property back . Two years ago we built our dream garden, last year we built the play area that feels more like a magical treehouse, and this year we added a pool (still pinching myself every day). We’re seeing our hard work over the years starting to come together as we approach the finish line of installing grass and landscaping that’s going to bring it all together. As I always say, stay tuned because you know I’m going to share it all with you! And a little reminder for you to keep going because home takes time.
The garden is cleaned up, prepped, and ready for t The garden is cleaned up, prepped, and ready for the summer crop. What started as a single garden box has transformed to this garden space over the past few years. Favorite thing about it: being tucked away in this cozy corner with the winding paths throughout it. One thing I would do differently: using pea gravel instead of the granite rocks we went with. These rocks hurt! Pea gravel is smooth enough to comfortably walk barefoot on.
The grass is in! Saying BUH BYE to the dirt around The grass is in! Saying BUH BYE to the dirt around the pool for the first time since December when we broke ground. We spent the past few weeks installing irrigation throughout our backyard and around the pool. Yesterday we finally had the sod delivered and within a few hours it got us one step closer to finishing our backyard oasis. We still have a long ways to go, but my goodness does it feel good to see this part done! And we can finally check off the final inspection for the pool build.
What does it cost to fill a 16,000 gallon pool wit What does it cost to fill a 16,000 gallon pool with a garden hose? Our total came to $229! Does this total surprise you? This of course can greatly vary depending on where you live and your situation. For us, we live in Florida and on county water. We only pay water fees and not sewage. The water company did not give us a discount. We filled the pool right at the start of our billing month so this is it! Have you filled up a pool before? I’d love for you to share your cost, pool size, and location if you feel comfortable doing so!
We have a 16,000 gallon pool and filled it up with We have a 16,000 gallon pool and filled it up with a single water hose. And we for sure had some questions! Answering them here:

• Why not use a water truck? We weren’t in a rush, it was the best way to end this project watching it fill up, and it would have been more expensive. 

• Why not use our local fire station? Our local fire department doesn’t do this and it isn’t very common that most do. We wouldn’t ask if they did. 

• Did our water company give us a discount? Nope. Most water companies will take off the sewage fee but we only pay for water and not sewage where we live. We did notify them so they wouldn’t turn our water off thinking it was a leak. 

• What is that on the end of your hose? We added a filter on the hose to help reduce iron, scale, any other heavy metals and containments to help give our pool a fresh start. 

• How long did it take? 51 hours 

I’ll be sharing the cost soon so make sure to add your guess in the comments!
Pizza nights are back! And one thing we’re addin Pizza nights are back! And one thing we’re adding since our screen enclosure is gone, are these Bitefighter LED String Lights by @tikibrandproducts . You’ve seen us use them in our playset area and now for our patio area. They give us the ambiance we need at night while helping to fight off the mosquitoes as a 2 in 1 solution. There’s no odor, no mess, and they will last all season long. Cheers to the summer nights ahead! #ad #TIKIbrand
Protecting outdoor furniture for the summer!

It’s time to give your outdoor furniture the best start for summer and to help it last long term. Here are some things you can do to protect your outdoor furniture as we enter the summer season:

1. If you have wood furniture, it’s time to seal it! I use Thompson’s Waterseal on all my outdoor wood furniture except for teak. This protects it from moisture, sunshine, and mold/mildew.

2. Easiest way to help keep cushions clean is by spot cleaning throughout the season. I use 30 Seconds Outdoor Cleaner for quick, fresh looking cushions. 

3. To really protect cushions, Shield H2O provides a water repellent treatment that repels moisture and spills, which in return helps prevent mold and mildew. 

4. Have teak furniture? Use a teak SEALER and not an oil. Teak oil is a short term solution and easily washes out with rain. Time to seal it to last long term! 

I have everything I used in my Amazon storefront under outdoor.
Load More... Follow on Instagram

Sign up here to have our fresh posts delivered to your inbox!

Enter your email address:

Delivered by FeedBurner

Copyright © 2023 Within The Grove • Customized by Brave Creative Design · Log in

  • Privacy Policy
  • Terms and Conditions
  • Disclosures + Photo Usage
 

Loading Comments...