


Outdoor Play Area with Turf Reveal

Our new outdoor play area is finally finished! At least with phase one (more on that in a second). Mid-January we came up with a plan for our outdoor play area and officially broke ground on it. What we thought would take 2 weeks to complete turned into 6 weeks with weather delays, installation issues, and a playset that took over 20 hours to complete. But guess what!? It was worth every hour spent out here creating this dream play space for our family.

Before

After

Location of the Play Area
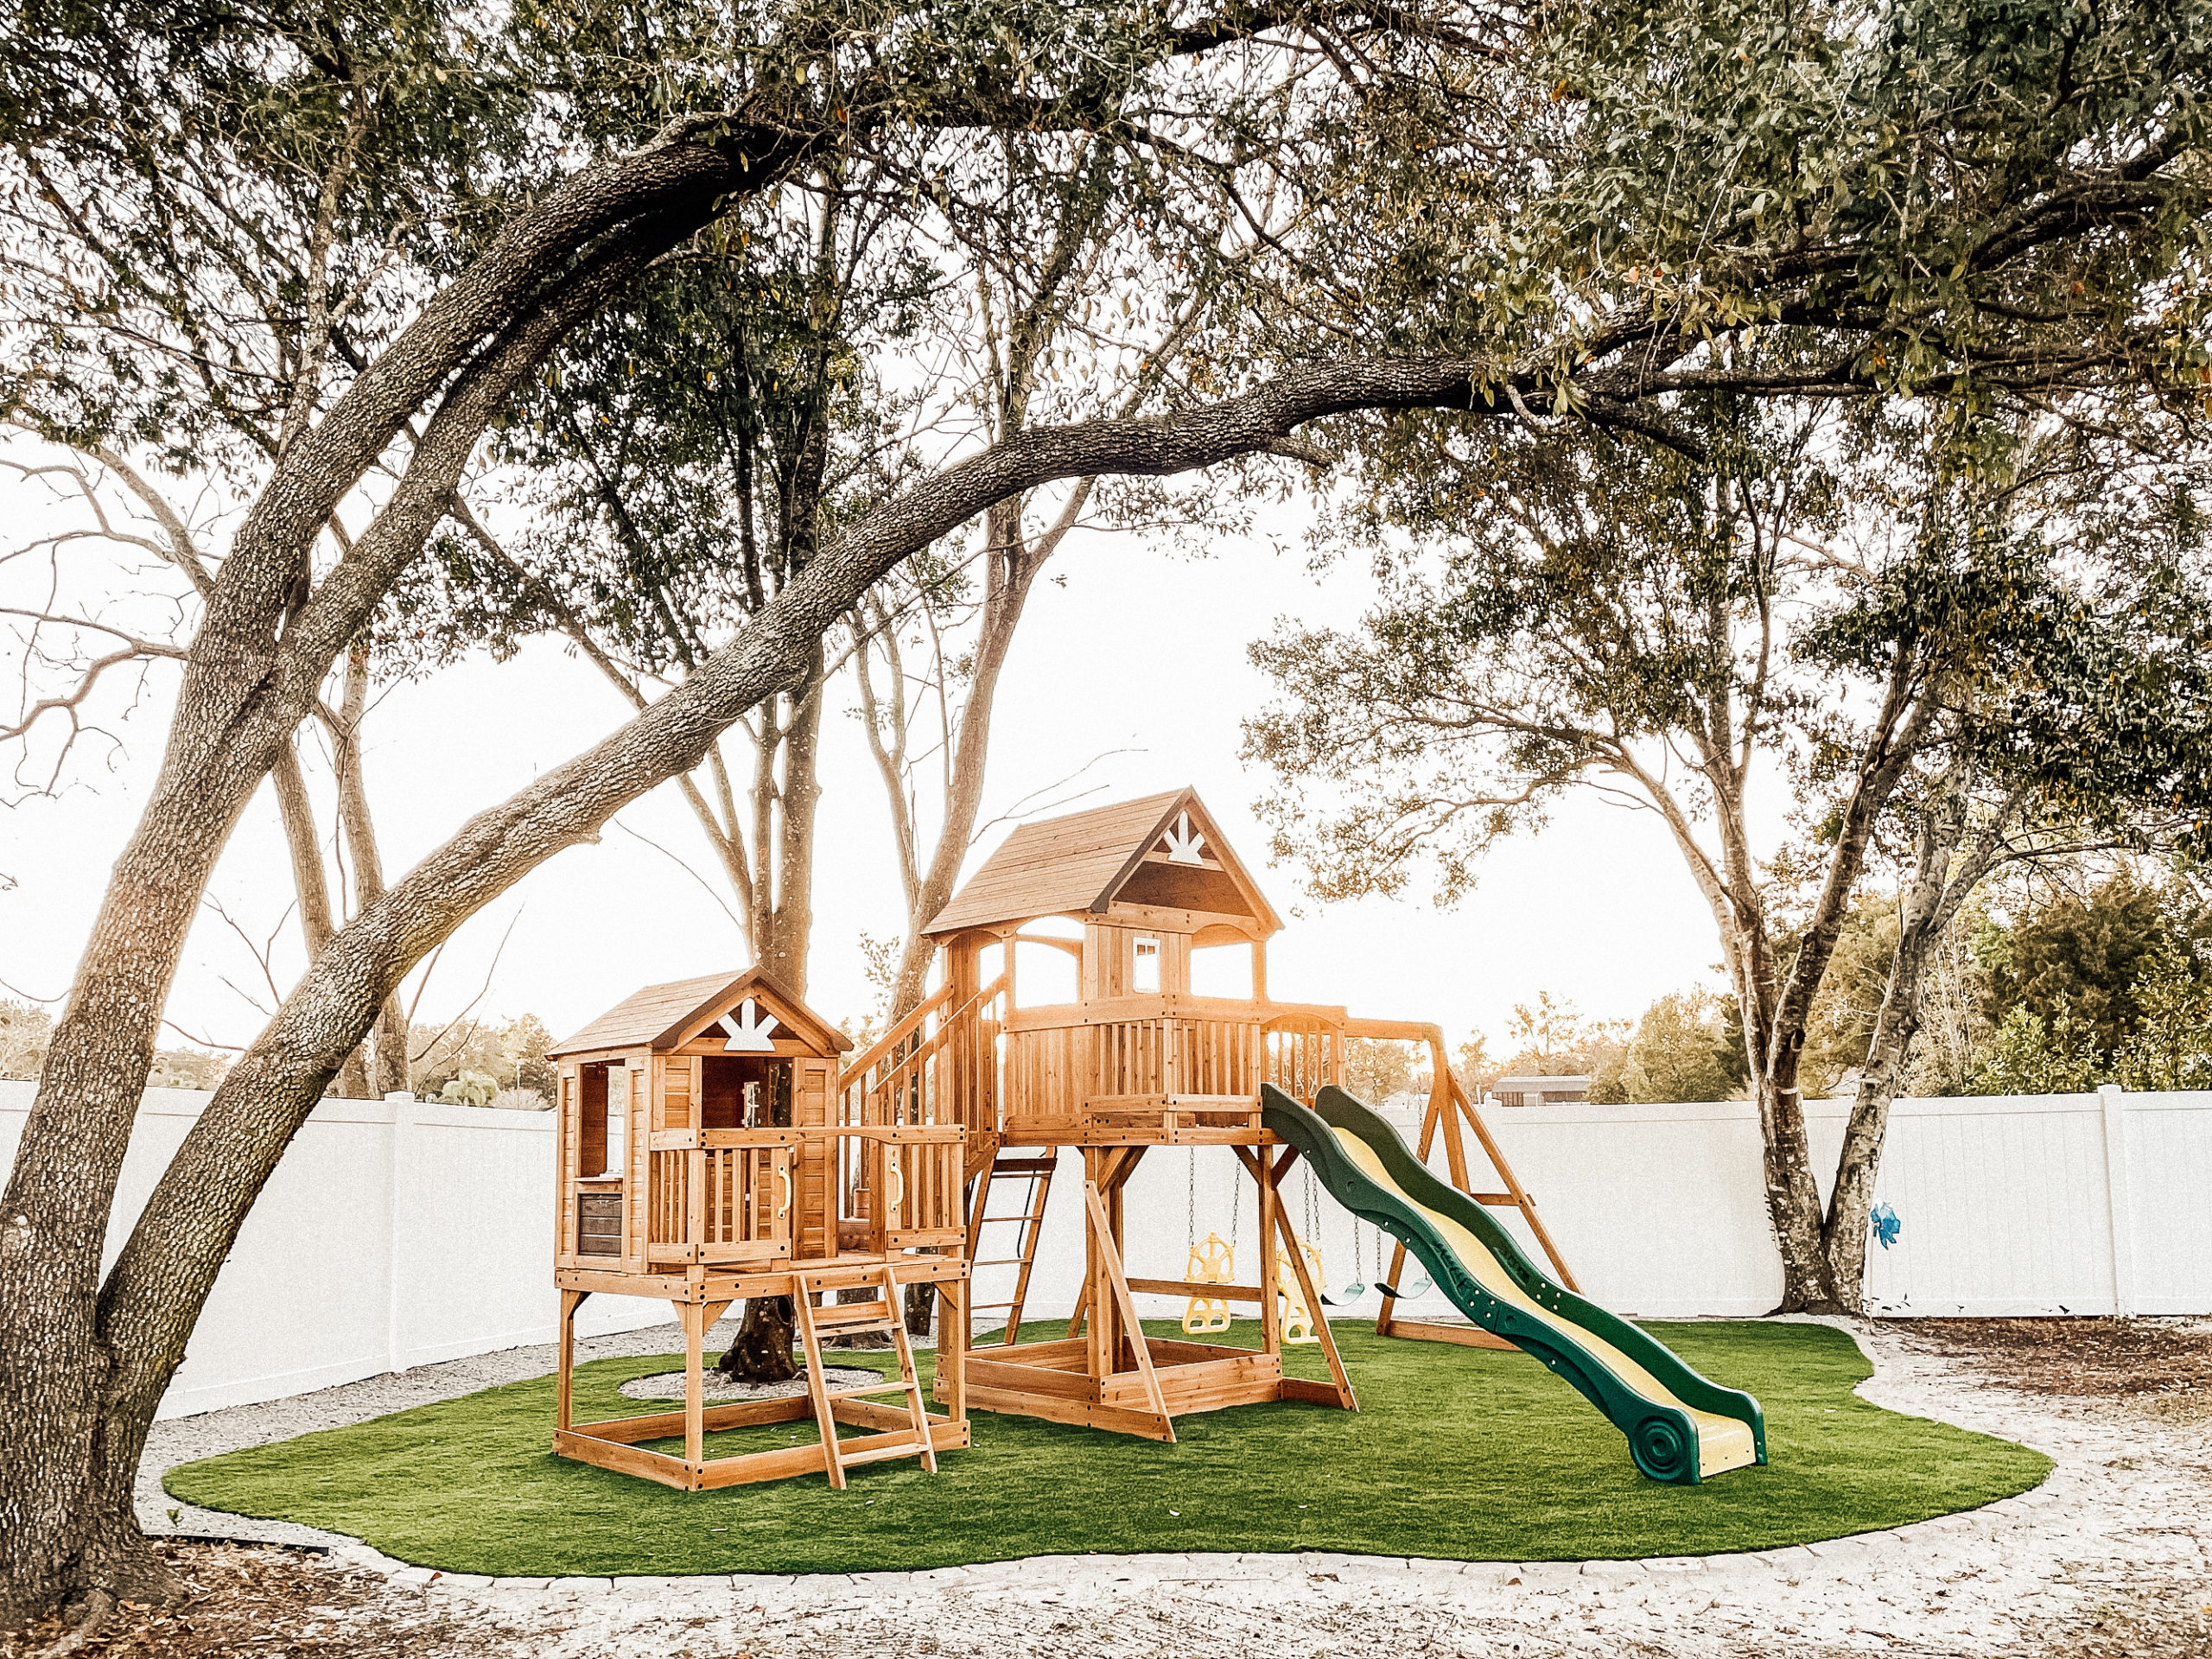
We decided on this corner of the yard for the play are for several different areas. Our number one reason was because of the trees. They were begging for a playset to be built between them with the shade that they provide. And not only that, the beautiful branch of the oak tree and the trees being the playset really make this feel like a treehouse.

And because of the shade provided by the trees, it’s nearly impossible to get grass to grow in this area. It became a spot in our yard that was being taken over by weeds, brush and therefore an area we didn’t really use. So why not make it usable space?

Lastly, we went with this corner because with a playset of this size, anywhere else would have stuck out like a sore thumb. And this location helps to balance out the back portion of our backyard with the garden being in the opposite corner.

Details about the Playset
We quickly realized the abundance of playset options out there and the price of them as well. We ultimately went with this playset after finding it almost half off as a Cyber Monday deal and it was the size we were looking for. Oliver’s imagination and creativity is something we love to watch as parents.
This playset has two forts along with the slide and swings. This will give him the thrill of the playset while also being able to transform the forts into whatever he wants. So far Oliver has turned them into a baseball store, a restaurant, kitchen and workspace, and a Home Depot.

As far as putting the playset together, there was the option to hire it out but it was going to cost $950. We knew from the beginning we want to build it ourselves but realizing how much money we were saving pushed us through the build. And of course, seeing the excitement of Oliver as each section was built. He was watching his playset become a reality as he jumped in to help too.

Overall, it took us over 20 hours to complete the build between weather delays, a few mistakes along the way, and building some parts of it on my own while Ryan worked. We created so many memories as a family building this together!

Why Artificial Grass
A question that I’m seeing pop up a lot over on social media, is why turf? We knew we had to put something down over here since this part of our property we can’t get grass to grow. And even if we attempted to, edging and cutting around this playset is the last thing we wanted to do.

Mulch was out of the question because every year we would have to replenish it. Plus, it’s an open invitation to all the insects to come and call the mulch home. This means in return, they could get pretty cozy in the playset itself. There’s also the option of rubber mulch but cost-wise, it was almost the same as artifical grass.

Which leads me to why we decided to install artificial grass. You can see the artificial grass install tutorial here. From a visual standpoint, I knew I wanted to go with turf. It helps to define the space and stays green all year. I just love the look of it! It has also created soft landing zone for the play area while giving us a cozy spot for us to sit on and enjoy as a family. Overall, I couldn’t imagine this play area any other way.

We created a curve design along the front and back for a more organic look and it flows with the yard. To help keep cost down and to add a little more visual interest, we add salt and pepper granite rocks three feet off the fence along the backside. Rocks were also added around the trees. These are the same ones we used in the garden further bring both spaces together. And the finishing touch was adding paver stones along the front.


What’s next ?
I mean, what possibly could be next?! With the turf and playset officially completed, I can start to focus on a few of the smaller details of the space. I would love to add a small picnic table to the back corner for snack, homework, crafting, etc. Adding solar lights on the two forts and above it seem like a must! I also need to seal the playset if I want it to last for years to come and keeping it looking great. And lastly, I want to add some landscaping around the play area.

This is already a space we’re using daily. On the weekends, it’s hours on end. During the week, Oliver is running out here between getting home from school and his baseball games. It’s the best feeling watching him enjoy this space. It’s an even sweeter feeling knowing that we created and built this together as a family.

Want to know how we installed the turf and all the materials we used? You can check out this post here giving the full step-by-step and links to everything! Also, don’t forget to check out the behind-the-scenes process over on social media as we tackle more of this project and future ones.
Come join us on our other social channels for even more behind the scenes.
Follow on TikTok || Follow on Instagram || Follow on Pinterest || Like on Facebook

it will be nice to have a slide and swing like this in my garden my child will love this surprise I hope I can do it
Beautiful… I hope you are keep going this .