


This post is sponsored by STAINMASTER. I’m thrilled to be sharing this with you today!
Hey, friends! This is a dream of a home update to share with all of you: the before and after of our flooring install with STAINMASTER. That’s right! The white tile that took over the majority of our home is out of here and our new luxury vinyl is here to stay. If you remember, I shared this project as one of our projects to complete in 2020. It has been in the making since November of 2019 so I’m bursting at the seams to share this reveal with all of you. So, what do you say? Let’s get to all of the amazing before and after photos and the details of this flooring.

But first, I have to show you where we started. Which is the builder grade white tile that greeted you the second you walked in our front door. Then followed you to the kitchen, living room, hallways. . . you get the point. Pretty much everywhere.

Before and After
And now we’re asking, “What white tile?” That’s because we saw it get demoed to allow this stunning STAINMASTER® PetProtect™ luxury vinyl in Alpine become the star of the show. I’ll gladly allow it to take center stage, because well, see for yourself. Here are some of the amazing before and after photos.


Can you believe this is the same home? That’s exactly how I feel every time I walk through my home now being greeted by this luxury vinyl. Now that it’s caught your attention as well, allow me to walk you through the transformation process.
Installation Week
The night before install week kicked off, we cleared out all the areas where the new flooring would be going. We placed the furniture and all of the home decor (including things on the wall) in the garage and the bedrooms that already had the STAINMASTER® PetProtect™ luxury vinyl. We were prepared for the crew to take over all week mainly because of the tile demo.


And to our amazement, it was a quick 3 day turnaround. THREE DAYS, my friends, for the tile demo, removing the mortar, leveling the concrete foundation and installing the STAINMASTER® PetProtect™ luxury vinyl. It took me three days to remove the tile from our small guest bathroom so this was very impressive to me. And just as fun to watch!


One question I keep getting on repeat is about installing luxury vinyl over tile. You can absolutely do that with this STAINMASTER flooring. It’s fairly simple to do since it’s a floating floor and connects through a click and lock system. We opted to remove the tile to avoid various height differences when transitioning into the bedrooms, laundry room, bathrooms, etc.
The After
I keep reliving the moment of walking through our home for the first time after the last piece of flooring was installed. Tears of joy, several happy dances, and me saying to Ryan on repeat: “Can you believe the difference!? What do you think? I LOVE IT!!” The STAINMASTER® PetProtect™ luxury vinyl has completely transformed our home right before our eyes.

The truth is, I have dreamed of this exact moment the second we walked into our home for the first time after closing. We knew it would be awhile to get to this point but also knew it would be very transformative for our home. We would view it in a totally different way and that’s exactly what has happened. What I love the most is that it brings a warm and cozy factor to every square inch of our home (even the hallways).


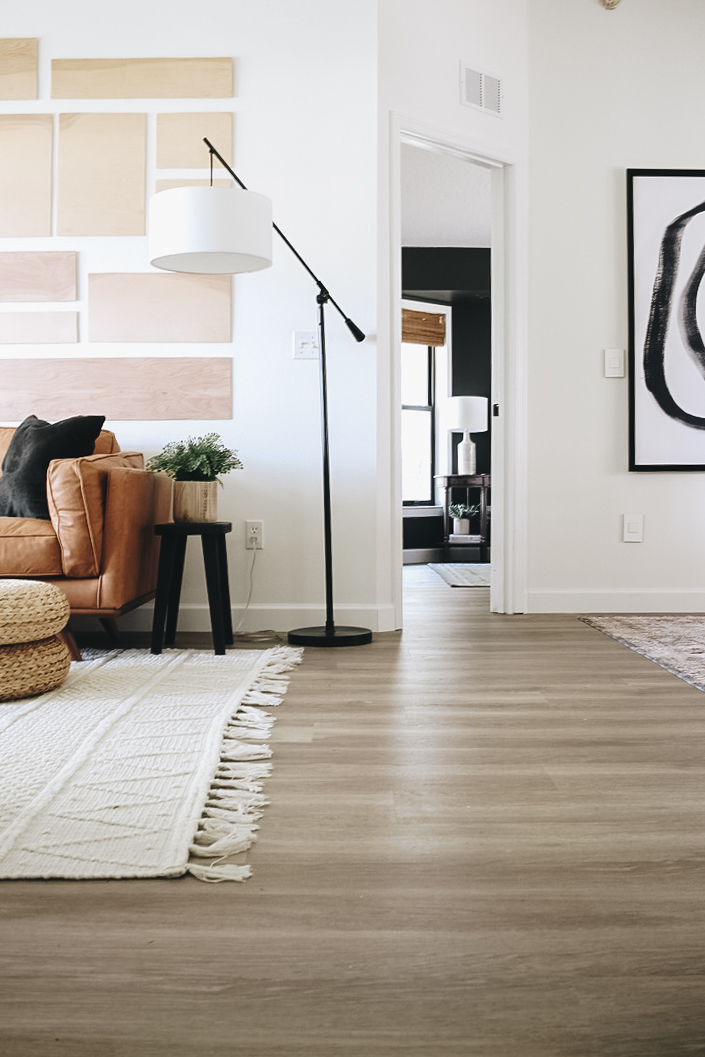
I know what some of you are already thinking: the texture and overall look of the luxury vinyl. As you can tell from the pictures, this STAINMASTER® PetProtect™ luxury vinyl in Alpine has gorgeous undertones of gray and taupe. The variations in the planks create a rich and natural look throughout our home. And this flooring actually has texture to it giving it a real life feel. Lastly, this floor has Pet ActionTraction®, allowing your pets to grip the ground when they are on the move. More fun for you AND your pet!

Why STAINMASTER® PetProtect™Luxury Vinyl by STAINMASTER
When we first moved into our home we debated on wood flooring, tile, luxury vinyl, or laminate flooring for our home. After a lot of consideration, pros and cons, etc., we decided luxury vinyl is the route we want to take with our home. It looks great, allows you to live in your home without worry of messing it up and less maintenance (no more scrubbing grout). But why STAINMASTER® PetProtect™ luxury vinyl?

This isn’t our first rodeo with STAINMASTER® PetProtect™ luxury vinyl. We had the exact same flooring installed in our guest bedroom, playroom and Oliver’s bedroom last year. Which is why you’ll see the transition pieces to these three rooms since the flooring was previously installed. We knew we were making a great choice when we first had it installed but it has been confirmed time and time again on a daily basis since then. Because of that, we decided to extend the same flooring and color throughout the rest of our home (minus the bathrooms and laundry room).


So, let’s chat about the details. I’m sure you’ve either experienced or have heard about luxury vinyl scratching easily. That isn’t the case with this STAINMASTER flooring. The STAINMASTER® PetProtect™ luxury vinyl has a Clawshield™ that’s meant to prevent pets from scratching the floor. But it goes beyond that! It also means that it resists everyday scratches from occurring.
Now, the biggest perk for me with this flooring is the fact that it is 100% waterproof. For example, when I was caulking the baseboards the other day, I knocked over my glass of water three different times. I wasn’t left scrambling for paper towels to clean it up. Instead I finished my last small section of caulk and then grabbed what I needed to clean the water up. And guess what!? The flooring is fine! Along with having a toddler that is Mr. Adventurous, I’m pretty much the clumsiest one in the family so waterproof flooring is key. And in case you do have pets, this STAINMASTER® PetProtect™ luxury vinyl flooring resists odors from pet accidents as well.

Basically, this flooring allows us to live to our fullest in our home without a worry in the world of messing it up. Have you ever been over to someone’s home and you’re afraid to sit directly on the floor because of the metal pieces on your jeans? Or maybe it was that one time the condensation on your cup almost caused a ring on the flooring? Or the time your shoes scuffed a part of the floor? Not in our home! Come as you are and join in on all the fun. But fair warning, sock sliding on our new floor will probably take place.
Don’t hesitate to reach out with any questions about the flooring. You can find your closest location here and you can check out the abundance of flooring options (carpet, luxury vinyl, sheet vinyl) here. Make sure you’re following along over on Instagram for even more behind the scenes. Meanwhile, check out this video showing you a before and after walkthrough of the flooring install. You’ll instantly see the impact the PetProtect luxury vinyl had on our home.
Before you go, let me say this! I’m beyond thankful for this amazing partnership with STAINMASTER and the opportunity to share this flooring product with all of you. And have I mentioned how amazing the team behind the scenes is? You’ve probably caught me gushing about them over on my Instagram stories. Working with them is truly like having a brand family to lean on. As great as the flooring is, the people behind the STAINMASTER brand are even better.
Let’s keep in touch!
We have a brand new community over on Facebook, House & Home, where we’ll be chatting, sharing, and helping one another when it comes to home decor and projects. Come join us! Check it out here.
Like on Facebook || Follow on Instagram || Follow on Pinterest

[…] other projects we completed, we still can’t believe it’s the same house. In case you missed the before and after post, here’s a look at our home pre and post STAINMASTER® […]
[…] information? You can check out our experience with hiring out the bedroom installs here and the entire before and after of our home here with the flooring […]
You share so much so I was wondering if you could give a ballpark of per sq ft cost for the exact product you put in your house. I imagine it depends on if there is demo etc but do you have a per sq ft number for just the material. I would love to have an understanding of this before I call my local supplier. Thanks! PS: I understand if you prefer is to get that info from the vendor but Was just hoping to get a hint prior to moving forward. Thank you!!