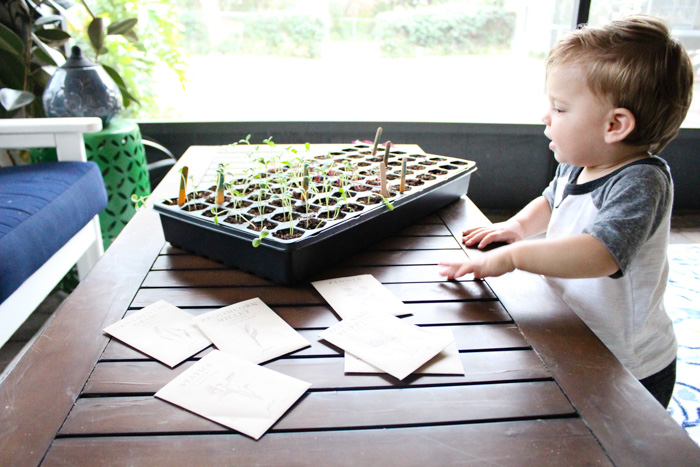
The Beginning Stages of Our Cut Flower Garden


If I could jump through this blog post and do a little happy dance with you, I would! Something is finally happening and I couldn’t be more thrilled. A little over 2 years ago I started dreaming of growing my own cut flower garden. I can’t tell you exactly why, but all of a sudden I found myself going almost weekly to purchase fresh flowers for my home. Then I attended a design workshop by Farm Gal Flowers and realized she was growing her own flowers in her yard here in Orlando. I was hooked. Especially after being around the flowers pictured below Farm Gal Flowers provided for a styled shoot and captured by Rachel V Photography.

Between having a little one and moving into our new home, the timing was never right. I didn’t want to rush growing our first cut flower garden but instead I wanted to enjoy the process and make sure it was done correctly. They take a lot of work! I’m finally in a place where I can plan and grow my first cut flower garden this spring AND fall. That’s right! Central Florida is conducive for two growing seasons and that’s music to my ears. We planted our seeds last week and this coming weekend we’re building our raised garden boxes. I’ve decided to share the whole process with you and if you’re local, keep an eye out for an opportunity to grab some of my fresh, handpicked flowers this spring season (if all goes well).
The Garden Layout

Thanks Farm Gal Flower’s Spring Cut Flower Garden Workshop and reading Floret Farm’s Cut Flower Garden, I knew right away the size I would need for our flower garden. We’re going with two raised garden boxes that are 4 feet x 10 feet. This will allow me to successfully reach the middle of each garden bed and grow an abundance of flowers. With spacing them 9 inches apart, I’ll be able to fit 65 plants/flowers per box. One box will be for my flowers and the second box will be for my greenery. This is a trial year so we’ll see if this works!

What We’re Growing

As I mentioned above, we’re growing a mixture of greenery and flowers. This year there wasn’t too much of a method of what I picked. I simply planted the flowers that I love, in the colors that caught my eye, and the ones that I thought were pretty. The greenery threw me for a loop, but I think I picked a few that will look gorgeous mixed in with the flowers. I also added mint and basil after they were suggested at the workshop I attended. Here’s exactly what we planted from the seeds purchased from Floret Flowers.
Poppies

Zinnias and Amaranth

Dahlias

Bunny Tails and Statice

Millet and Frosted Explosion
The Process So Far
So far I’ve planted the seeds in trays, watered them every other day, and some started sprouting within 2 days! Here’s a quick video on the beginning stages explaining some of the first steps.
I have an indoor light to place over the seedlings but also doing a lot of research if I even need it since it’s well above 80 degrees here in Florida already. The next step will be transplanting them to the garden bed once they’re ready. That’s a whole other process I can’t wait to share with you.

I’ll share an update on the construction of our garden beds, where we decided to place them, and the soil we used. We still have a lot to figure out. For example, where we’ll be getting our compost in bulk and figuring out our watering system. I can’t wait to share this whole process with all of you and fingers crossed we grow the flowers successfully and have a cut flower garden we’ve been dreaming of!
Let’s keep in touch!
Like on Facebook || Follow on Instagram || Follow on Pinterest

[…] place to start if you’re wanting to try seeds as well! Then there’s also this post giving an update at the beginning stage of one of our first cut flower garden. It’s pretty fun to look back on […]
Hi! So cool that you’ve started your own cut flower garden. I’m in the process of growing my seedlings and was wondering if yours got too leggy to where they would bend over? And what did you do to support them or did they turn out just fine after transplanting?
Hi Mar! Some of my seedling started to get a little leggy. I let them do their thing until I could transplant them. Transplanting went great and they took off! If you have a variety/flower that continues to bend over after transplanting, stakes and netting is a great way to support them!