


Explore this post to learn more about how to paint Target furniture and get my step-by-step guide to flipping a Target accent cabinet.

Today seems like a great day to work on flipping Target furniture! What do you say? I’m taking one of the most popular cabinets at Target a few years ago (the Windham 2-Door Accent Cabinet) and transforming it into a modern piece.
I just happened to find my cabinet at Goodwill a few years ago, but from what I’m hearing a lot of you have this cabinet too. And if you’re like me, it worked for your style a few years ago but now you’re looking for a way to update it. I’ve got you, my friend! Keep reading for a before and after with our Target cabinet.
Which Target Accent Cabinet is Best for Furniture Flipping?
I used the popular Windham Accent Cabinet from Target. In the late 2010s Target had these cabinets in tons of fun colors, from yellow and red to white, black and the teal color I used for my project. These days, Target doesn’t sell this exact cabinet anymore. While they do still offer a black version of this cabinet, it was out of stock when I looked online recently.
If you want to try painting Target furniture but don’t have this exact cabinet, don’t worry! It’s common to see these cabinets at Goodwill (where I got mine) and other thrift stores. Or, you can simply pick up a different Target cabinet. This 2-door accent buffet cabinet from Target is very similar, although larger and a bit pricier.
The key to making this project worthwhile is finding a Target accent cabinet that has the size, shape and storage you want and is affordable. We’ll work on updating the style in this Target furniture flip!
Target Cabinet Makeover: Step by Step
Looking at the before-and-after image of my Target cabinet flip below, you’d never even know that it’s the same cabinet! And all it took to transform it was a fresh coat of paint, new hardware, and removing the wooden glass panes from the doors. Ready to work on your flip and learn how to paint Target furniture? Let’s get started!

Materials
- Target Accent Cabinet (I recommend this one or this one)
- Oscillating Multi-Tool
- Epoxy Wood Putty
- Gloves
- Sanding Block
- Tack Cloth
- Paint Sprayer (or a paintbrush)
- Zinsser Bin Shellac-Based Primer
- Paint – I used Amulent Decor Paint by the Chippy Barn in Seaside Cliff
- Wax or Polycrylic
- Drill + drill bit
- Handles + Bolts
** Some of these links are affiliate links.
Updating & Painting Target Furniture to Look More Modern
If I wanted to make my cabinet look more modern, I knew the first thing that had to go were both of the wooden panes. It would take this piece from looking farmhouse to modern. Or at least on the way to looking modern. Once the panes were removed, the rest was a simple coat of paint and new hardware!
Step One: Remove Wooden Panes
Since the wooden panes were not attached to the glass, you’ll use an oscillating multi-tool to cut where the wooden pane meets the wood on the cabinet door. I made six cuts total. Be very careful with this step and take your time because you don’t want to break the glass.

Step Two: Repair Any Damaged Wood
Once removed, you may have some areas you need to repair from cutting away the wooden pane. Using epoxy wood putty, apply it where the oscillating mulit-tool accidentally took too much off. This product is great because you’re able to mold it to your piece.
If you’re attaching new handles to the cabinet, you’ll also want to fill in the old knob hole. That is if your new handles require two holes. Otherwise, just leave it. The epoxy wood putty has about a 15-20 work-life once you activate it so cut off a little bit at a time. You’ll allow it to cure for an hour and then sand it down until smooth. Wipe the cabinet clean using a tack cloth.

Step Three: Prep & Prime Your Target Cabinet
I’ve seen a lot of Target furniture flips that instruct you to sand the cabinet before priming and painting, but I took a different approach. To paint the cabinet, I used the Amulent Decor paint by The Chippy Barn in Seaside Cliff. This paint is a ceramic paint (a first of its kind) and doesn’t require much prep work unless you’re working with a glossy surface. This particular cabinet is made with wood particles with a hardwood on top that is similar to laminate, so I did not need to sand it before painting.
This not only made the project a lot easier and less time-consuming, it also led to a much cleaner, smooth finish on the cabinet. It was definitely a win-win!

With that said, I did prep this piece by painting it with the Zinsser Bin Shellac-Based primer first. This type of primer is a shellac primer made to adhere to laminate surfaces so that your paint will successfully adhere. I applied one coat with a paintbrush. If you can do this outside, I recommend that because of how potent the smell is with this primer. It takes one hour for the primer to dry.

Step Four: Painting Target Furniture
Next up is painting the cabinet with your chosen color. If this is your first time painting furniture, I highly recommend this Amulent Decor Paint. As mentioned before, since it’s ceramic-based paint, it is self-leveling and very durable. Two things you certainly want when painting a piece of furniture. You can apply this paint with roller, paintbrush, and a paint sprayer. The best results will be with a paint sprayer if you have one. I did use a paintbrush on the doors.
Apply the paint using nice, even strokes of the paint sprayer. I used an entire 16-ounce can of the Seaside Cliff paint on this cabinet. By using the paint sprayer, it allowed for full coverage in one coat. If painting by hand, it would have taken two to cover the cabinet. Keep this in mind as you go to paint your piece of furniture or if your piece is larger than mine.

Seaside Cliff went on beautifully and the color kept getting prettier as it dried.
Step Five: Sealing Your Target Cabinet
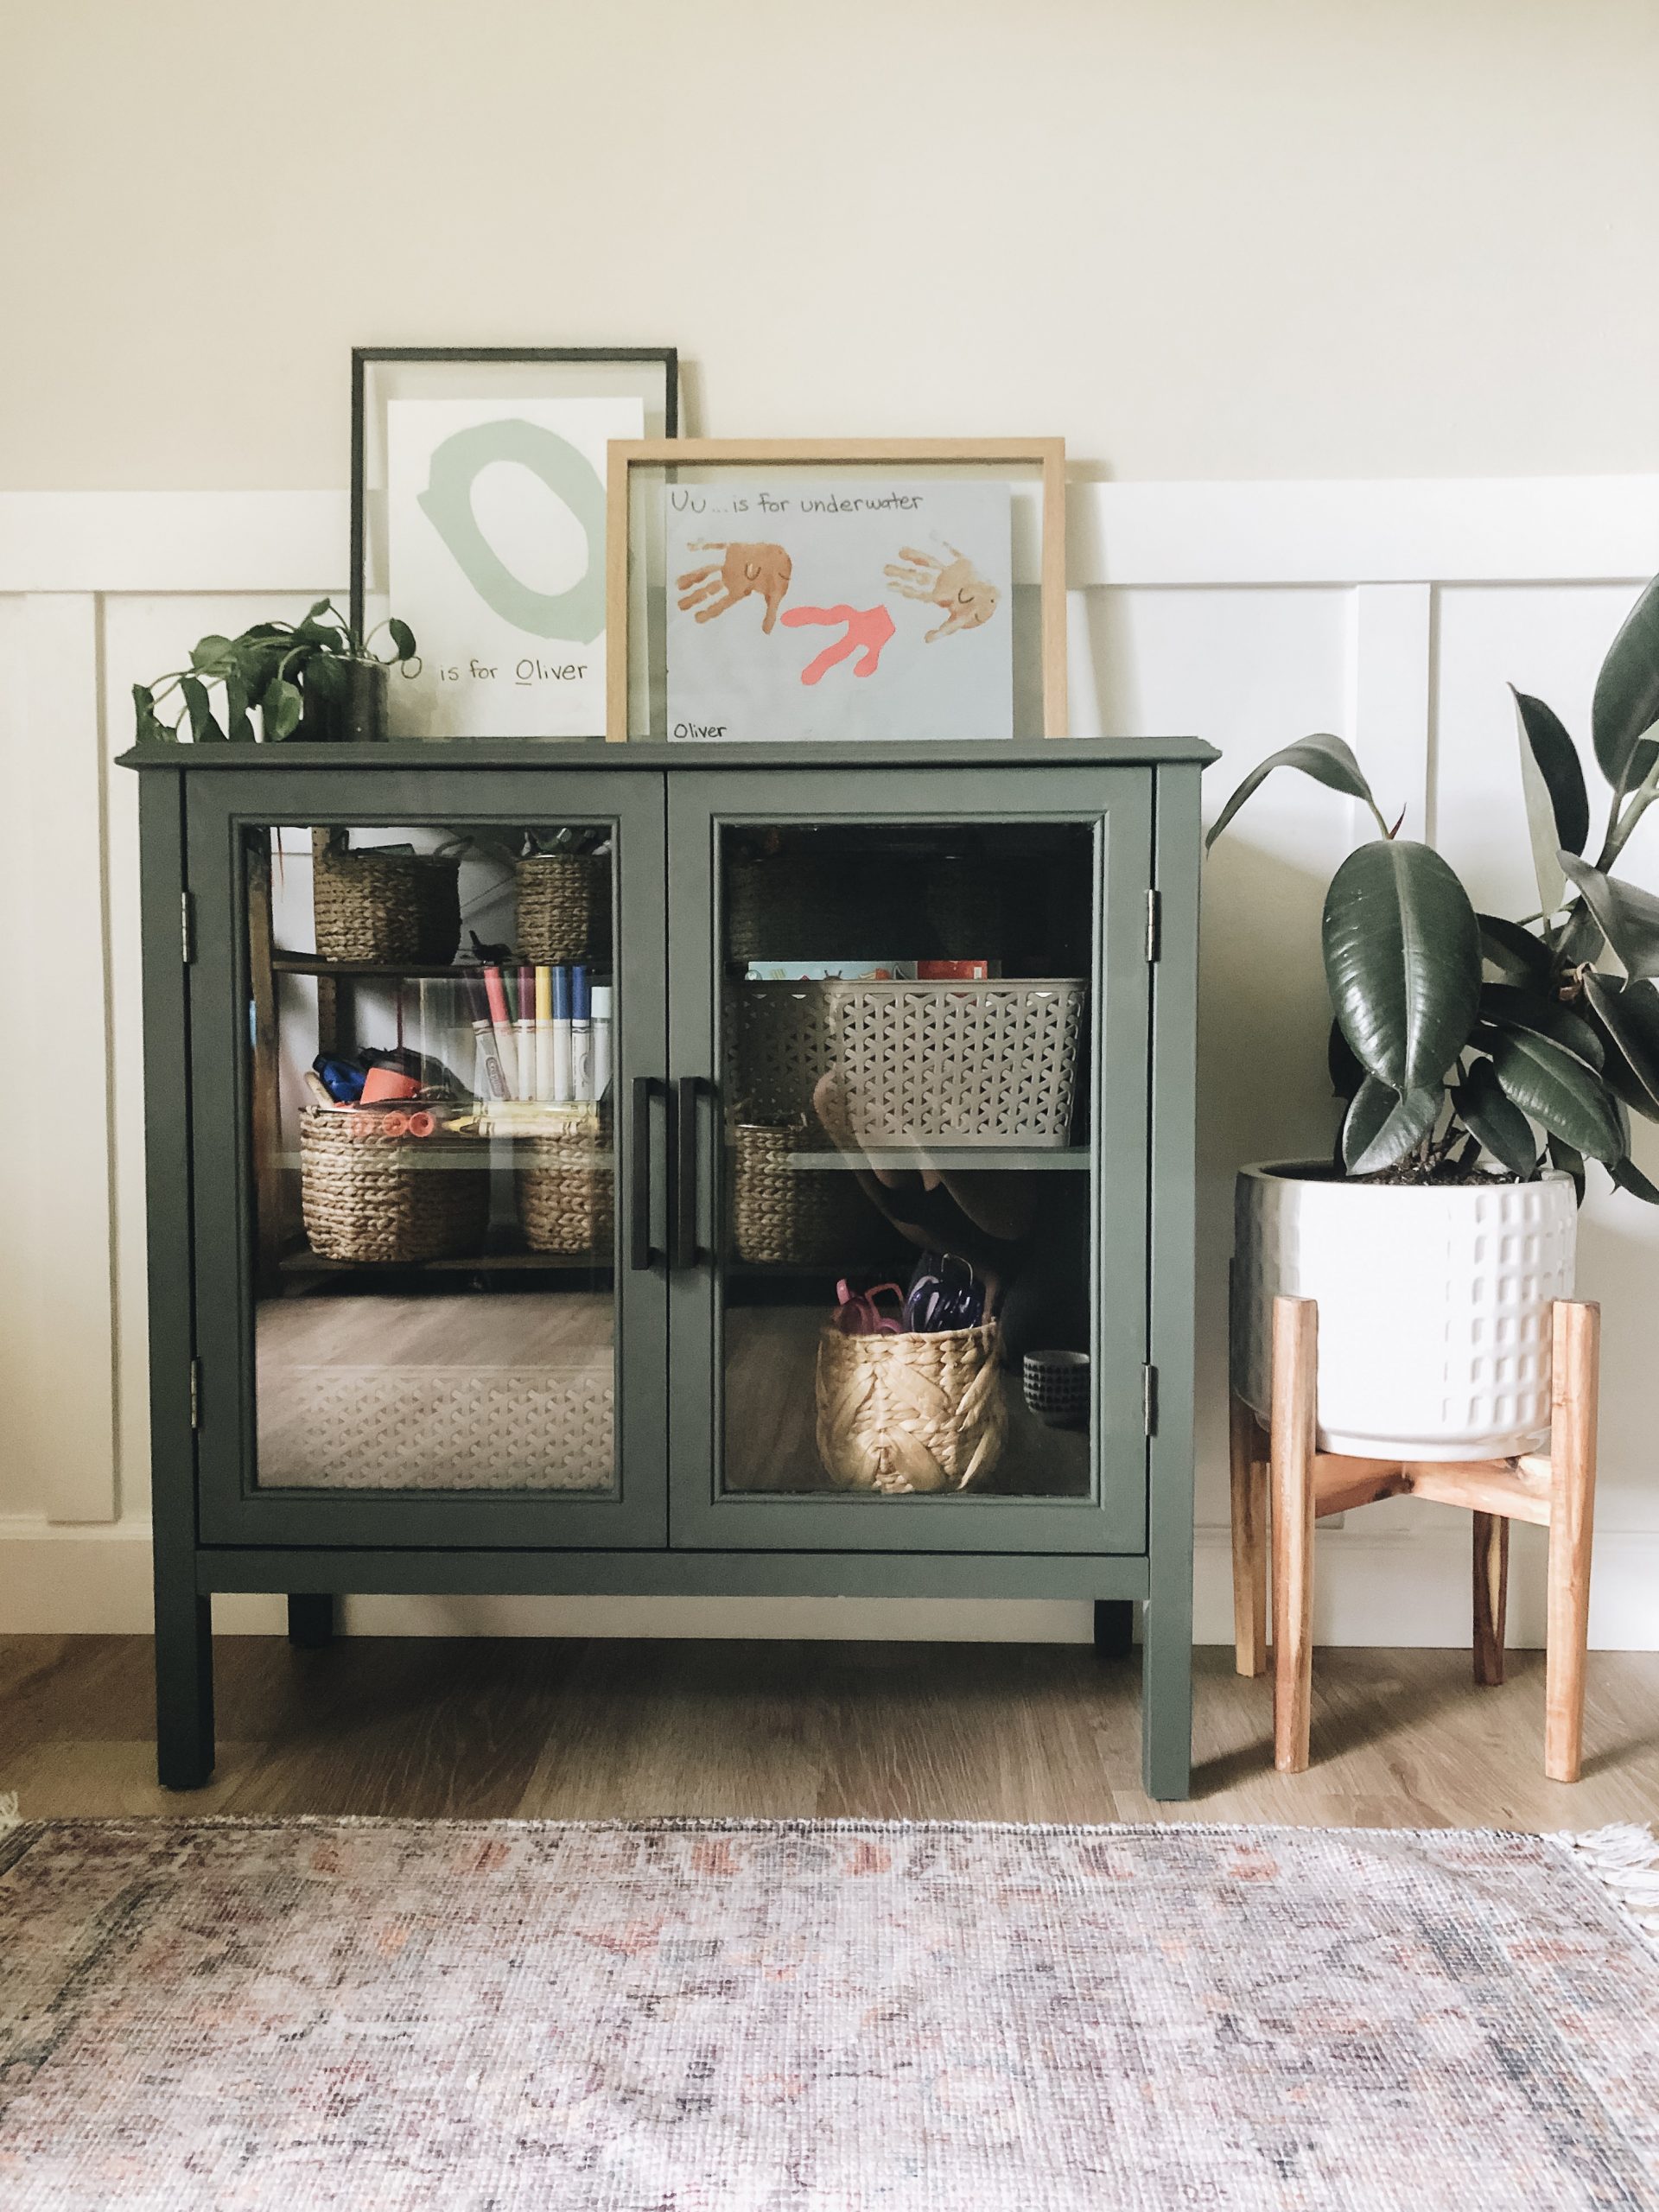
Even though this paint is durable, I do recommend sealing it. You can either use a wax (The Chipp Barn offers scented ones) or you can seal it with polycrylic. My go-to is always the polycrylic since it will offer even more durability, which is exactly what I needed since this piece is now in Oliver’s playroom as his art cabinet.

Step Six: Attach New Hardware
Now that your cabinet is finished, you’ll want to attach your new hardware. Of course, this is optional but it really helped change the look and elevated the piece to look more high-end. I switched out the black knobs that came with the cabinet for matte black handles that really fit the modern aesthetic I was going for. Small changes, big results.

Okay, now that we have gotten through the how-to, can we talk about this transformation!? I can’t tell you how many people messaged me on Instagram stating they have this cabinet and will be flipping it ASAP. This is one of those flips where it looks like an entirely new piece, looks modern and will work beautifully in so many spaces in your home. This transformation honestly shocked me as well.


Common Questions About Flipping Target Furniture
Is it OK to paint cabinets without sanding?
Normally, painting cabinets and any other furniture would require sanding the furniture. Sanding adds a bit of texture to the surface and helps primer and paint stick better. But, when you’re working with laminate furniture like the Target cabinet I was working with, it can be a bit challenging to sand and get a nice, smooth finish.
In this Target cabinet makeover, I chose to skip the sanding and work with ceramic paint instead! It worked out beautifully and the cabinet looks like it was made this way!
Can I paint over laminate furniture?
Yes, you absolutely can! You just have to be choosy about the products you’re using and be patient! A lot of laminate furniture painting tutorials recommend using an oil-based primer, but I decided to go with a Shellac-based primer and it worked wonderfully. This type of primer is specifically designed for laminate surfaces and will help ensure your paint sticks to the surface of the cabinet.
Do your best to paint in low humidity (if you can!) and let the primer and paint dry thoroughly before adding additional coats or using your cabinet.
What kind of paint do you use on laminate furniture?
I recommend using a ceramic-based paint like Amulent Decor Paint. As mentioned above, ceramic-based paint is self-leveling and very durable. It can be applied with a roller, paintbrush or paint sprayer (my personal favorite) and dries looking like a truly professional finish!
What if I don’t want to remove the wooden glass panes?
You definitely don’t have to! While I love the modern look of the plain glass doors on my Target furniture flip, you could choose to just paint the wooden panes instead. In that case, make to tape over the glass very carefully before using your paint sprayer or paintbrush. I recommend Frog Tape for this kind of work.
Be sure to take your time removing the tape too and ensure the paint is thoroughly dry before doing so. If you do notice that some paint bled through the paint, you can carefully remove that with a razor blade, gently scraping the paint off the glass.
Try Your Own Target Furniture Hack
As crazy as it might sound, you can buy this cabinet to flip it. It’s only $150 at Target which isn’t bad for a piece of furniture. Catch it during one of their sales and you can get it for an even better price. At the end of the day, you’ll be creating a modern piece that would cost more to buy anywhere else for this type of look. If you try this project, tag me, email me, message me! I want to see it!
Check out some of my other favorite furniture DIYs
- How to Strip and Bleach Previously Stained Wood Furniture
- DIY Floating Desk for Kids
- DIY Plywood Desk
- DIY Faux Floating Shelves
Let’s keep in touch.
We have a brand new community over on Facebook, House & Home, where we’ll be chatting, sharing, and helping one another when it comes to home decor and projects. Come join us! Check it out here.
Like on Facebook || Follow on Instagram || Follow on Pinterest

This is such a brilliant way to modernize a piece of furnature! I don’t know why I always have trouble picturing a piece’s potential. The way you used the paint to update it was beautiful too! What was the name of that shade of green you used? Thanks for sharing!