


FrogTape Paintover Challenge – Living Room Reveal

I was beyond thrilled when I was asked to be a part of Frogtape’s Paintover Challenge 2020. I’ve followed along with the Paintover Challenge the past two years and they’ve always looked like so much fun. . . and it was! I immediately knew the space I wanted to transform: our living room. So with the challenge of only spending $500, using the All Natural color trend and using paint + FrogTape products, I went all in!


Like with every project where a major makeover occurs, shall we start with the before photos of the living room?
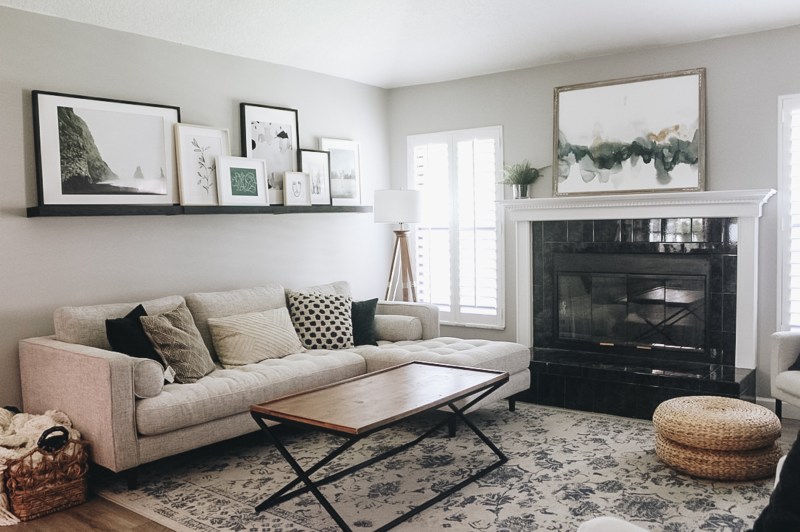


So, here’s the thing. The living room wasn’t bad to begin with. Yes, the fireplace needed an update from the 90’s black tile ASAP but the rest looked okay. But it just wasn’t “us” anymore. We already started to transform the space a few months ago with new chairs and a couch. But the rug, the entertainment center (that we built) and the overall design was leaning more towards farmhouse. We’re leaning more towards modern these days. We took everything out of the space and started demo.

Fireplace
The very first thing that set this project in motion was knocking out our old 90’s fireplace. Let me tell you, IT FELT SO GOOD!! I’ve been waiting for this moment since we moved into our home over three years ago. Not only was this style outdated but the black tiles darkened the space and appeared like a black hole.

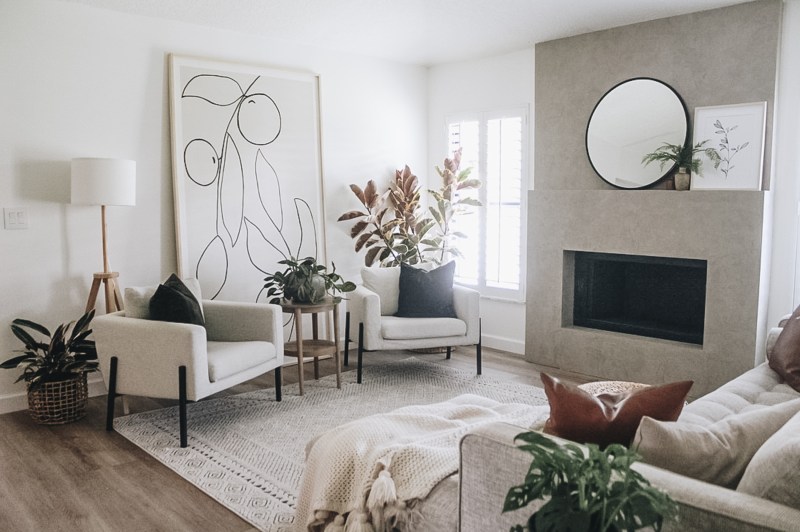
We rebuilt the fireplace using 1 x 3 and 1 x 4 pieces of lumber to create the look we wanted which was very minimalistic. One sheet of drywall later and a lot of sparkling + sanding, we were ready to apply the roman clay. Luckily we had extra pieces of our STAINMASTER flooring on hand to fill in the exposed area where the hearth used to be.

Our vision for the fireplace was to create a cement look without having to use cement. This roman clay in Charleston was the perfect medium to use! Although a little scary at one point, it totally pulls off the cement look. And the great thing is that this roman clay also works with FrogTape. I wasn’t sure how it was going to dry on the tape but the tape came off just as easily compared to used paint.


Wood Feature
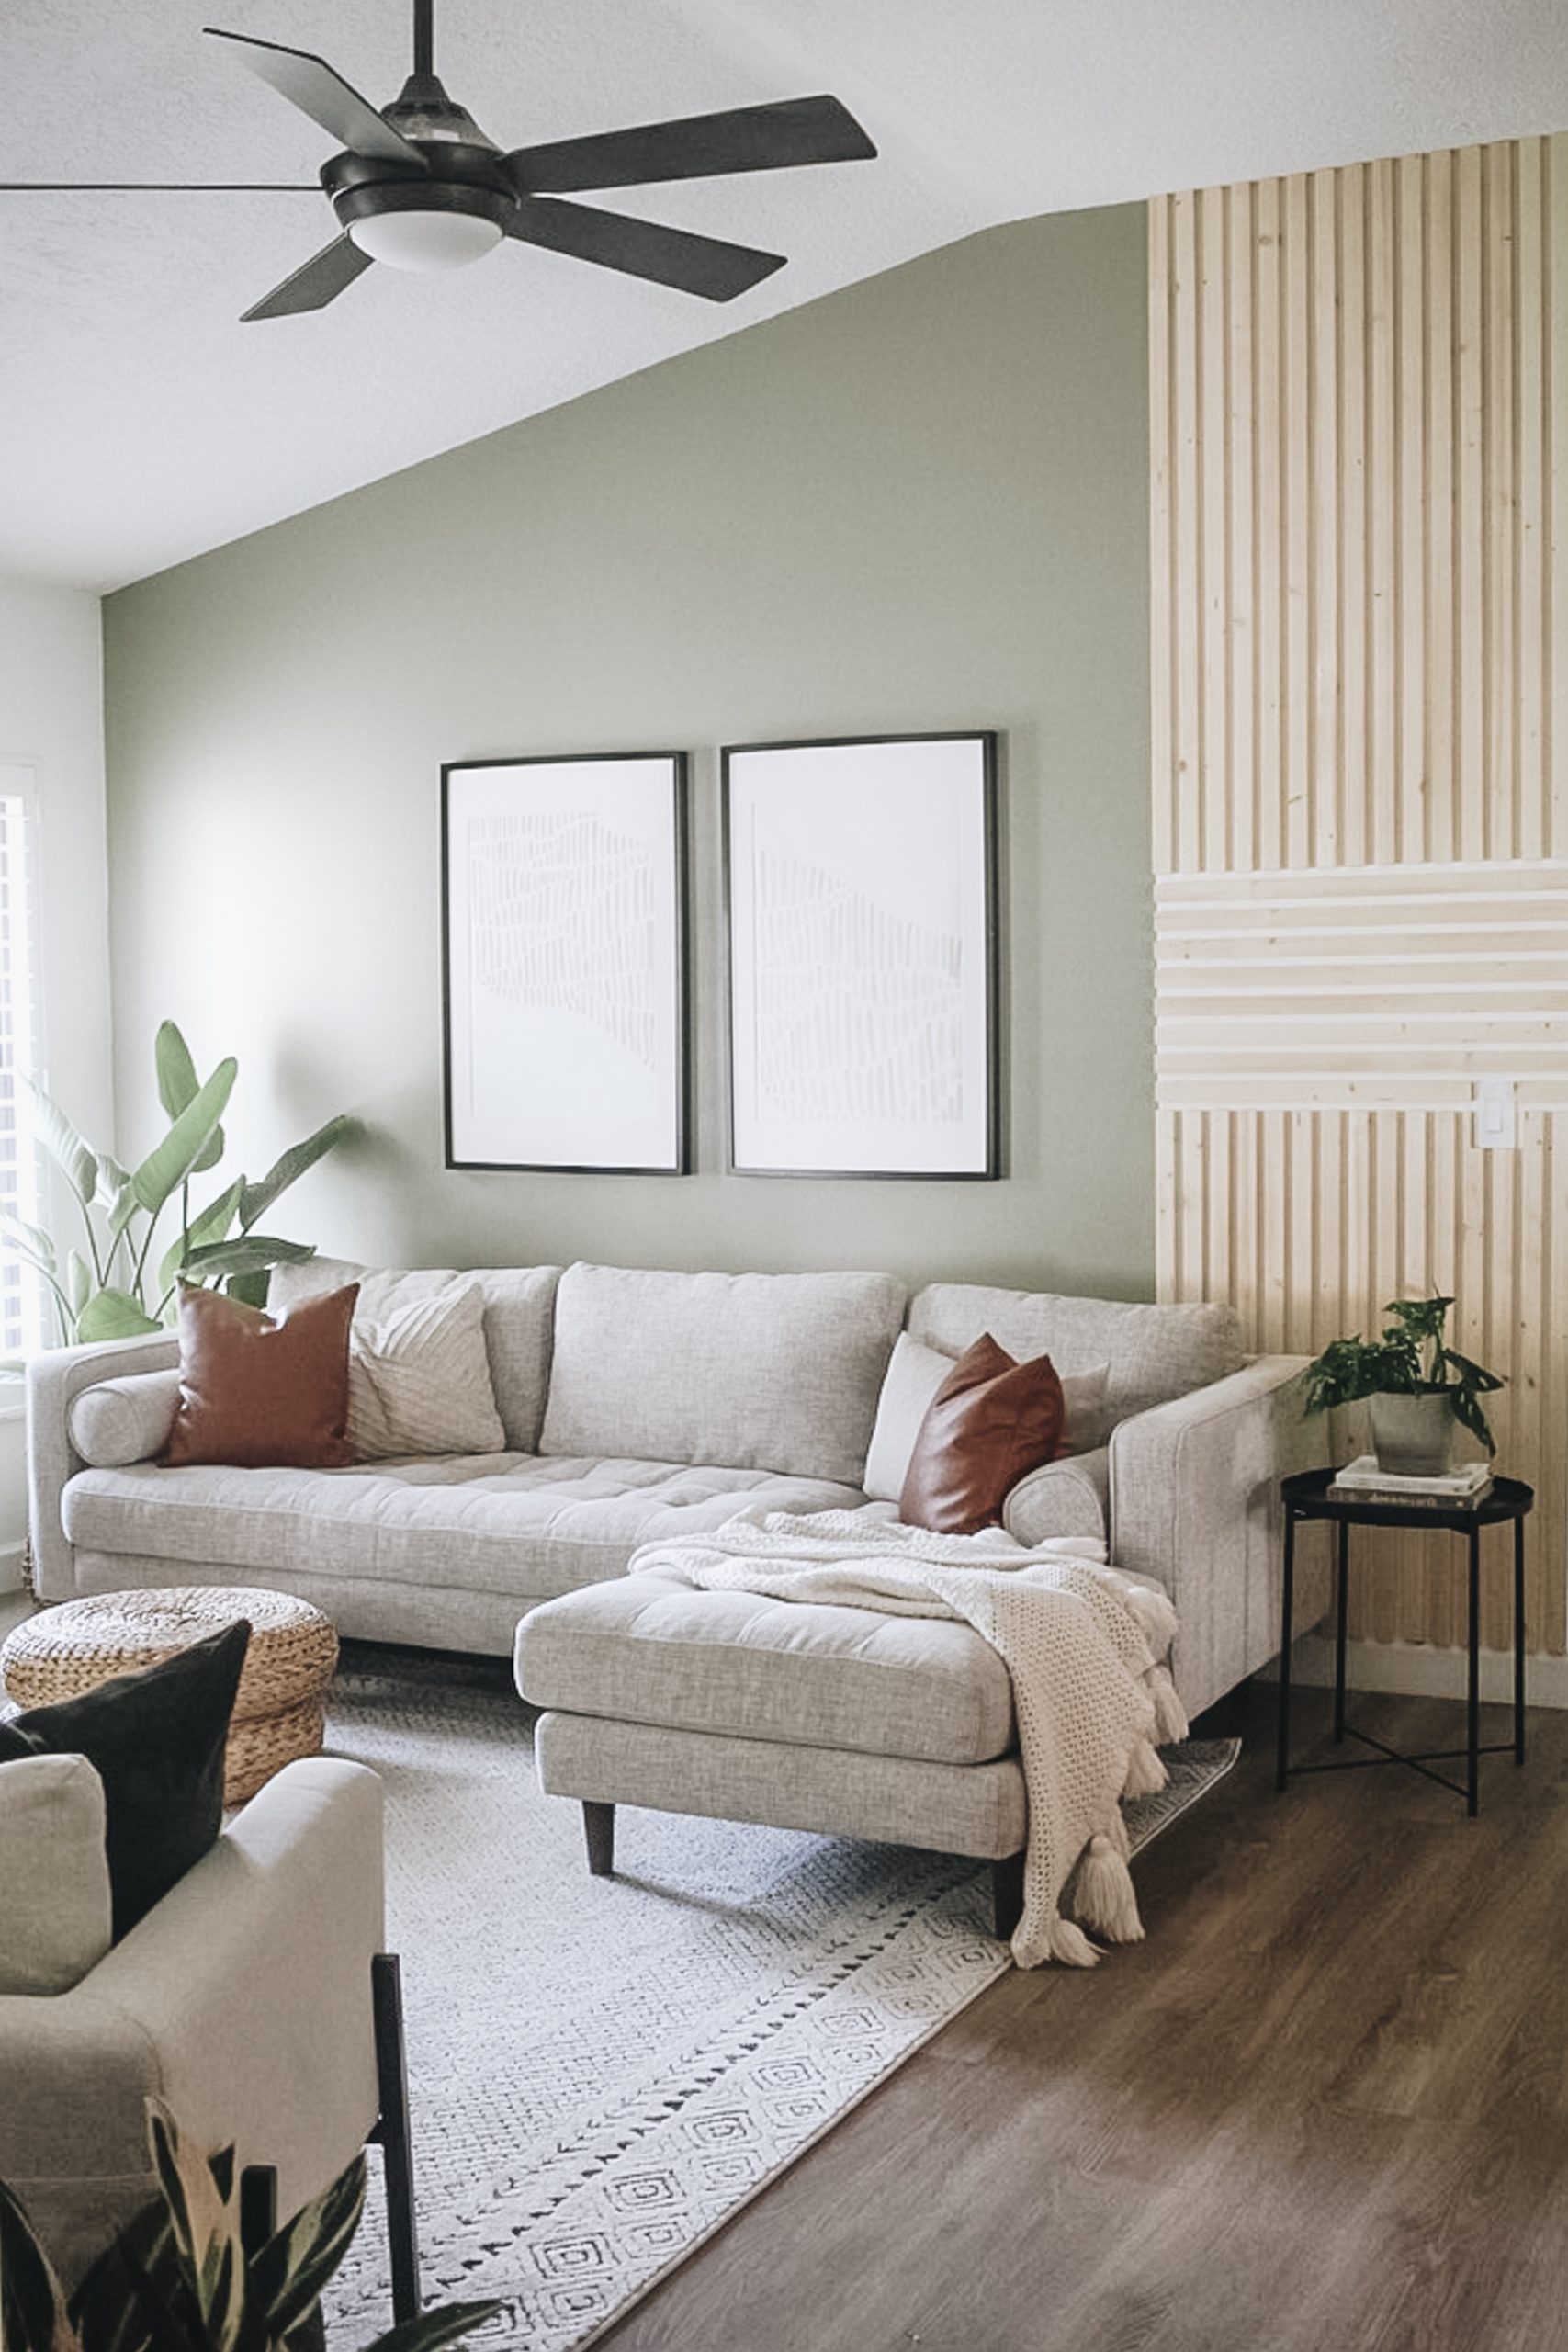
The wood slats on the living room wall was a last minute decision. With just three days until I had to complete the project, I decided to go for it. I’m always looking for ways to incorporate different types of texture and wood tones. This was the perfect solution.
This side of the living room is unique in the fact that it is vaulted (the other side isn’t). By only installing the 1 x 2 pieces of wood at the highest point of the wall, allowed the quirkiness of this wall to blend in. It used to stick out like a sore thumb with the wall all being the same color. Really, I guess you could say we highlighted a unique feature in a unique way that looks great.


Accent Wall
The original plan was to keep all the walls white in the living room. There’s nothing more that I love than a crisp, bright white space. But there’s almost nothing more that I love than a bold (or pretty) pop of color. I suddenly felt like something was missing and knew I needed to paint the wall green.

For the first time in a long time I didn’t buy a single paint sample. I grabbed a few paint chips at the store, taped them to the wall and narrowed it down to the exact one I wanted to use. (I’ll have the paint colors and links to everything at the end of this post.) I also decided to keep the wall color between the wooden pieces white because it soften that part of the wall and created dimension. This is when the yellow FrogTape came in handy as I painted the green.


DIY Extra Large Artwork
Now, can we talk about this extra large artwork? There are so many elements of this room that I love but I was dreaming of this piece of artwork. Instead of crowding the space with an entertainment center, console table or placing the chairs against the wall, I just knew an oversized piece of artwork was made for this space. I just hoped my vision would come to life like I was picturing it in my mind.

With a thin sheet of plywood, paint and FrogTape I got to work. The result of this artwork as I was putting it all together made me want to spoil the entire design. It took everything in me not to share this with all of you until the reveal. I couldn’t believe what $20 got me and how this artwork turned out. Do you know what people pay for artwork this size? And it truly is the perfect addition to this side of the living room without overpowering it. I just love it!

Finishing Touches
I finished the space with a new rug, plenty of plants, home decor accents and shopping our home for a few things. Usually I saw the finishing touches pull the space together. But in this case everything makes this space what it is. Everywhere you look there is something magical and special to look at. On the left side the DIY artwork, front and center the fireplace and to the right the wood accent wall.


I’m so proud of this space and so thankful FrogTape trusted me to be a part of their 2020 Paintover Challenge. It has been an absolute blast! And because you’re probably wondering, here’s everything I bought for the space and the total cost to transform it:
DIY Oversized Artprint: $20
Fireplace lumber and drywall: $37 (Everything else we had on hand.)
Roman Clay: $66
Paint: $44
1 x 2 lumber: $24
Side table: $95
Rug: $180
Artwork above couch: $0 – used what we had
Birds of Paradise: $20
Total: $486
What I already had / Shopped my home
Couch
Pillows
Blanket
Chairs
Additional Plants
Leftover flooring
Fireplae Decor
Lamp
Ottomans
Paint Colors:
Walls – Simply White by Benjamin Moore
Accent Wall – Cypress Green by Benjamin Moore
Fireplace – Charleston Roman Clay by Portola Paints
Links
Click here to shop all the sources.
Come join us on our other social channels for even more behind the scenes.
Like on Facebook || Follow on Instagram || Follow on Pinterest

Anywhere online I can buy the Cypress Green by Benjamin Moore and get it shipped internationally?
I’m planning to do an accent wall very similar to yours — the part with the wood planks (right by the green wall). Do you have a diy for that part? If you don’t, could you share what wood you used? Thanks!
I do! Here’s the link! https://withinthegrove.com/diy-wood-slat-wall/
Hi,
I really loved your room and the over-sized Artwork. I am also planning to do similar artwork. Could you please tell me what material you used and how did you do it?
I can’t stop thinking about this space! All three DIY projects are things I want to try in our home! Thanks again for sharing your talents.
So fun! Thanks for sharing! I’m so intrigued about the ceiling being vaulted on one side – I’m trying to figure it out in the pictures but it doesn’t compute in my brain! In any case, this space is gorgeous!
I absolutely LOVE this room!! It’s so warm and inviting but still magazine ready. Way to go!!