


We Painted the Exterior of our House!

Whew! You guys, I’ve been waiting to share this reveal with you since I started on our exterior makeover back in June. It was a doozy trying to get it all done but I DID IT! I literally painted every square inch of our home: the stucco, every exterior door, the garage door, the windows (yes, the windows!) and the fascia. Mix that with Florida rain, heat, a toddler running around and curveballs thrown left and right. . . here we are in September with the final reveal. I hope you’re just as excited about it!

Before we dive into all the things that I did, we need a good ol’ flashback to where we started:

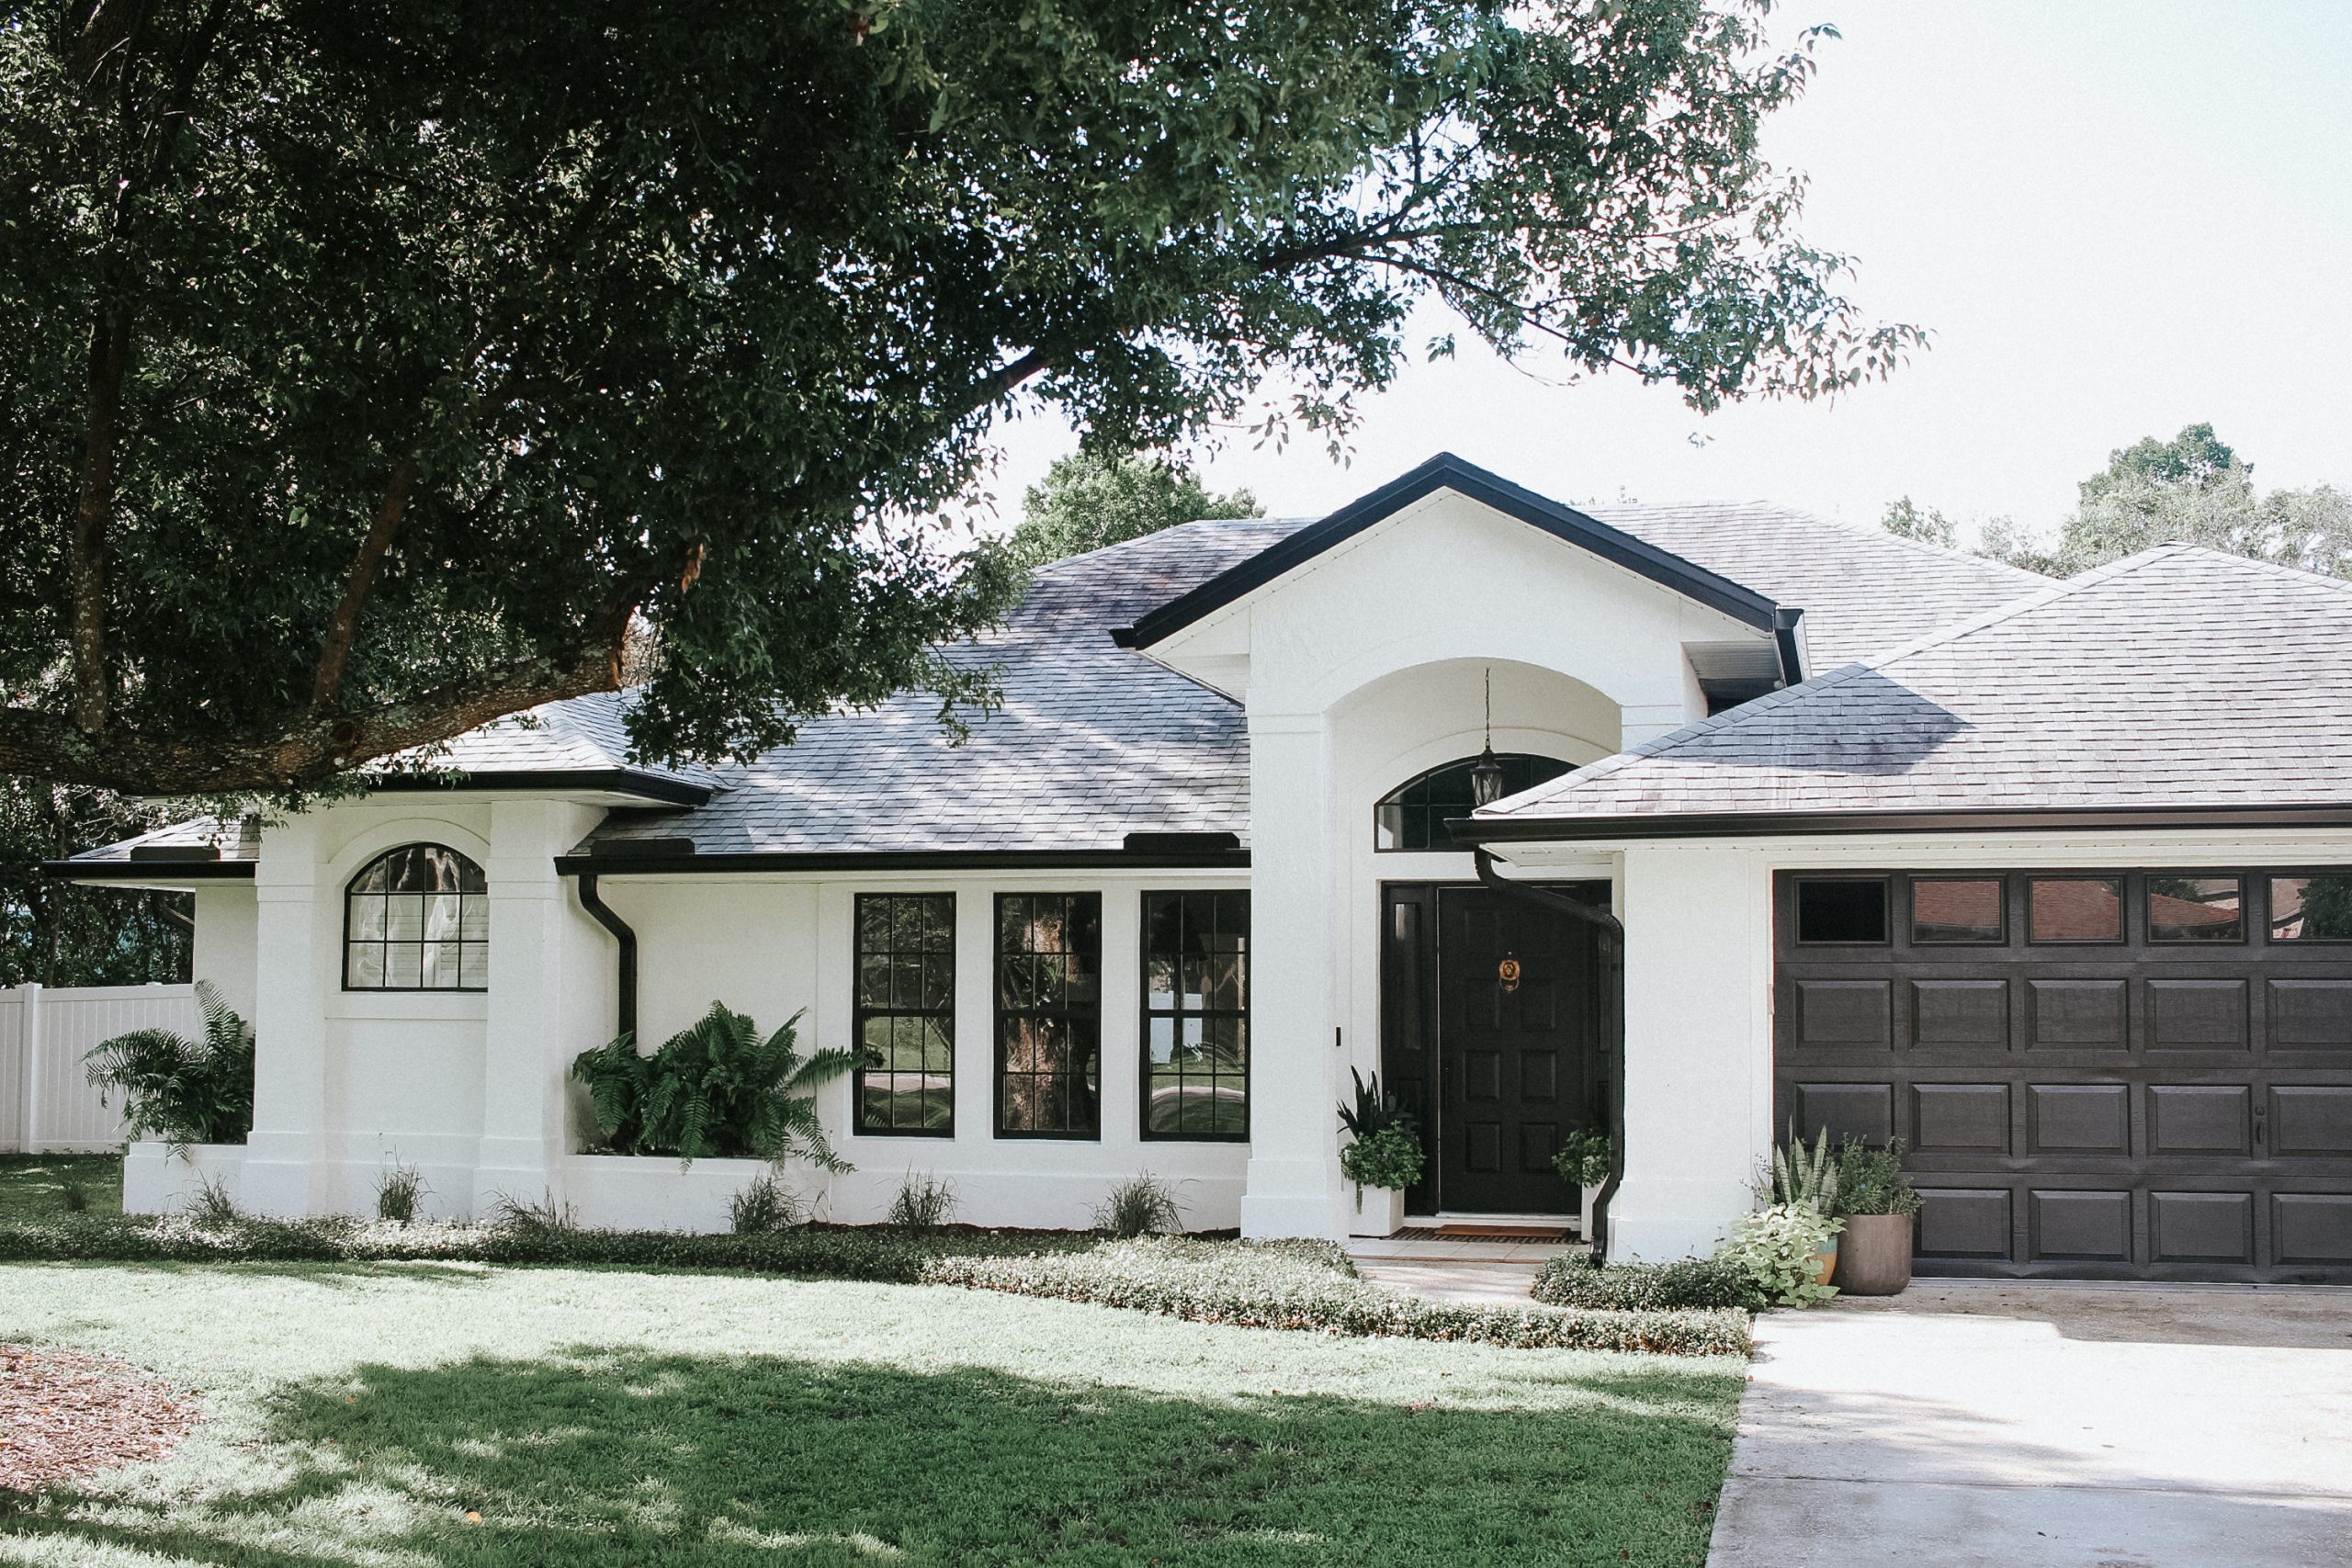
And here’s were weeks of hard work got me with our home:

Doing this paint project myself saved us thousands of dollars and allowed us to budget for new gutters that we desperately needed for our home. Don’t worry, I’ll be sharing the cost breakdown along with the paint I used, what exactly went down and things that I learned along the way.
As far as exactly how to paint a stucco home, painting exterior doors/garage door, painting exterior windows, etc., I’ll be writing separate tutorials for those! We’d be here for another three months if I crammed it all into one post.
Paint Used:
Stucco: Cloud White by Benjamin Moore in their low-lustre exterior paint.
Fascia: Cloud White by Benjamin Moore in their low-lustre exterior paint.
All exterior doors + garage door: Black Magic by Sherwin-Williams in their satin Pro-Insudtrial paint.
Exterior window frames: Black Magic by Sherwin-Williams in their satin Pro-Industrial paint.

Cost Breakdown:
This cost breakdown is for our home that’s 2,600+ square feet. Depending on the size of your home, one story versus two stories, etc. your cost + time spent painting your home can vary.
20 gallons of Cloud White for the stucco and fascia: $1000
2 gallons of Black Magic for windows + exterior doors: $80
Rented Paint Sprayer: $180
489 linear feet of gutter/downspouts + installation: $1,550
Misc. Prep/paint supplies: $60
Total cost: $2,870

What Went Down
Painted Windows Black
The very first step in their entire transformation was painting all of our exterior windows. Keep in mind, if you have a warranty on your windows this will void it! We have metal windows which made this possible to do. Our windows are also due to be replaced so I figured this wouldn’t hurt to try first. I’ve gotten asked about painting vinyl windows and I can’t tell you yes or no since ours are metal. I’m going to let this before and after speak for itself:


Before we had creamy windows and I knew they would blend in with the white exterior and almost look dirty. In order to get the white exterior we wanted, I knew I had to do something about the windows. I used the Pro-Industrial paint by Sherwin-Williams on the interior windows (you can read that tutorial here) and loved the results. I confirmed with my local paint store it can be used on the exterior and went for it.

The prep work took the longest with the windows but I’m here to tell you, every second spend taping off, protecting surrounding areas and covering the glass windows is worth it. That moment when you peel everything off and see your black window frames you have dreamed of at a fraction of the cost, well, you need to just try it.

Now, what if you have muntins or grids that are between the glass panels? AKA there’s no way you can remove them or access them. In other words, you won’t be able to paint them. I have a solution for you! Electrical tape. Seriously! You simply place the electrical tape over the grids (on the glass window of course) lining it up with the grids. That’s what I used for the interior and exterior of our grids and haven’t had an issue. The trick is getting the right kind. I used an electrical tape that is weatherproof, can withstand high heat, etc. They haven’t budged since June and we live in Florida.

**Painting our windows first just comes down to personal preference. It doesn’t matter if you paint your house first or your windows first, do what works best for you. Either way it’s a lot of taping off!
Painted the Stucco White
We knew moving into our home we would eventually want to paint it. It was originally a beige color. Which wasn’t bad but if we were going to re-paint it, we didn’t want it to look exactly the same. If you had asked us a few years ago, we would have said gray. But fast forward to current day and our hearts were set on a creamy white. We slapped a few samples on various parts of our home so we could see them in different lighting and angles.
Narrowing it down to a few, we thought we had our heart set on Simply White. But I did one more test run and painted three extra large paint samples on one side of our home. We ultimately went with Cloud White by Benjamin Moore. It had just enough creamy undertones while still being white.

I will say, now that the house is fully painted, depending on what is reflecting on it will change the color. For example, on our patio it always looks like a stark white due to the earthy brown tones of the patio pavers reflecting on the house. The front of our house can look very creamy because of the grass and plants casting a green hue on the house depending on the time of day.


Now, actually painting the house was one of our biggest, frustrating moments. We invested money in an industrial paint sprayer that could handle painting the exterior of our home and do it quickly. Right out of the box we had issues. We’re talking the sprayer clogging every 15 seconds and throwing paint everywhere. It ruined a few of our black windows that I had to go back and paint. After 4 hours of reading the user manual, talking to the company and watching YouTube videos, we only had a 30 foot section painted on our home.

We threw our towel in and accepted our house wouldn’t be painted that weekend. We were able to return the paint sprayer and opted to rent one from a local tool rental company instead. BEST DECISION EVER. We were put on a two week wait list which delayed our house getting painted.

We rented a Titan 440 paint sprayer for $180 for the weekend. The best money we have ever spent on our home. We prepped everything early Saturday morning and we were painting by 11 am. We completed not one, but TWO coats of paint around our entire home by 4:00 pm which also included the soffits. I can’t say it enough: rent a paint sprayer if you’re painting your house! There’s a slim chance you’ll need an industrial paint sprayer again and if something is wrong with it, it’s on the place you rented it from and not your pocket.

Painted Garage Door and Exterior Doors
After seeing the amazing contrast with the black windows, we knew right away all of the exterior doors and garage door would be painted black as well. Originally we were thinking a muted black but after giving it a test run it didn’t look quite right. We decided to use Black Magic on all of the exterior doors as well. Our ultimate goal is to have a wooden front door and garage but we’ll see. For now the black is perfect!


All of the doors were painted in a satin sheen. I wanted something that gave some luster but wasn’t a ton. This seemed to be the perfect balance and the exterior doors still wash off easily. All of the doors look amazing with their new facelift but the front door and garage door are my top two favorites! It transformed the front of our house even more. Painting all of the exterior doors took about two weeks with painting during nap time and if it wasn’t raining.


Painted the Fascia
Now, you might be wondering why I didn’t paint the fascia with the paint sprayer. That would have been easier, right? Right. But at the time we were going to paint the fascia black to help trim out our home. We tested an area in the back of the house and, well, didn’t like it at all. We decided to go with Cloud White on the fascia and let the gutters be the black accent we were wanting.
So, by brush, I painted two coats of white paint on all the fascia going around our home. Why a paintbrush? It would have been way too much prep work to protect the roof, windows, stucco, screens, doors, etc. to paint the fascia with a paint sprayer. A paintbrush in this situation made more sense.

New Gutters
The finishing touch: black seamless gutters. Our old gutters only covered half the house with not enough downspouts to make them effective. They were worn, beat up and original to 1994. We took them down ourselves so we could paint the fascia. Once all the painting was done, we got three different quotes and set up installation.

When we booked our installation, the company we went with was about three weeks out with installs. By the time we got out on the schedule for install, it ended up being about 6 weeks. A lot of it had to do with product being delayed due to COVID. My friends, these black seamless gutters were the icing on the cake for our exterior makeover. They truly brought the entire home together and we could finally step back and take in the weeks and weeks of work we put in!

**The only change I made after the gutter install was painting the peak at the front of the house black. Before it looked like we forgot to paint it or forgot to install gutters. By painting it black, it truly completed the house!

The After
From a paint sprayer messing up, vacationing for a week, a lot of delays due to rain, waiting on the gutter install, working during nap times, etc., IT’S FINALLY DONE!! This is by far the largest paint project that I have tackled, let along in the Florida heat, and I’m so excited and proud with how it turned out.
The day the gutters were installed I remember walking out to the road and soaking in the entire view. I walked down the road to the left and right just so I could walk back up to the house to see it from different angles. We all hopped in the car to do a casual drive by to look at it and it see it from the road behind us. I worked so hard for this moment and was soaking it all in.

And the biggest question I’ve been getting: Would I do it again? Yes, yes and YES! It saved us thousands of dollars which allowed us to budget for our new gutters. The only thing that I would do different next time is have a family member come and stay with us for a few days or hire a babysitter so I could have gotten more done at one time. But other than that, knowing that I painted literally every square inch of my home (minus the roof) gives me all the feels. It’s what keeps me going back to DIY time and time again.


Your home looks amazing after the new paint job! It’s incredible how a fresh coat can completely transform a space. Thanks for sharing the process!
It looks amazing. Only thing I’d change if it were my house is the downspouts would be the same color as the house. Gutters are a decorative element. Black works great with the horizontal gutters, but cream for the downspouts would be best. Just something for others reading your blog might consider
Gorgeous transformation!!! It’s one thing to have the vision but to also DIY is inspiring. Thank you for the ideas on how to paint the metal window frames, I was saving for all new black windows, which was too expensive. This means I may actually get my black windows if I DIY!
[…] Black by Sherwin WilliamsIron Ore by Sherwin Williams; SourceBlack Magic by Sherwin Williams; Source Within the GroveSoot by Benjamin MooreBlack Beauty by Benjamin […]
Beautiful makeover. You did a stunning job. ❤️❤️❤️❤️ Great taste.
GEE THANKS Now I’m gonna be up all night dreaming and decorating in my sleep LOL Just Kidding. After 3.5 years living in our ” supposed to be” retirement home at the lake. WE ARE PAINTING TOMORROW. The painting will only take a couple of day. But 15,438 web sites, 5,400 pinterest pages, 12 trips to the paint store, 18 sample cans, 3 painters later ( fired 1 before he started, 1 after he started ( ohhh girl) and 1 fight against the HOA and its go time! So while looking again ( my husband (NOT AGAIN”) I just wanted to find porch ideas yanno, and I found ” The Grove” I decided the same color scheme I first selected lol go figure. The house will be white with Black umm Charcoal ok maybe the black trim. Thank you so much for the idea and product information so I can now get the windows I wanted without having to buy them all new!! We do have to hire a painter, only because I trade on the market, he’s a pilot and gone 1/2 the time. Painting crew spent the last 2 days pressure washing, bleaching the exterior, prepping and here we are. How funny that I also wanted a cedar garage door and matching front door and stairs but that will have to wait until i’m 100% sure of which color, trex or hardwood.. anyway you catch my drift. ( another 3.5 years maybe). So thank you for sharing your inspirations, hard work, nightmares etc and the finished product that is outstanding. I joined your Pinterest and will definitely follow you. Look forward to reading all of your blog and seeing your ideas as they came to life!
Looks amazing. The garage windows look different. Did you swap them out?
Hi! I took out the decorative plastic piece between the glass panels to make it look more updated.
This post is exactly the answer I needed for my windows! I love the way you painted your house and now am trying to convince my husband that these are the colors we need in our life 🙂
How come you can’t paint the window grids? Are they not printable or too much work? BTW your house looks amazing now!!
They’re between the panes of glass. No way to access them! And thank you so much.
Beautiful! I’m located in central FL and my husband & I just closed on our first home. It’s totally in need of a ton of renovation, and we’re planning to start painting this weekend. 🙂
Thanks for the inspiration and advice!
I am so glad that it helped!
Looks amazing! Now I know I can paint white windows black. Thank you for the tips!
I’m glad that it helped!
It looks like you painted the black right on the window glass. How did you get it off??
I used H2O Masking liquid. You paint it on the glass and it creates a protective film. Let it dry, paint, and then peel off the masking liquid. Windows won’t have any paint on them!
I have never left a comment before, but what an AMAZING transformation – kudos to you for your hard work and vision of the finished project. Loved all your photos – You must now have the best looking house on your street or in your neighborhood. It does look like either a new garage door your you changed out your top window panel from arch windows to rectangular windows – also a wise improvement for the overall look. You so deserve to be so proud of yourself !!!
Hi! Here’s the set I used: https://amzn.to/2PfZ0vo
WOW! Great job!
You are right to be proud!
I’ve been trying to muster the courage to tackle our exterior and this is just what I needed – thank you for sharing.
Wow, all I can say is wow!!
Thank you so much, Chris!
Hi. Brand new to your site. Love love love!! My question is, you mentioned you used electrical tape on your windows due to the internal grids. Can you elaborate on that? Did you simply run the tape on the exterior of the window covering up the inside grids? I’m so curious.
Look forward to hearing from you.
Christine Bruno
This turned out great! Are the windows vinyl? Just curious how the windows/paint are aging with the additional heat that the black paint generates.
Awesome job! Looks fantastic.
Are you going to do a post on your grass too? It looks great.
Your home looks amazing. This is what I would like to do one day.. I was wondering if you have an HOA for your neighborhood and was the Cloudwhite an approved color or did you ask for it to be approved? I agree a wood toned front door and garage door would add some warmth and look very nice!! Great job!!!
Looks great! Can I ask who did your gutters?