• Home
  • ABOUT
  • WORK WITH ME
  • Paint Colors
  • Shop Our House
    • Guest Bedroom
    • Front Living Room
    • Living Room with Fireplace
    • Previous Second Living Room
    • Current Playroom
    • Prior Playroom
    • Dining Room
    • Laundry Room
    • Oliver’s Bedroom
    • Guest Bathroom
    • Covered Lanai
    • Patio
    • Master Bedroom
  • CONTACT
    • Facebook
    • Instagram
    • Pinterest

Within the Grove

Join the list to receive occasional news and special updates!

How To Plant a Container Garden

August 13, 2019

Container gardens are my favorite because they can be so many different things. It can be a group of pots gathered together with beautiful flowers spilling out, a garden box you’ve built on the ground to hold vegetables or a cut flower garden, a series of boxes lining a patio and so much more! We recently decided to build a container garden on top of our trash can storage unit and it as the best decision.

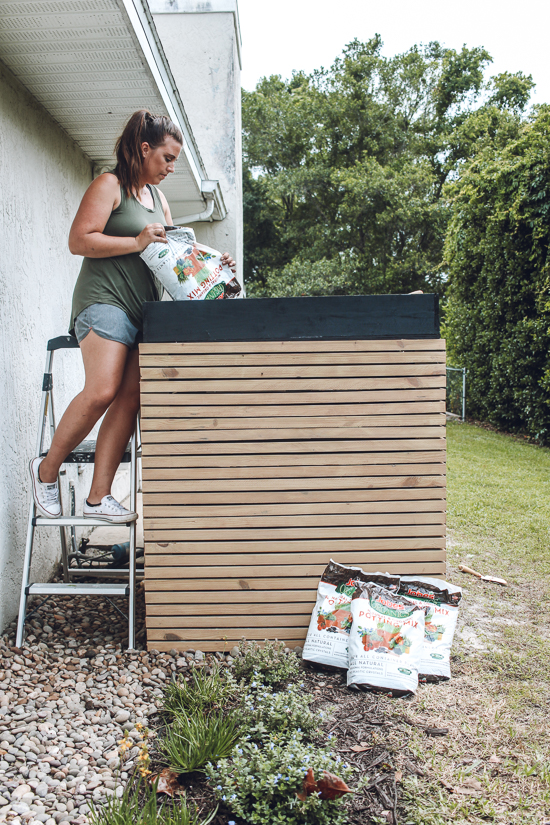
Not only is it visually appealing but it also attracts so many butterflies throughout the day. It’s so nice to walk to this side of our yard or peek out from our living room window and see the abundance of bees and butterflies this container garden has attracted. Now, here’s where we started the first day I planted everything:

And here’s where we are now about 2 months later:

There’s so much growth with the flowers and it makes me one proud plant mama. I can’t take all the credit for it! Earlier this summer I had the amazing opportunity to spend a few days with Jobe’s Company as I learned about their gardening products. I walked away with a better understanding of how to have a successful garden that I’d love to share with you. So if you’ve been wanting to try some sort of container garden, this post is for you!

Here’s What You’ll Need 
  • Jobe’s Potting Mix + topsoil (if needed)
  • Jobe’s All-Purpose Granular Organic Fertilizer 
  • Jobe’s Container and Bedding Organic Fertilizer Spikes
Flowers Used
  • Yellow Lantana 
  • Blue My Mind
  • Zinnias
  • Purple and White Salvia
  • Foxtail Fern
  • Creeping Jenny
  • Mondo Grass

** Affiliate links are included in this post. Thank you for your continued support of Within the Grove!

With any container garden, you want to make sure you have proper drainage before adding a single speck of dirt. Since this is a custom container box acting as the top to our trash can storage unit, we didn’t have the option to drill holes in the bottom of the box. Instead, we built the box at a downward slope and placed a pipe with several holes in it along the back of the box.

If you find yourself in a similar situation, you’ll want to wrap the pipe with WeedBlock® Natural™ to keep the oil out of the pipes. Otherwise, you will be dealing with a clogged pipe. It’s been an amazing weed fabric to try since it’s made of renewable resources and it allows for plenty of water flow. Which is perfect for this situation. If you’re still a little nervous about dirt seeping through, you can add a layer of rocks as an extra barrier.

Now, let’s chat about the foundation of your container garden: the soil. Since this box is essentially like a large pot (or you may be planting your flowers in pots), you want to use potting soil. Jobe’s has an all-natural, organic potting soil that contains Biozome®. A component you’ll only find in products by Jobe’s. Just hang with me for a minute. Because I already know what you’re thinking! Is it you have no idea what Biozome® even is?

Let me tell you exactly what it is first. It’s a combination of healthy bacteria, mycorrhizal fungi, and archaea. Basically, microorganisms. But that’s not the cool part. Archaea, for example, comes from some of the most extreme environments on the planet, including hydrothermal vents on the ocean floor. The combination of these ingredients cleanses the soil of toxins, returning it to a healthier, more natural state.  The survival rate of your plants, including growth, just increased with this alone. You can find out more about it here and geek out as I did!

Once you have your container full of potting soil, place your plants where you’d like them. Using my thriller, filler and spiller method, I was easily able to place my plants where I wanted them. I did add a few spiller plants along the side as well.

As you go to plant the flowers, you’ll want to break up the root ball first in order to help promote root growth. You can refer to the tag in the pot of the plant for additional planting information (spacing, watering, etc.). I ended up spacing mine closer together than what was recommended because I wanted my flower container to grow in really full.

Next up: fertilizer. After taking a poll over on Instagram, I discovered that over half of those interested in gardening didn’t realize they needed to use fertilizer or just didn’t add it. I’m here to tell you: don’t skip this step! Fertilizer is the lifeline to growing healthy, beautiful flowers! This is because your soil doesn’t contain the essential nutrients that plants need for optimal growth.

You can either add all-purpose fertilizer granulars to your soil or the fertilizer spikes. Jobe’s has figured out a way to make both varieties organic depending on your needs. I personally prefer the spikes because it takes the guess work out. You simply determine the size of your plant base, refer to the back of the fertilizer bag, and place the number of spikes around the plant that is recommended. The spikes are long-lasting and only need to be reapplied twice a year. Jobe’s has a fertilizer spike for just about any type of plant you can think of. I used the container garden spikes.

Alright, so you have your flowers planted. Now what? Water those babies as much as they need them! During the summer months, this might look like every morning or evening. Avoid watering mid-day or afternoon because it will burn the leaves and evaporate quickly. I don’t think any of us have time for that!

You’ll also want to prune away the dead flowers as you see them. This will help promote new growth and allow the flowers to flourish even more. No matter how big or small your container garden is, these are simple steps that you can follow to give yourself the container flower garden you’ve been dreaming of. I know my container garden is on top of a trash can storage unit, but remember, this pertains to pots. Which means it doesn’t matter if you rent or own, grab yourself some pots and start planting!

Let’s keep in touch!
We have a brand new community over on Facebook, House & Home, where we’ll be chatting, sharing, and helping one another when it comes to home decor and projects. Come join us! Check it out here.
Like on Facebook || Follow on Instagram || Follow on Pinterest

Share this:

  • Click to share on Twitter (Opens in new window)
  • Click to share on Facebook (Opens in new window)

Related

Filed Under: Gardening, Landscaping

« DIY Faux Floating Shelves
DIY Floating Frames »

Comments

  1. Joy says

    August 14, 2019 at 12:44 am

    I’m a camo… sometimes green and sometimes brown.

    Reply
    • ElizabethRishel says

      August 14, 2019 at 9:21 am

      Yes! You and me both!

      Reply
  2. Allie Allan says

    August 13, 2019 at 11:53 pm

    I’m a green thumb 😂 – I know my way around plants ❤️

    Reply
    • ElizabethRishel says

      August 14, 2019 at 9:21 am

      That is amazing!! Keep it up!

      Reply

Leave a Reply Cancel reply

Your email address will not be published. Required fields are marked *

This site uses Akismet to reduce spam. Learn how your comment data is processed.

Looking for something?

withinthegrove

This pretty much sums up the progress of making 25 This pretty much sums up the progress of making 250 cement tiles. But I’m halfway through! The moment I finish the last tile is the moment I knock out the old tile. Let’s do this!
Time to bet on my DIY skills! I’m attempting to Time to bet on my DIY skills! I’m attempting to make my own cement tiles for our outdoor front door area. Mainly because of what I’m saving vs buying them. Won’t be saving much on time but I’M MAKING TILES! Never thought I’d hear myself say that. Make sure to follow along because if this works out, I have a feeling a lot of you are already eyeing a spot in your home to try your own DIY cement tiles. 
 
Thank you @vintagerevivals and @abby_roadhome for showing it’s possible with your gorgeous bathroom tiles! 

#CementTiles #DiyCementTiles #DiyProject #DIYonABudget #DIYProjects
We got the call that the pool build is starting! W We got the call that the pool build is starting! Which had me scrambling to dig up all the plants that were in the way in an effort to save them. Literally down to the last second before the crew showed up. Exciting day but you know what’s even more exciting? Knowing the next crew will officially be breaking ground with the excavation phase of the build.
This time of year is full of organizing and purgin This time of year is full of organizing and purging to bring spaces back to life. But sometimes all a space needs to feel refreshed is, well, a refresh and a little attention. Your number one requested space was the living room. So I gave mine a refresh with some unique and gorgeous finds from @homesense_us . I found a few fun pots for my houseplants, a gorgeous magnifying glass, and a few other items for our coffee table and couch.

I never know what I’m going to find when I walk into Homesense since it’s always rotating with amazing finds. But I do know I’ll walk out with a few new favorites for my home at affordable prices. If you haven’t yet, I urge you to check and see if you have a Homesense near you! #DiscoverHomesense #HomesensePartner
2022, you were awesome. But I’m determined to ma 2022, you were awesome. But I’m determined to make 2023 even better! And I hope you join me! We can be one of our biggest cheerleaders, but together we’re going to do big things. Go ahead and write down a big, small and a few in-between projects you want to get done this year in your home. Kicking it off with intention and that reminder that we can do this. Ready to get started?! Let me know in the comments the first project you want to tackle!
We finally got the Christmas/winter edition of the We finally got the Christmas/winter edition of the window projection up and running! It was a hit for Halloween and just as fun for this time of year as well. I built frames wrapped with a plastic drop cloth but you can also secure the drop cloth over the windows using command strips. The videos are from @atmosfx and we use a mini projector to play them on the screen. Place a Bluetooth speaker outside and you’re in business! Such a fun addition this time of year for the exterior of your home.
It’s the last little bit of the demo we needed t It’s the last little bit of the demo we needed to do in order to give the green light for the pool to start. And 2,456 pavers later, it’s done! This was exhausting but worth the money we saved doing it ourselves. And why remove them? We’re using a different stone around the pool and we want it to be cohesive up to the house. Don’t worry, someone got one heck of a deal on these pavers, we made a little money, and someone else got them out of our driveway. I’d say that’s a win-win. Stayed tuned for the entire pool process as we enter 2023. It’s going to be pretty exciting to watch!
Our patio space has served us so well over the yea Our patio space has served us so well over the years and now it’s time for a change because we’re getting a POOL!! Sharing this with you makes it even more real because just a year ago I would have told you it isn’t in the cards for us. We’ll be breaking ground soon but first we have to remove the screen enclosure. Spoiler: we won’t be putting one back up around the pool. It has already made the biggest difference visually and SO much natural light pours into our home now with it gone. It’s going to be so exciting seeing this all unfold so stay tuned! Up next: removing the pavers.
This holiday season we were able to travel to my h This holiday season we were able to travel to my hometown for the first time in awhile. We were greeted by the most beautiful sunset on the beach. Fast forward to this week as I headed to @homesense_us for some holiday shopping, and I ended up finding a few pieces for our home that remind me of that core memory on the beach. The beautiful wicker bench caught my eye first followed by the comforter and toss pillows. Everything at amazing price points while not sacrificing style and quality. #HomesensePartner

Mixing a thrill of a find with a core memory, I guarantee you'll fall in love with your home even more as you go to decorate. Decorating your home isn't grasping on to the newest trend or what you think others would do. It's what YOU want to do. And sometimes that's based on an emotional connection. Oh, the stories your spaces will be able to tell as you decorate each one. Start with seeing if there’s a @homesense_us near you! #DiscoverHomesense #HomesenseSarasota
Load More... Follow on Instagram

Sign up here to have our fresh posts delivered to your inbox!

Enter your email address:

Delivered by FeedBurner

Copyright © 2023 Within The Grove • Customized by Brave Creative Design · Log in

  • Privacy Policy
  • Terms and Conditions
  • Disclosures + Photo Usage
 

Loading Comments...